Sam's is your source for Hatteras and Cabo Yacht parts.

Enter a part description OR part number to search the Hatteras/Cabo parts catalog:

Email Sam's or call 1-800-678-9230 to order parts.

Painting saga about to begin

Maybe I'll try that. It would be a lot easier than spraying it with a Preval, which would mean spraying test panels etc. Not to mention annoying everyone in the adjacent slips as well. I have some West System rollers around here somewhere, I think I will try with them. If it looks bad I can always sand it off, 5454 sands easily.

Also this AM bought some Epiphanes wood finish for the teak part I've repaired. I am going to try to get one coat onto the teak in order to keep primer dust from getting into it. I think I'll decide which to do first when I get there. And today I'm bringing a cooler over there and keeping some ice in it. It is supposed to be over ninety today, although (thank God) she's in a covered slip.
 
Jim, a sugestion for your varnish work. Make a wiping varnish. I thin 50/50 with paint thinner/mineral spirits and add LITTLE Japan drier to speed the cure. Wipe a thin coat on with a small piece of old t-shirt. Fold the t-shirt piece into a square or pie shape with a point and don't get too much of the very thin mix on it. A little goes a long way. Just dip a part of the rag so it doesn't get so wet that it drips. You can use your finger/thumb as an edge guide and you don't even have to mask/tape. Much faster/easier than a brush. Goes on super smooth. Takes many more coats for a build up, but so fast and easy to do. I can put a coat on all the exterior teak (window sticks, door frames and tackle locker edges) on our 36C in literally 5 minutes. Drys tack free in an hour or two. No brush to clean just toss the rag. One coat is fine for sealing as you are doing. Makes a beautiful gloss finish with enought coats. Try it you will like it!

Regards, Bob K
 
I've never heard of this. I might try it, though, depending on how things are going.

Off to the hardware store. Need 320 discs.
 
Jim, I do a good bit of wood working and got interested in finishes several years ago. Google "Understanding Wood Finishing by Bob Flexner" to find out more than you ever wanted to know about different types of varnish, oils and other wood finishes. I re-did all my interior wood over the winter with home-made varnish/oil wipning mixture (thinned 50/50). Used satin varnish/ boiled linseed oil, Japan Drier mix and wiped it on, let stand about 15 minutes, then wiped it off with a dry rag. That puts a VERY thin coat. One or two coats a day until it got the build I liked (about 5 - 10 coats depending on the area/wood). Very happy with the outcome. Deep, soft glow that looks like it is in the wood and not on top of the wood. Will see how it holds up, but so far so good. Wood working websites have lots of great information on finishes for both indoor and outdoor furniture.

I will never brush varnish again unless I am just in a big, big hurry to make a thick coating. Try a little thin "wiping varnish"on some scrap wood and you will see how easy/well it works. On smooth wood, little or no sanding required after the first coat - just some very light spot sanding with #500 to remove any lint/dirt that may have gotten on before wiping on the next coat.

Also, FYI just reconditioned and resprayed cabin door exterior with Imron. About a 3 foot paint job - I'm still learning to spray but all in all not too bad - just a very slight little bit of orange peel in one tiny corner spot which I will buff out. My wife thought I bought a new door! Also brushed the extra left over Imron on the helm chair foot rest with a foam brush. Came out much better than I expected. Paint was mixed for about 2 hours and was beginning to thicken a little, but it brushed out fine on a small hoizontal surface. Would not try to brush anything big though.

Regards, Bob K
 
Last edited:
Done sanding for the moment, and got two coats of varnish on the teak trim. If the weather doesn't turn bad, I'll roll on some AG tomorrow. And yes, I did get a proper NIOSH respirator; I don't think my health insurance would cover a liver transplant, and I don't want to find out.
 
I would have used Imron, which I think is a better paint than AG, but neither Imron or AwlCraft are set up to be applied with brush and roller, and I can't spray where I am. Today I got the first coat of AG on the area I'd prepped and it doesn't look too bad. It certainly looks better than it did, which isn't saying much. I have some runs to sand out, but a lot of the areas look pretty smooth and shiny to me. I think the next step will be the cabin house sides and front brow; I've ordered a new bridge gasket from Sam's, and I am going to pull the old one, mask the bridge itself (which does not need painting yet) and begin sanding the cabin sides etc.

Most of the area I did today was the wooden rear bulkhead, which isn't as fair as I'd like, but was sanded to 320 and degreased and tacked thoroughly before painting. If I had the ability, I'd just take the bulkhead out and put one in made of Coosa panel. If I ever have to apply a new outside layer, that's what I am going to use, but I hope I don't have to do that.

And the fume mask worked well; I don't have a headache and I haven't turned yellow yet.
 
Good luck with this project, Jim. Blue Note will look awesome when you're done.:)
 
I'll let you all know how she looks when I get over there tomorrow. I have to move a car first, but after that I am going to go over and see how today's painting efforts look once they are cured.
 
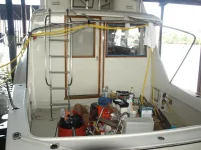
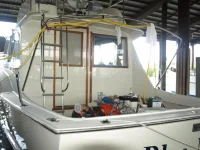
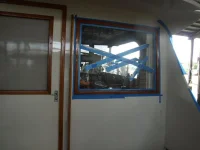
P6143106.webpP6143107.webpP6133100.webp

Three photos of the recent work: a "before" and two "afters", I think. Getting photos under the shed roof is more difficult than I had thought, but perhaps the difference is visible.
 
And of course the before photo is after the afters.....of course.

These pictures make it appear as if the color is different, but it is not; I am using the same Oyster White that she was painted with in the 90s. What I've found from this so far is that it is not difficult to get a decent gloss with AwlGrip. It IS difficult to keep it from running, even carefully tipping out the rolled areas. Part of it is that it is so hard to see, because it IS so shiny; a spotter would come in handy. (volunteers?) Also, it is difficult to figure out how much reducer to put into the mixed and induced paint- the instructions call for 10-33% by volume, but that would be way too much; it will make the paint so thin it will run even more easily than it does, and also have a negative effect on opacity and hiding power.

I've decided that the next area will be the brow of the flybridge, extending to the cabin roof outside the bridge and the aftmost part of the flybridge deck. This will require taking out the bridge gasket, but not too much hardware, and I think it is all easily within reach of the sanding and dust collection system that I have. (I seem to be coughing a lot, so the dust collection system is a must, not to mention the complaints I would get from the owners of other nearby boats if I didn't use it) Plan is to remove all the bridge screws, pull out the gasket, mask the bridge edges, prep everything, and then paint down to a defined break line dictated by the shape of the cabin top etc. I seem to have a harder time getting good quality roll-and-tip when I am working larger areas, at least the vertical ones, so I am going to try to do a smaller area now and see if I can control it better.

Kibitzing and advice welcome, but if you stop by I am likely to put you to work :)
 
Looks beautiful Jim!

I am doing similar work on our 37 and have finished fairing, priming and getting two coats of Interlux Perfection (Oyster White) on the forward deck and gunnels. I am learning by doing. Working outside around weather windows is very challenging!

I decided to take a break and work smaller sections at a time, when I can.

Enjoy the results!
 
So that's what it's supposed to look like.

Very nice. Please keep the pictures and updates coming.
 
Thanks to all. I am learning a lot, which is another way of saying I am making mistakes and learning from them. All the cockpit trim is back on, and I am planning the next stage- the front brow, the flybridge deck, the cabin top and sides, extending back to the cockpit coaming outside area. These are all pretty much continuous so I can paint them in one long session. First all the prep work. This will be just sanding for the most part- there aren't any repairs in this section that I know of, so I am just going to sand all the existing paint to 320 in order to get a smooth fair surface for the new paint.

Biggest problem so far has been drips and runs. If I use the amount of reducer they advise, the paint is too thin. I am reluctant to use NO reducer, but I think they are asking for too much. I am going to try a different kind of roller- a phenolic foam roller- as I think the short nap Urethaner carries too much paint onto the work surface, which is why it runs. And I think as it sets AG gets a bit thinner or runs more easily or something. I am still figuring all this out. The horizontal surfaces are going to be easier, I think. Maybe the paint will just sit there until it sets up if gravity doesn't make it run.

Maybe I'll flap my arms and fly to the moon, too....................
 
The moon is kinda far Jim. Just turn the boat upside down when a run starts. That will make your runs flow back in. Drain the engine oil first.:)
 
"Maybe I'll flap my arms and fly to the moon, too...................."

Attention! Drop the paint roller, and step away from the paint fumes! <gg>

Time to go smell some oak and tar instead, the HMS Bounty replica is in Annapolis!

Your paint job looks great so far.

Chris
 
To little reducer will cause runs also. Sounds backward but if the paint is to thick it becomes difficult to put on a thin coat. With a thicker coat the solvents can't evoperate quickly enough and that causes runs and sags. Assuming your using the brushing reducer you might try the same mix your using and adding a little of the standard spray reducer. As you thin more you will lose hide and it will require more coats. Most of the roll and tip pros are 4 + coats.
 
When we did the doors on Cinderella, it took 5 coats. Mixed with reducer as indicated on the can. Added just enough thinner so the brush would not drag. Coats were each very thin.

Though we had removed the doors and had them laid out for painting, I also had some additional vertical surfaces and didn't notice issues with drips.

4 coats would have been ok but we were battling the last of the pollen at the time and with the doors laying flat, needed that last coat to get it right.

Job is looking nice, Jim

Cheryl
Cinderella
1971 53 MY
 
To little reducer will cause runs also. Sounds backward but if the paint is to thick it becomes difficult to put on a thin coat. With a thicker coat the solvents can't evoperate quickly enough and that causes runs and sags. Assuming your using the brushing reducer you might try the same mix your using and adding a little of the standard spray reducer. As you thin more you will lose hide and it will require more coats. Most of the roll and tip pros are 4 + coats.

Interesting! I will get a can of the spray reducer and try that. Thanks! Also a foam roller will hold less, which might help. I don't mind doing more than two coats; it's sanding out the runs that takes up a lot of time, which if I can avoid it would be good.
 
On to the next step: I began taking all the side trim off, seeing what repairs need to be made, and got most of the flybridge gasket out of there. Sure is a LOT of dirt trapped in there. I have deployed my high-tech dirt removal system which consists of a gallon jog of Simple Green and a toilet brush borrowed from Commodore Horst. I have help tomorrow (or "hep" as we call it in the South) so I hope to get a lot done.

Bad news: looks like the front of the bridge will need repainted, too. Dammit. It's not easy to get to.
 
The painting jihad continues: today my friend Lane Whigham came all the way down from Carlisle, PA, and we got a lot done. Specifically, there is now new AG on the front of the bridge, which looks much better than it did. It will get a second coat Thursday AM, if all goes well.

I DID use more reducer, and it seems to help. I have to say that having two people, one to roll and one to tip off, seems to help as well. It isn't perfect, but it does look quite a lot better than it did. If I am really extraordinarily lucky, I will be able to have help more than one day, and this will go faster than I thought to believe. I'll post some photos of todays work, presently.
 

Forum statistics

Threads
38,156
Messages
448,737
Members
12,482
Latest member
UnaVida

Latest Posts

Trending content

Back
Top Bottom