Sam's is your source for Hatteras and Cabo Yacht parts.

Enter a part description OR part number to search the Hatteras/Cabo parts catalog:

Email Sam's or call 1-800-678-9230 to order parts.

My 1st Hatt - 1984 52C

  • Thread starter Thread starter JuiceClark
  • Start date Start date
  • Replies Replies 230
  • Views Views 37,771
On the off chance you don't know an electric kitchen knife is THE weapon of choice for that. Nice long blades, smooth fast cuts.

I had forgotten that! Thanks much. I would've hacked-away at it with a razor knife and made a mess.
 
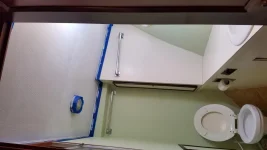
I'm sure many of you have painted the rubber-ish vinyl wallpaper. As I burn-out a bit, I hate to do two coats. Did any of you paint it with a one-coater?
Maybe Sherwin Williams has some extra-adhesive stuff that can be pigmented. Painting everything with Kilz first is such a drag.

Getting that old lime color the hell off the boat will be a real turning point. Painting the ceiling made a dent - it was gross.

MasterHeadBow.webp
 
I'm sure many of you have painted the rubber-ish vinyl wallpaper. As I burn-out a bit, I hate to do two coats. Did any of you paint it with a one-coater?
Maybe Sherwin Williams has some extra-adhesive stuff that can be pigmented. Painting everything with Kilz first is such a drag.

Getting that old lime color the hell off the boat will be a real turning point. Painting the ceiling made a dent - it was gross.

View attachment 49624

Guess we lucked out PO repainted heads white in our boat. Don't have any vinyl wallpaper. We do have some old laminate in the galley surrounding the slider windows, but we plan to remove and replace that with a shiplap board at a later date.
 
It's been so long since my last renovation, my source for teak & holly plywood has been out of biz for years.

Does anyone order sheets online? Anyone in Sw FL get sheets somewhere locally??

It's about time to start replacing the completely destroyed parquet floor in the galley.
 
Juice, you could try Harbor Sales in Baltimore, MD, or (I think this is the name) World Panel Products in NC. I know Harbor used to sell teak and holly veneer plywood, nice stuff.
 
Juice, you could try Harbor Sales in Baltimore, MD, or (I think this is the name) World Panel Products in NC. I know Harbor used to sell teak and holly veneer plywood, nice stuff.

Thanks Jim, I will do so. Shipping $ will be a real bummer, but I only need 3 sheets.


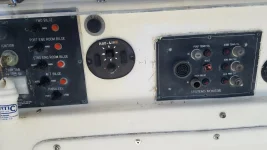
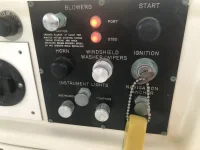
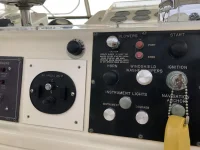
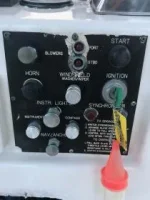
Today's joy was found when I decided to start replacing all the weathered switches and fuse covers on the helm. It appears someone reattached the plates last time with a healthy smathering of 5200...all the way around. So, there's no way to get it off without ruining the fragile plate. That's just cruel.

I hope Sam's has those helm panels for a 52C in stock!

5200ed panel.webp
 
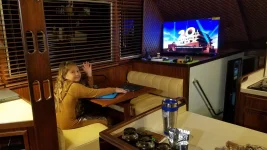
Tonight is the first night the family is staying aboard...doing a test run at home and will be interesting to find what I've forgotten to inspect.

Thanks to all of you for the help and encouragement.

Looks like dad is stuck with a bunk. 3rd grader called it first. :mad:
1st night aboard.webp

20210515_205126.webp
 
Last edited:
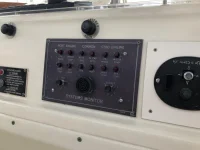
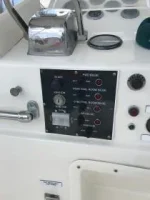
I was able to clean up the switch panels rather than replace them. Not perfect, but pretty good. I started with a cleaning using roll-off then a light compound. I finished them off with a quick coat of Back-to-Black spray used to bring car plastics back to life.
 

Attachments

  • System Monitor After.webp
    System Monitor After.webp
    67.1 KB · Views: 136
  • Port Before.webp
    Port Before.webp
    66.3 KB · Views: 135
  • Port After.webp
    Port After.webp
    73.5 KB · Views: 135
I was able to clean up the switch panels rather than replace them. Not perfect, but pretty good. I started with a cleaning using roll-off then a light compound. I finished them off with a quick coat of Back-to-Black spray used to bring car plastics back to life.

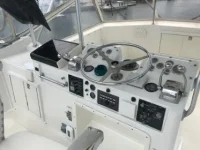
Looks good - I will follow your lead on the upper helm panels when I get to that point. My engine panels are in decent shape, but someone used an oil discharge placard to cover a hole on one side behind the FB wheel, and the panel where the anchor windlass switch/trim tabs(?) were mounted was cracked when we bought the boat. Probably going to use thin starboard to make covers for those openings. I plan to replace it with starboard to mount new switches. On the upper console I removed a defunct VHF radio, a dead LORAN-C receiver, a non-functioning autopilot control panel and a couple of other pieces of dead gear. I've pulled 3 disconnected heavy cables out from the radar arch to the FB console, and removed a dead 'green-screen' radar display and box that were mounted on the console to the left of the helm station. I'm going to do a white starboard overlay to mount new VHF and other electronics up top, engine gages appear to be working so that's something at least. PO only had a chartplotter/radar display unit at lower helm, so I am investigating running a repeater cable to mount a cheap monitor up top showing that, and a mounting clamp for a tablet with Aqua Maps.
 
I was able to clean up the switch panels rather than replace them. Not perfect, but pretty good. I started with a cleaning using roll-off then a light compound. I finished them off with a quick coat of Back-to-Black spray used to bring car plastics back to life.

Yeah, that's what we want. I noticed the panels even looked good when I got some Corrosion Block on them while working on connections. However, the corners are already broken on a couple of 'em...they're toast. PO must've used half a tube of 5200 on those little panels.

Those start/stop buttons and (Emergency Horn) buttons don't look original! I might like a new assortment of those as well.
 
Those start/stop are original
 
Those start/stop are original

Wow, they look brand new. Florida destroys things with letters. I'd have to repaint them every 2 years with a tiny art brush.
 
Wow, they look brand new. Florida destroys things with letters. I'd have to repaint them every 2 years with a tiny art brush.

Original style. Not sure if they've been replaced, but they were replaced with the same ones that were on there originally.
 
If the switch is for more than just running power to the bulb, then you probably can't do that. All of the RayLine motors are 12v and they just put in resisters to drop the voltage for 24v or 32v inputs. The bulb ran on whatever the input voltage was but everything else was 12v..

While I'm waiting for new FB switch panels, I'll work on the big Ray-Line light this weekend.

Thanks for this input because it's very useful. I had figured since it's a 24v light, the switch would also be 24v. Nope. After a little reflection, I realize all the switches are the same for all the models - and just the bulb must be getting 24v. That would explain some wiring which just didn't make sense, because there's an extra wire in the mix.
 
I'm having 52c switch panels recreated for a project. Pm if you need a set.
 
I was able to clean up the switch panels rather than replace them. Not perfect, but pretty good. I started with a cleaning using roll-off then a light compound. I finished them off with a quick coat of Back-to-Black spray used to bring car plastics back to life.

That looks fantastic.... I'm going to have to give that a try on my faded panels. Will be interesting to see how long it lasts.
 
Haven't been paying close attention, but yes, those panels do look nice. I use the back to black on the exhaust insulation wrap in my ER. There, it lasts. I'd say probably less so with the UV exposure up top.
 
Our print shop was having trouble getting the layout converted on the engraver software so they made me some UV resistant stickers for a temporary solution.They turned out pretty good
IMG_1445.webp
IMG_1442.webp
 

Attachments

  • IMG_1409.webp
    IMG_1409.webp
    10.7 KB · Views: 147
Well gang, tomorrow I'll take the family for our first overnight trip. We're only trekking about 20 miles to South Seas Plantation. My two girls and wife will manage to break anything vulnerable on the boat, which will make it better in the long run.

I brought her home and started digging in about 125 days ago and have tried to do at least one small thing each day. That has gotten her to the point where we can stay comfortably with everything we need working.

In the next couple weeks I hope to:
Install a new water heater
Deal with a weird macerator setup
Undo a ridiculous governor setting and adjust idle
Install a new battery charger
Paint non-skid on the bridge
Tear the rotten decorative wood off the bow pulpit
A ton of little things....

The girls leave for a few days in a couple weeks. That's when I FINALLY get a few buds on the boat and we'll head out 50 miles and hit a few reefs.

I gotta say the ol' girl is a joy to work on...but there's a lot of her!
 
Last edited:
Breaking and removing vulnerable stuff is good. What does not kill you makes you stronger.
 

Forum statistics

Threads
38,154
Messages
448,706
Members
12,482
Latest member
UnaVida

Latest Posts

Trending content

Back
Top Bottom