Sam's is your source for Hatteras and Cabo Yacht parts.

Enter a part description OR part number to search the Hatteras/Cabo parts catalog:

Email Sam's or call 1-800-678-9230 to order parts.

Cockpit sole fishbox lid screws are stripped

  • Thread starter Thread starter Reefgeorge
  • Start date Start date
  • Replies Replies 23
  • Views Views 9,162

Reefgeorge

Well-known member
Joined
May 31, 2010
Messages
563
Status
  1. OWNER - I own a Hatteras Yacht
Hatteras Model
Not Currently A Hatteras Owner
I have a 47 Cabo with two fishboxes in the cockpit sole. Each box has two lids on each end of the box that hinge towards the middle of the box. In the center in a fixed fiberglass pad with non skid to match the sole and each lid's piano hinge screws fasten into the edge of this fixed pad. The screw that go into the fixed pad are stripping. I don't know what they bite into after they penetrate the fiberglass and gelcoat but nothing bigger or longer will bite into the holes so whatever is in there no longer has any holding power.

Does anyone have a suggestion on how to repair this issue? The center pad is probably removeable but its not obvious how.

Thanks,

George
 
Maybe you could clean out the screw holes with compressed air as best you can then inject epoxy into the holes with a syringe. After this, drill new holes that are appropriately sized for the screws to bite into.

You might have to thicken the epoxy before you inject it if regular epoxy just drains away through the holes.

Chris
 
Another approach would be to drill out each screw hole with a 3/8" bit, then epoxy in a piece of 3/8" hardwood dowel and screw into that.
 
Another approach would be to drill out each screw hole with a 3/8" bit, then epoxy in a piece of 3/8" hardwood dowel and screw into that.

X2 Bob. Only good way to do it.
 
There are SS T nuts if you can access the back side, Alternate is something like a drywall anchor in SS. The back side opens like an umbrella when it is drawn up. Sorry, I forget what these are called.

Bobk
 
Try to get the holes filled with thickened epoxy, or epoxy in a fiberglass dowel. We always drill and tap our holes in frp to use bolts instead of using sheet metal screws. Try to stay away from using wood if you can.
 
There are SS T nuts if you can access the back side, Alternate is something like a drywall anchor in SS. The back side opens like an umbrella when it is drawn up. Sorry, I forget what these are called.

Bobk

Molly and toggle bolts.
 
For the epoxy hole filling suggestion, do I need to enlarge each hole first to say 3/8" or just fill the small ragged holes as is?

Is there an epoxy that will set up if the surrounding area is still damp wood or do I need to get each hole dry first?

Can you point me in the direction of fiberglass dowels, never seen 'em?

Thanks.
 
McMaster Carr has frp dowels.
How about a photo of what you're dealing with so we can get a better idea?
Looked online and think I found the lid setup on a 47 express. If you can get the panel out that the hinges attach to it will make the project a lot easier.
This type of hinge set up is always a problem because the builders never set them up to last long term. If you can get them out the best repair would be to open up the underside, then epoxy an frp strip behind the edge and or to the underside of the top.
It's going to be tough to get the wood (balsa or plywood?) dry from the top. Start with a shopvac and then would move to heating it with light bulbs to help.
 
Last edited:
Acetone helps dry it as well, but is VERY flammable - take precautions.
 
You understand it perfectly and I agree that removal of the stationary center piece and surgery into the body underneath up against the hole openings is the best approach but I would like to try a through the hole fix first. My starting appraoch after ideas here and elsewhere:

1) drill the holes out over sized to 1/4"

2) Use a cutoff allen wrench and drill/shop vac to clean out the "material" behind the holes and create a bigger epoxy resevior.

3) Dry if necessary

4) Inject thickened epoxy and chopped fiberglass with a syringe and tube extension (looking into the FRP dowel idea as well)

5) Pre-drill and re-attach.

If that fails then I'll have to do the full heart lung transplant after the center brace is removed.

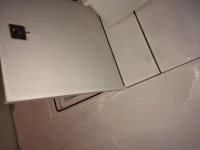
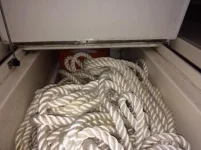
Pictures attached.

Comments?IMG_5744.webpIMG_5745.webpIMG_5746.webp

Thanks.
 
Last edited:
Okay, since it's vertical I would cover the part to be worked on with a good (3m) vinyl tape, tape it then drill the holes. Cover everything else too and be ready to tape over the holes so the epoxy doesn't run/fall out. Remove the tape before the epoxy gets super hard. A heat gun will help to dry and also blow out the dust and moisture, don't get things too hot. Maybe try a few holes first to get the hang of it.
We had the same thing happen to our deck hatches which are hinged to each other. Tried the simple fix a few times before I got really pissed and cut the backs open gluing in 1/2 fiberglass sheet stock to the entire edge and replacing the balsa with foam, ours just weren't thick enough to hold anything properly.
Also, don't be scared to use the tap in you battery drill if you're going that route.
 
Last edited:
Could you tell me more about the 1/2" sheet stock fiberglass that you used as an insert? Was is 1/2" sheets of material like for circuit boards (only thicker)? Did you laminate up multiple layers to make a thick backing block? I am envisioning a 1" x 1" (ish) x 30" chunk that gets inserted and backs up the hole openings behind the fiberglass/gelcoat skin.
Thanks.
 
We get it from McMaster too, it's basically like plywood that's made from fiberglass instead of wood, easier to buy it than make it, there's usually some on Ebay also. Hard to cut so use a diamond tipped blade. 1/4 or 3/8 is probably thick enough. Have used the same stuff for thu hull backing pads and assorted other projects for years.
Cutting the underside open is a big project, might be best to try epoxy and fillers using the frp rod first. If you go that rout make sure to first put in some epoxy without filler so it can really get into the wood, let it flash off a little and then add the thickened epoxy, if the wood is dry it could suck a lot of resin out of the thickened epoxy diminishing the strength.
Where's the boat located?

Sheets and Strips
https://www.mcmaster.com/#fiberglass-plastic/=15rqfkf

Rods
https://www.mcmaster.com/#fiberglass-plastic/=15rqfww
 
"Where's the boat located? "

Ft. Pierce Florida.
 
Reef, I don't like any of the pre packaged epoxies.
 
I use it and find that it performs well. It is very neat and easy to use, but pricey. And, there's not much in the tube.
 
The reason I don't like the pre mixed epoxy is you have no control over the consistency and or strength. Guess it's okay for a quick onboard minor repair, especially just gluing something together, when access to the full arsenal of potions is limited.
In this case, where you're trying to cheat a little on a proper repair that may involve some moist/damp coring, surfaces that can't be cleaned or scuffed, and needing a very strong repair for the bolts/screws to grab you're going to have to mix up some epoxy that's stronger than just adding some cabosil or glass bubbles like what's in the tubes. It's the length of the lids with the hinge that's creating the leverage that is constantly trying to pull the hinge off. Noticed on the newer Cabo's they placed the hinge on the long side of the hatch lid which reduces the force. There's a reason the charter boats place the fish box hinge on top instead of on the ends.
 
"Where's the boat located? "

Ft. Pierce Florida.

RAKA is in Ft Pierce. They are a very good source for epoxies and reinforcements.

Bobk
 

Forum statistics

Threads
38,156
Messages
448,741
Members
12,482
Latest member
UnaVida

Latest Posts

Trending content

Back
Top Bottom