HATTERAS YACHT PARTS
CABO YACHT PARTS
Sam's is your source for Hatteras and Cabo Yacht parts.
You are using an out of date browser. It may not display this or other websites correctly.
You should upgrade or use an alternative browser.
You should upgrade or use an alternative browser.
Cockpit Mezzanine & Tuna Tube Winter Project
- Thread starter rustybucket
- Start date
- Replies 256
- Views 152,147
riverrandy
Well-known member
- Joined
- Sep 7, 2015
- Messages
- 234
- Status
- CAPTAIN
- Hatteras Model
- 64' MY - Series I (1974 - 1981)
Not my checkbook, but I vote in the Glass. An now you get an extra hour of light in evenings to work on the project
Play'N Hooky Too
Well-known member
- Joined
- Jun 27, 2016
- Messages
- 224
- Status
- OWNER - I own a Hatteras Yacht
- Hatteras Model
- 46' CONVERTIBLE-Series I (1974 - 1981)
Although it would be cool to be able to see into the bait well, having glass might affect the survivability of your bait. I've been told that they get less stressed out if they are kept in a dark enclosure.
rustybucket
Legendary Member
- Joined
- Jul 12, 2013
- Messages
- 1,200
- Status
- OWNER - I own a Hatteras Yacht
- Hatteras Model
- 52' CONVERTIBLE (1983 - 1990)
Although it would be cool to be able to see into the bait well, having glass might affect the survivability of your bait. I've been told that they get less stressed out if they are kept in a dark enclosure.
I've kinda thought about that, but most of our bait is pretty hardy. We use hardtails, cigar minnows, pinfish..etc. If I had a bait that was better in the dark I could always tape something over the window or get some black vinyl and cover the glass.
shallowskiff
Member
- Joined
- Mar 9, 2019
- Messages
- 35
- Status
- OTHER
- Hatteras Model
- Not Currently A Hatteras Owner
Pretty good plans.
rustybucket
Legendary Member
- Joined
- Jul 12, 2013
- Messages
- 1,200
- Status
- OWNER - I own a Hatteras Yacht
- Hatteras Model
- 52' CONVERTIBLE (1983 - 1990)
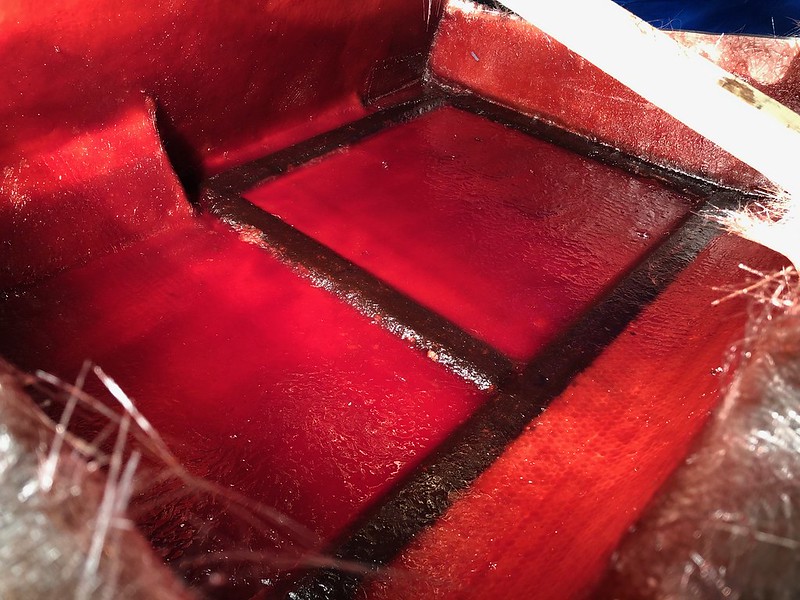
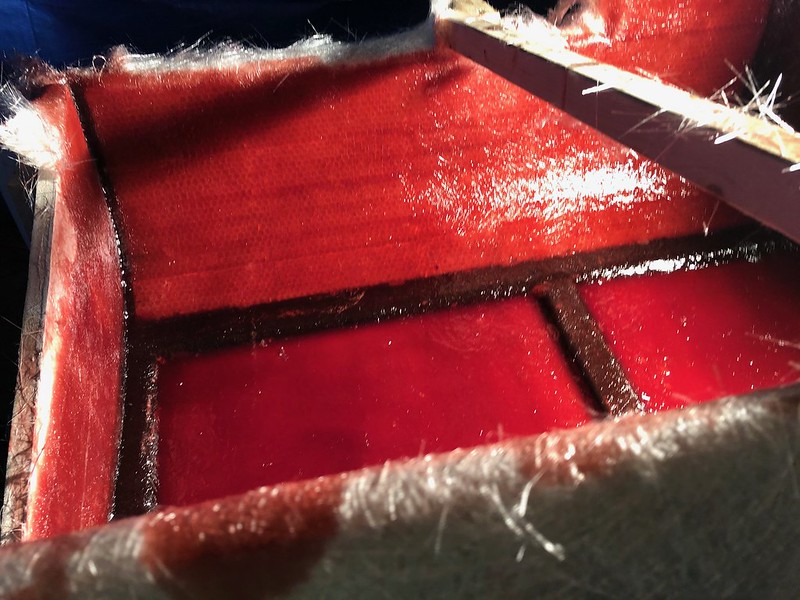
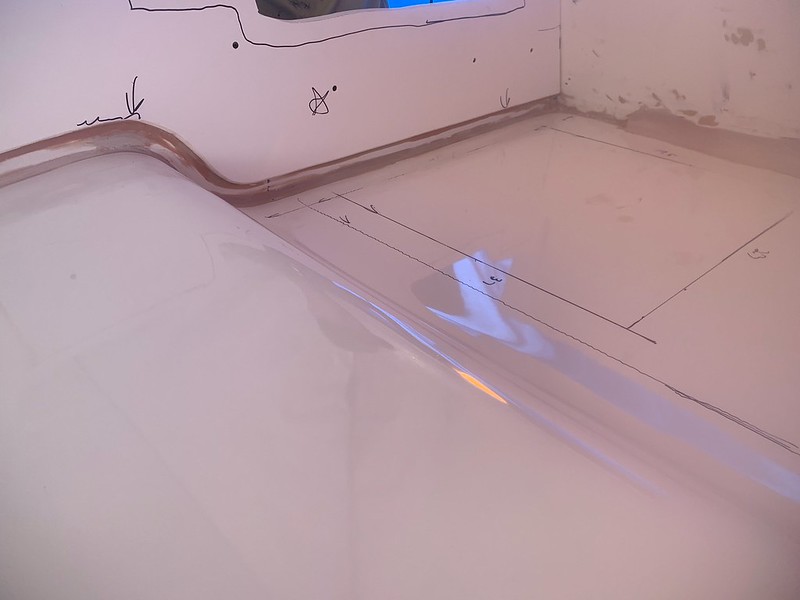
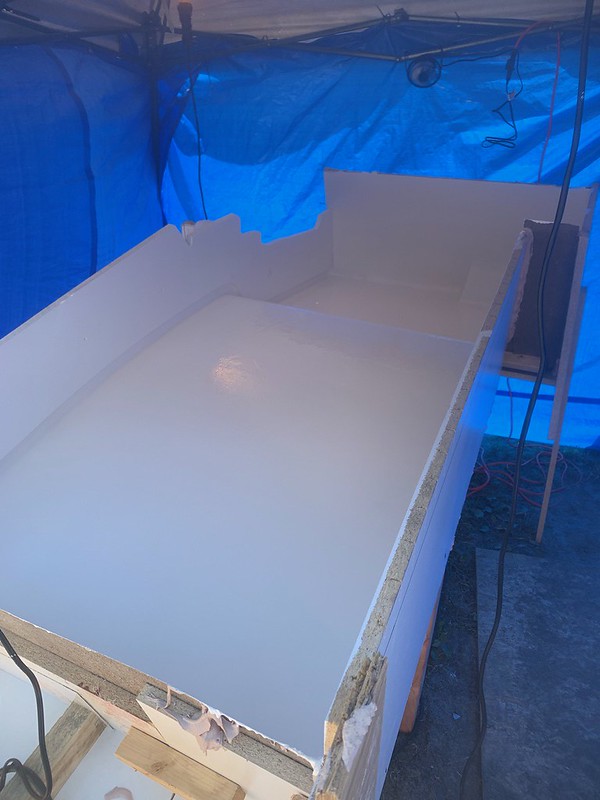
Got a good bit done this weekend on the port side baitwell. Mold was final faired, waxed and sprayed down with PVA (aqua net super strong hold hair spray).
We pre-cut all our core material and layup material before getting started. Used scored 1/2" nidacore on the radius and 1/2" coosa on the window frame
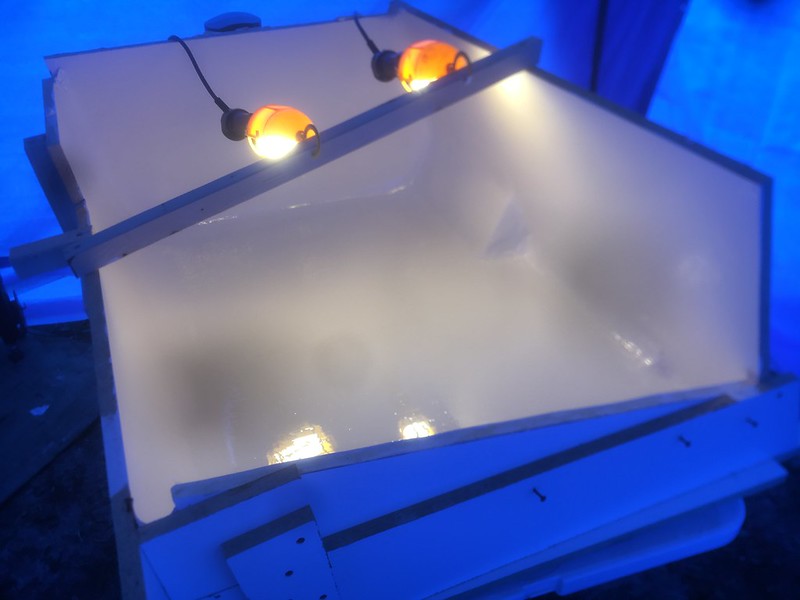
This is the first coat of gelcoat inside the mold
Once layup starts it's pretty hectic until done so I don't have many in-progress pics
We pre-cut all our core material and layup material before getting started. Used scored 1/2" nidacore on the radius and 1/2" coosa on the window frame
This is the first coat of gelcoat inside the mold
Once layup starts it's pretty hectic until done so I don't have many in-progress pics
Last edited:
rustybucket
Legendary Member
- Joined
- Jul 12, 2013
- Messages
- 1,200
- Status
- OWNER - I own a Hatteras Yacht
- Hatteras Model
- 52' CONVERTIBLE (1983 - 1990)
2 layers of 1.5oz mat, core materials, then 2 more layers of 1.5oz.
rustybucket
Legendary Member
- Joined
- Jul 12, 2013
- Messages
- 1,200
- Status
- OWNER - I own a Hatteras Yacht
- Hatteras Model
- 52' CONVERTIBLE (1983 - 1990)
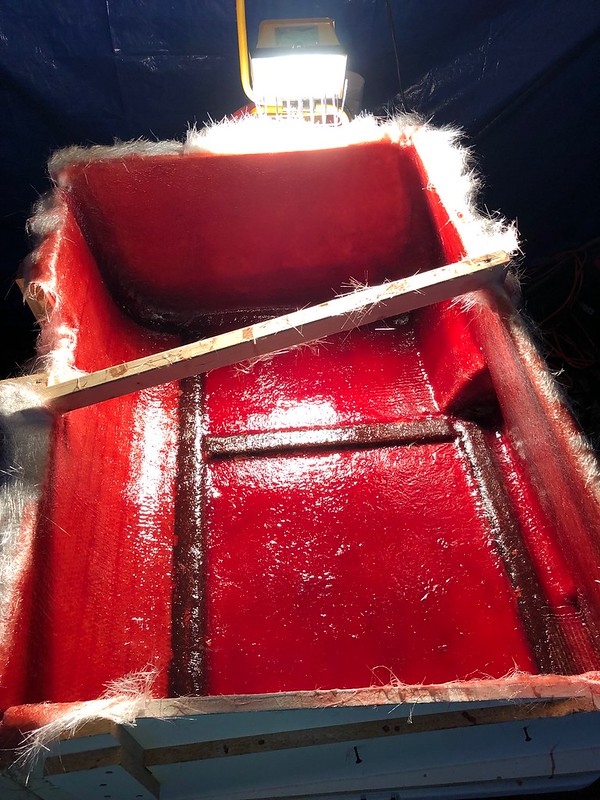
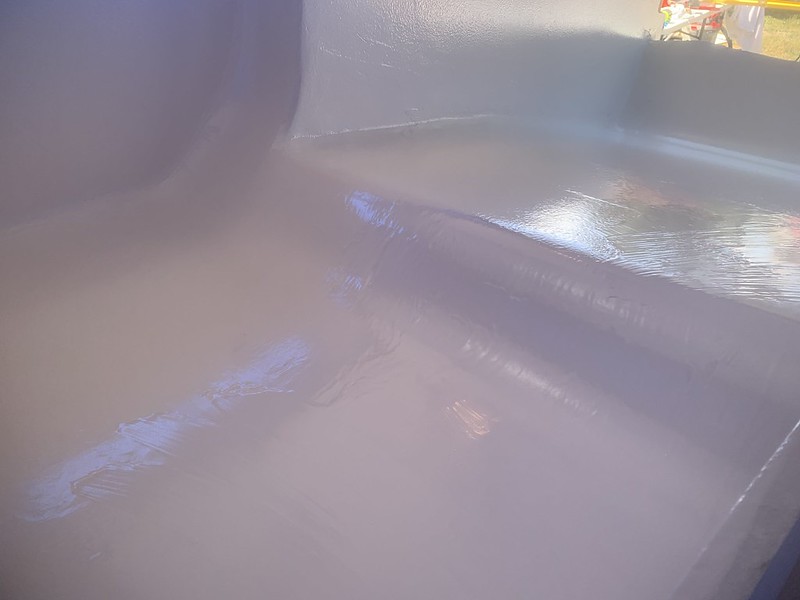
We started layup around 9pm, finished around 1am. I stayed awake and babysat the mold until about 2:30am. The heat it generated was pretty intense so while we had a heater going in the tent, I had to add a fan in to help dissipate some of the heat in the thicker areas.
At about 8:30am the next morning we popped her out of the mold. Some of the bondo stuck to the part in some areas but nothing a little chipping/sanding didn't take care of. We will have to trim the part quite a bit to fit, so we left the below-deck bondo until after we trim/fit we will sand the rest clean.
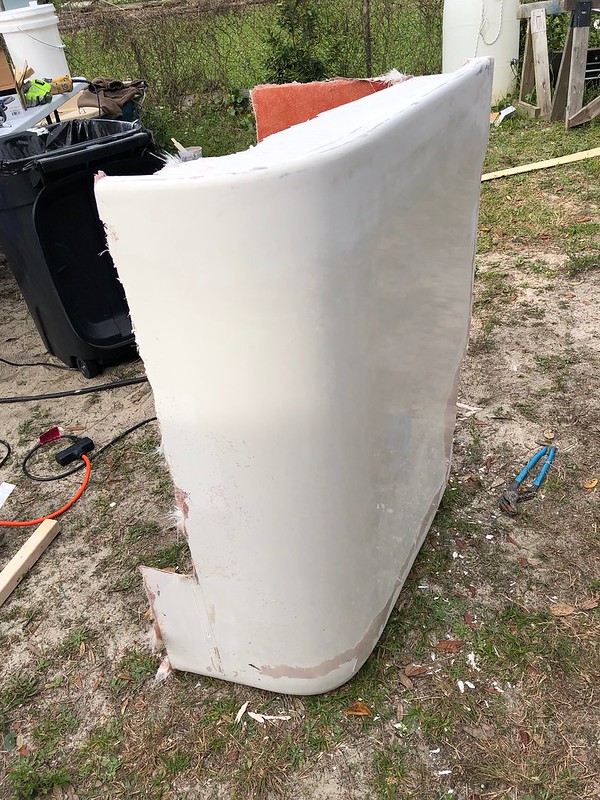
Unfortunately I had to hit the road so we only had time to sit the part in the boat, everything lines right up and looks like it's going to fit perfectly with some trimming (was expected)
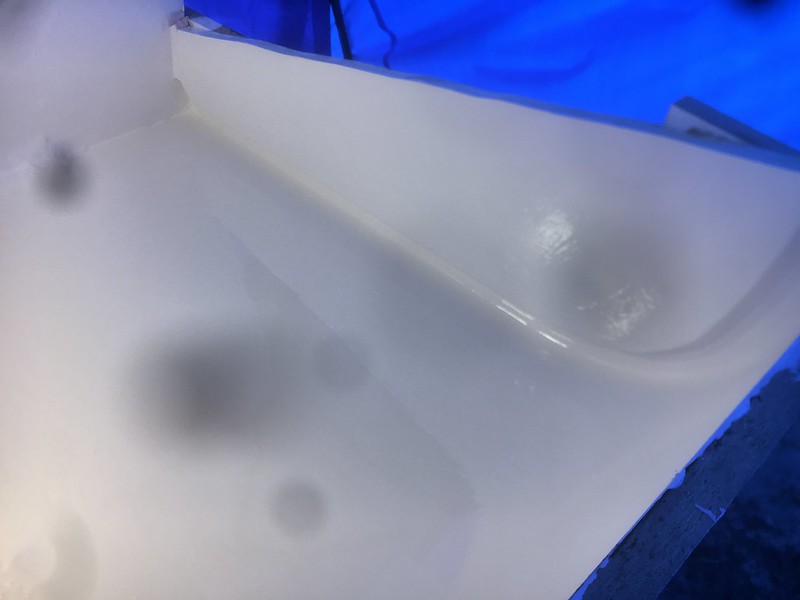
We were a little thin on gel coat in certain areas of our mold, which is fine, this part will be painted after install anyways. Overall, I'm VERY happy with the way the part turned out. Is going to look great installed
Will be back down this weekend to build the starboard side mold and possibly trim/install the port side part.
At about 8:30am the next morning we popped her out of the mold. Some of the bondo stuck to the part in some areas but nothing a little chipping/sanding didn't take care of. We will have to trim the part quite a bit to fit, so we left the below-deck bondo until after we trim/fit we will sand the rest clean.
Unfortunately I had to hit the road so we only had time to sit the part in the boat, everything lines right up and looks like it's going to fit perfectly with some trimming (was expected)
We were a little thin on gel coat in certain areas of our mold, which is fine, this part will be painted after install anyways. Overall, I'm VERY happy with the way the part turned out. Is going to look great installed
Will be back down this weekend to build the starboard side mold and possibly trim/install the port side part.
rustybucket
Legendary Member
- Joined
- Jul 12, 2013
- Messages
- 1,200
- Status
- OWNER - I own a Hatteras Yacht
- Hatteras Model
- 52' CONVERTIBLE (1983 - 1990)
Another very productive weekend on the project!! My brother came over from Houston to help out for the weekend. We were able to build the mold for the starboard corner baitwell and transom tuna tubes and get the part built!
The mold itself was quite a contraption lol. We built the top 2/3 of the mold in the boat, we then removed the mold and built the bottom portion on the table. approx 1/3 of the baitwell side will be below deck in the final install.
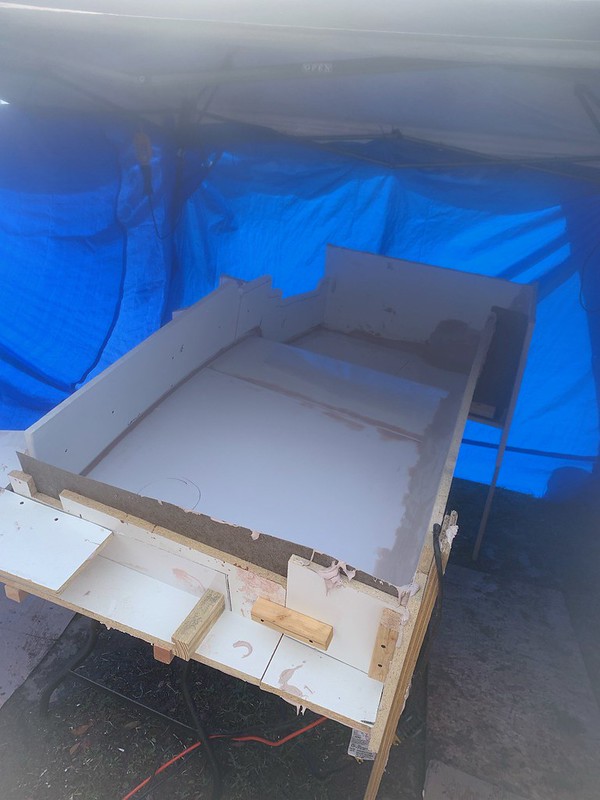
After the mold was built and faired we did 3 coats of johnsons paste wax, then 3 coats of PVA (aqua net super strong hair spray)
Here are a few pics after the gelcoat was laid.
The mold itself was quite a contraption lol. We built the top 2/3 of the mold in the boat, we then removed the mold and built the bottom portion on the table. approx 1/3 of the baitwell side will be below deck in the final install.
After the mold was built and faired we did 3 coats of johnsons paste wax, then 3 coats of PVA (aqua net super strong hair spray)
Here are a few pics after the gelcoat was laid.
rustybucket
Legendary Member
- Joined
- Jul 12, 2013
- Messages
- 1,200
- Status
- OWNER - I own a Hatteras Yacht
- Hatteras Model
- 52' CONVERTIBLE (1983 - 1990)


rustybucket
Legendary Member
- Joined
- Jul 12, 2013
- Messages
- 1,200
- Status
- OWNER - I own a Hatteras Yacht
- Hatteras Model
- 52' CONVERTIBLE (1983 - 1990)
Laying the glass


Last edited:
rustybucket
Legendary Member
- Joined
- Jul 12, 2013
- Messages
- 1,200
- Status
- OWNER - I own a Hatteras Yacht
- Hatteras Model
- 52' CONVERTIBLE (1983 - 1990)
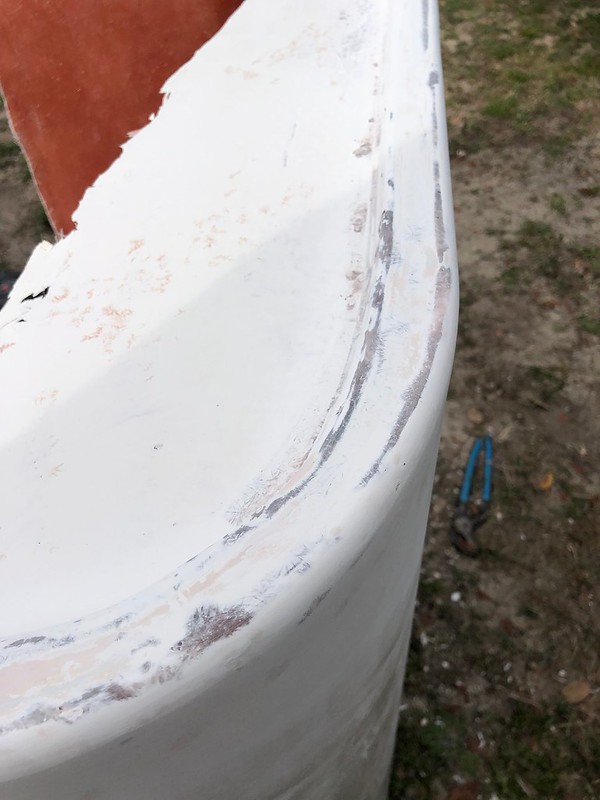
Popped her out of the mold, everything was dang near perfect. Had a couple of small air voids in the lid rim that we will fill. Other than that couldn't be happier with the end result.
We were in a rush popping her out so still got some bondo stuck to it in the pics, all that will be chipped off and sanded. The overall finish of the part is very smooth.


We were in a rush popping her out so still got some bondo stuck to it in the pics, all that will be chipped off and sanded. The overall finish of the part is very smooth.
riverrandy
Well-known member
- Joined
- Sep 7, 2015
- Messages
- 234
- Status
- CAPTAIN
- Hatteras Model
- 64' MY - Series I (1974 - 1981)
Fantastic Progress. If your brother gets board, I am just down the road a bit from Houston")
rustybucket
Legendary Member
- Joined
- Jul 12, 2013
- Messages
- 1,200
- Status
- OWNER - I own a Hatteras Yacht
- Hatteras Model
- 52' CONVERTIBLE (1983 - 1990)
Fantastic Progress. If your brother gets board, I am just down the road a bit from Houston
lol, the running joke is that if he weren't helping it would take me at least half the time to finish the project! lol.
rustybucket
Legendary Member
- Joined
- Jul 12, 2013
- Messages
- 1,200
- Status
- OWNER - I own a Hatteras Yacht
- Hatteras Model
- 52' CONVERTIBLE (1983 - 1990)
Ok, stayed home this weekend but still got a couple pieces finished off.
These two pieces are the fishbox top (under the mezzanine seat, short piece in the pics. The long piece is the fishbox lid).
First step was to build the molds out of 3/4" birch plywood. We drug radius's/fillets in all the corners with a larger radius on the corner of the lid that will be sticking out into the cockpit a little bit.
After building the molds we put a couple coats of johnsons paste wax followed by a layer of PVA then straight to gelcoat


Next we laid in 2 layers of 1.5oz mat


These two pieces are the fishbox top (under the mezzanine seat, short piece in the pics. The long piece is the fishbox lid).
First step was to build the molds out of 3/4" birch plywood. We drug radius's/fillets in all the corners with a larger radius on the corner of the lid that will be sticking out into the cockpit a little bit.
After building the molds we put a couple coats of johnsons paste wax followed by a layer of PVA then straight to gelcoat
Next we laid in 2 layers of 1.5oz mat
Last edited:
rustybucket
Legendary Member
- Joined
- Jul 12, 2013
- Messages
- 1,200
- Status
- OWNER - I own a Hatteras Yacht
- Hatteras Model
- 52' CONVERTIBLE (1983 - 1990)
Next up, cutting the coring.
To keep strength up the top of the lid will be a piece of 1/2" coosa board.
I'll be thru-bolting the hinges so rather than foam in those areas we ran 5" of 1/2" coosa board laminated along the hinge side. This will create a rock solid area to thru-bolt to.

The remining portion of the fishbox lid will be 1.5" thick divinycell, making total thickness a little north of 2"


After all the coring and top layer of mat was cut to size we pulled everything out and laid the entire part up in one go. Doing this generated quite a bit of heat and was pretty close to enough heat to warp the part or cause heat bubbles, so next time we do this we will lay up about half, let it cure then lay up the rest. But it all came out good this time although we had to run fans on it and really pay attention to what was going on.

To keep strength up the top of the lid will be a piece of 1/2" coosa board.
I'll be thru-bolting the hinges so rather than foam in those areas we ran 5" of 1/2" coosa board laminated along the hinge side. This will create a rock solid area to thru-bolt to.
The remining portion of the fishbox lid will be 1.5" thick divinycell, making total thickness a little north of 2"
After all the coring and top layer of mat was cut to size we pulled everything out and laid the entire part up in one go. Doing this generated quite a bit of heat and was pretty close to enough heat to warp the part or cause heat bubbles, so next time we do this we will lay up about half, let it cure then lay up the rest. But it all came out good this time although we had to run fans on it and really pay attention to what was going on.
rustybucket
Legendary Member
- Joined
- Jul 12, 2013
- Messages
- 1,200
- Status
- OWNER - I own a Hatteras Yacht
- Hatteras Model
- 52' CONVERTIBLE (1983 - 1990)
Laid the parts up Sunday, popped them out of the mold monday morning. Pretty much as close to perfect as I could imagine. Thinking we will put 4 heavy duty hinges on the fishbox lid and it will have gas struts so it will stay open when opened.
This is actually how they will be placed in the boat, long piece will be the hinged lid for the fishbox.


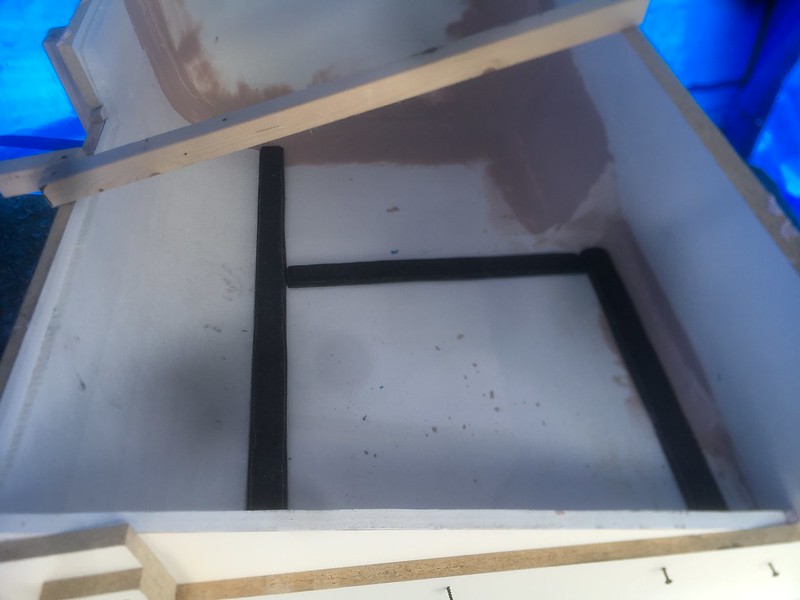
Once we get it dry installed we will build a channel for a press fit bulb seal (or two) so everything will seal up nicely.
This is actually how they will be placed in the boat, long piece will be the hinged lid for the fishbox.
Once we get it dry installed we will build a channel for a press fit bulb seal (or two) so everything will seal up nicely.
rustybucket
Legendary Member
- Joined
- Jul 12, 2013
- Messages
- 1,200
- Status
- OWNER - I own a Hatteras Yacht
- Hatteras Model
- 52' CONVERTIBLE (1983 - 1990)
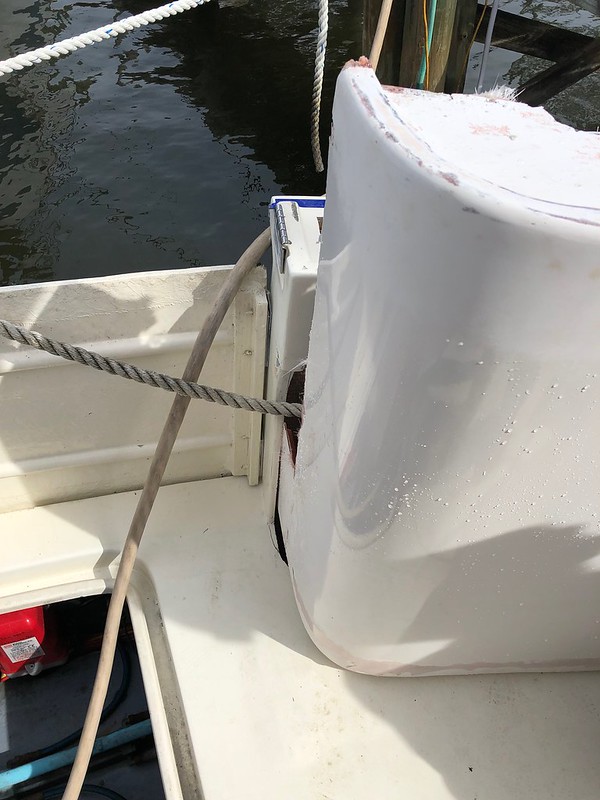
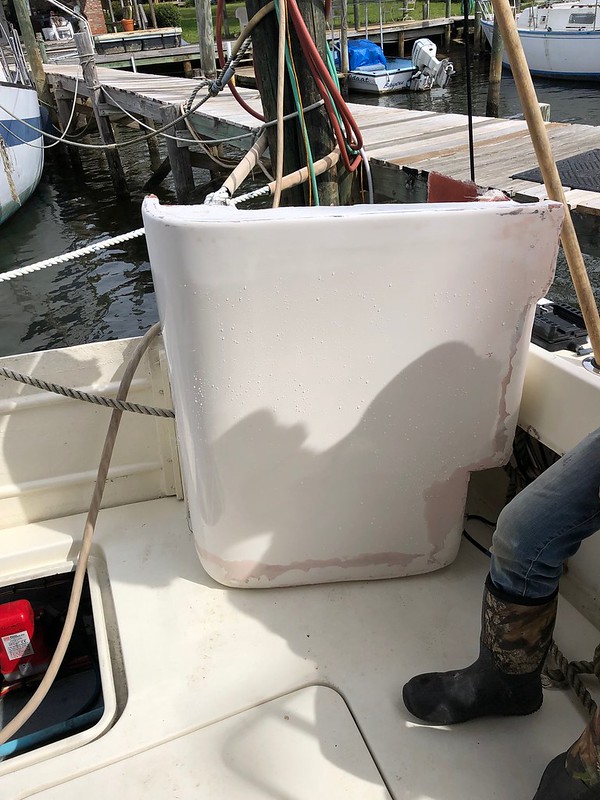
Finally got back down to the boat and got the Port Baitwell trimmed and dry fit. Fit was perfect, like a glove, couldn't have been any better. Got started on prepping/cutting the Starboard side, but ran out of time.
I didn't have any clamps with me so it is slightly sagging in the pics, when picked up a little all the surfaces mate up very nicely.


I didn't have any clamps with me so it is slightly sagging in the pics, when picked up a little all the surfaces mate up very nicely.
riverrandy
Well-known member
- Joined
- Sep 7, 2015
- Messages
- 234
- Status
- CAPTAIN
- Hatteras Model
- 64' MY - Series I (1974 - 1981)
Beautiful fit!
Forum statistics
Latest Posts
-
-
Any recent advice on how to retrofit Cruisair Split units
- Started by Cap'n Kirk
- Replies: 7
-
-
-

Trending content
