Sam's is your source for Hatteras and Cabo Yacht parts.

Enter a part description OR part number to search the Hatteras/Cabo parts catalog:

Email Sam's or call 1-800-678-9230 to order parts.

Help painting the hull mistake? Hubby might kill me that I'm taking on too much!

Joined
Sep 28, 2014
Messages
40
Status
  1. OWNER - I own a Hatteras Yacht
Hatteras Model
50' MOTOR YACHT (1964 - 1968)
Hello,
New to painting boats, just made the mistake of doing a little sanding on my 1966 50' hatteras, after finding out I should have deglazed the wax off first. Thank goodness it really wasn't a lot of the boat. Is that going to make that big difference before I deglaze the rest of my yacht. I used 100 grit on a grinder sander. Now how do I fix that mistake help help : ) Let me say I'm a toolmom, handy went to school for carpentry/cabinetry, I'm cheap don't want to pay 80.00 hr yard labor. This all started because the rub rails are really looking cruddy and I was worried it can wait another 2 years to be painted, since it's hauled out for bottom paint now it needed to be addressed. I plan to rent a scissor lift for all the work. Going to use Pettit easy epoxy paint.
 
Last edited:
NEVER sand before using an appropriate solvent to remove wax. Otherwise the sanding just moves the wax into the sanded paint and subsequent painting will fail. If silicone is involved, it is EXTREMELY difficult to eliminate and fish-eyes in the paint are the typical result and hard to repair.

PrepSol - http://pc.dupont.com/dpc/en/US/html/visitor/common/pdfs/b/product/dr/ChromaSystem/H-19295_3919S.pdf - was the "goto" solvent for pre sanding for as many years as I can recall but I have to admit I haven't done that work in the last couple of years so there may be something else that is now considered a better choice. In any case, solvent wash BEFORE sanding is mandatory for good paint work…whether it's a boat, a car, an airplane, or your new DIY bucket sub-woofer! :)
 
Thanks Mike or do I call you Skipper? I know that now and yes I will never do it again. It was a few small spots. So how do I fix it?
 
Sodium hydroxide, otherwise known as lye, obliterates silicone. It is one of the few compounds that will. Purple industrial cleaner at Home Depot is a good source. Water sheeting on a surface indicates a lack of wax. Beading of water indicates presence of wax.
 
100 grit paper is very aggressive for sanding anything that's going to end up finish coated. It's going to take a lot of priming and sanding to fill the gouges from 100 grit. I'm Assuming your sanding the wood rub rails? Unless you're just touching up the bad spots that's a pretty huge job for 1 person, especially if you run into some surprises along the way. Don't forget to post some pictures.
 
I only used 100 on the hull in areas that were chipped or cracked and then I will epoxy them by feather ing them out and lightly sand them. Probably 10 small spots that I used it on. So the wood rub rail has some cracking and peeling paint to fix. I feel better after reading everyone's input. I will use a good cleaner and then deglaze it.
After I deglaze it i have heard that acetone is a great last cleaner right before painting is this correct?
 
Do you have a sister?
 
The paint system you are using should have a final cleaner specified. I'll defer to Mike and the more experienced painters here, but when I was painting the topsides of my boat (rolling and tipping AwlGrip) I used their degreaser-prep solution- AwlPrep. I did not used acetone or lacquer thinner. This is not the same thing that you use to remove wax or silicone.

It sounds like the problem you now have is twofold- deep scratches in the finish, plus wax or silicone in them. I suppose the answer to that is to first scrub with a degreaser and then alternate sanding and degreasing until you have a reasonable surface for beginning to prime for a finish coat. If I were sanding that area I think I would be using 220 and finishing with 320 before I started laying on any paint.
 
What Jim said is probably the best advice - use the prep/degreaser solvent recommended by the paint-maker. As far as cleaning the sanded areas, all you can do is use the solvent liberally and work it using a rag with a decent bit of nap - like a washcloth. It WILL remove the wax though it may take a lot more rubbing/solvent than it would have if done before sanding. If there is wax with silicone (or silicone in any form at all), then, as noted, it will be much more difficult and will probably require a solvent designed for that purpose…or lye! I did not know that lye would eat silicone! ;)

As far as sanding grits…well 100 does seem a bit heavy but if that's what's needed for the initial work, then so be it. It means, of course, that more sanding will be required to get to a grit where primer/paint can be applied without showing sand scratches. 100/240/320 or 400 will do the job.
 
This all sounds like good advice! I will be there today and take photos so you can see there's not much sanded. I have NOT gone over the whole Hull with 100 grit so let's make that clear. Just a SMALL FEW spots. Now since I have the whole rest of the boat left to sand lets say 48' of my 50' boat I need to in order 1. Clean and degrease just the areas that need epoxy filled and rub rails 2. Fill and epoxy sanded hull and any of the rub rails 3. Sand epoxy 4. Clean and degrease the Whole boat. 5. Use a dewaxer recommended by the paint Company 6. Sand the boat company recommended use a 3m pad as a sander. 5. tack cloth to get the lightly sand off. 6. Paint
 
Welcome to the world of great vintage boats! My wife and I own a 1965 50MY, I would love to share so ideas. I sent you a PM.

Rob
 
If I was going to the trouble of prepping a hull for paint, I wouldn't use a one-part poly on it. That stuff just doesn't last. I used to use it all the time on my wooden boat, but the paint only lasted three years anyway so it didn't matter if the shine was gone in two.

Could you maybe post some pix of the areas where you sanded with 100 grit? Any "before" pix? Depending on the condition of the surface, 100 grit might have been the right choice for the first pass.
 
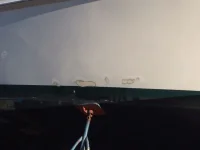
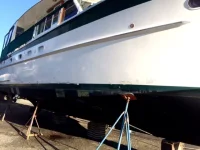
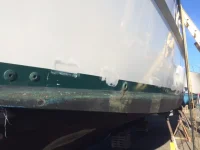
Here are the pictures. I first cleaned well with a solvent the area to be filled with the proper epoxy from Pettit paint. The good news is the prior paint was interlux very similar so Ive read. Im pretty confident I can just patch and touch up the areas needed. I just really need to concentrate on getting the starboard side done because I can do the rest when it gets back in the water if I need to. The best part is they only call for cleaning with part ammonia and water then sand, tac cloth and then use the solvent to clean. I got most of the patching done yesterday and today I'm having a scissor jack delivered to getto the high spots. I know the boat looks good from a distance but the top and bottom rub rails I was really concerned along with the calking around the port windows needed done. I did a few of the starboard side ones this fall. I will take close ups today of the cruddy rub rail job the previous owner did.

IMG_444004919.webpIMG_444004911.webpIMG_444003427.webp
 
I agree about not using a one-part paint. I don't think it's going to last very long at the waterline. Plus you need to repaint part of the boot stripe. I think you need a two-part paint for that. Like AwlGrip.
 
Welcome to the world of great vintage boats! My wife and I own a 1965 50MY, I would love to share so ideas. I sent you a PM.

Rob
I just got some of the pictures in my album before the remodel if your interested. I will try to get some of the after ones in there some time soon.
 
Last edited:
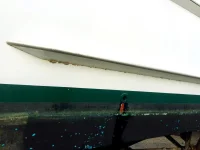
IMG_2506.webpIMG_2507.webpIMG_2505.webp
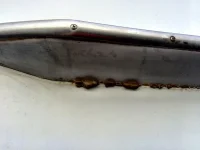
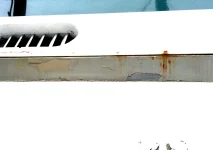
These are some of what the rub rails look like.
 
What is your timeline/deadline to get back in the water? I'm a little confused with what you think the hull is currently painted with; 1 part paint or a 2 part paint?
You're looking at 2 super huge projects between the rub and bumper rails and painting the hull, especially for 1 person without a lot of experience.
The only way to fix the rub and bumper rails so there won't be any issues for a long time is to remove the stainless, strip them to bare wood, repair/replace any rot, coat them out with epoxy and then start the priming and painting process. Or, remove them and replace with vinyl/pvc or aluminum rails which is probably an even bigger and more costly job. We replaced our wood rails with vinyl/pvc over 28 years ago when we first painted our 50c and have done zero maintenance except buffing the stainless rail. Our bumper rail is fiberglass that we got from Slane, a great piece and pretty easy install.
The bubbling on the hull around the water line is pretty common on many of the very old Hat hulls. Think the paint is lifting from behind because some of the fillers or primers on the hull have absorbed moisture over time which causes them to lift or bubble. If it was me I would just try to get the bad spots feathered in, sealed up with something 2 part and then spot painted. If you really want to paint the entire hull you're probably going to need some reinforcements on the labor front. Good luck, keep asking questions.
 
I'm with Cricket- we did our rub rails in that way also. Hard to tell from the pics, but does your entire hull REALLY neat to be re-painted? Have you tried to buff it out? You mentioned chalking- it's amazing what we did with our hull with 3M compound (I think it was the restorer kind) and a buffer. I would repair and match the really bad spots and rub rails, then buff the rest of the boat.

Cheryl
Cinderella
1971 53 MY
 

Forum statistics

Threads
38,156
Messages
448,741
Members
12,482
Latest member
UnaVida

Latest Posts

Trending content

Back
Top Bottom