Sam's is your source for Hatteras and Cabo Yacht parts.

Enter a part description OR part number to search the Hatteras/Cabo parts catalog:

Email Sam's or call 1-800-678-9230 to order parts.

Reviving the "Finally in the paint booth thread"

mrdeepseafisher

Well-known member
Joined
Jan 15, 2012
Messages
283
Status
  1. OWNER - I own a Hatteras Yacht
Hatteras Model
53' YACHT FISH -Series I (1977 - 1981)
Well its hard to believe its been 2 1/2 yrs plus ..... but its true. Through a combination of my work distractions and the guys doing the work focusing on other projects the work stopped for the last 1 1/2 yrs, BUT, we are now making a push to get her back in the water in the next 2-3 months. The paint job turned into "while we are at it" and we have replaced all windows and portholes. Added davit, made major changes on the mezz deck, made changes to the flybridge ladder, significant stainless work, built a fishbox and livebait well in the cockpit. I really like the larger portholes we installed in the master stateroom, made a huge difference on the light into the stateroom.

Two weeks ago I saw the boat unwrapped for the first time in over a year . The guys are buffing and polishing and beginning to put all the parts back on her. I have done some of the work myself (which probably didn't help the progress).

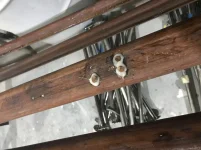
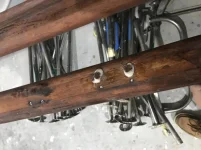
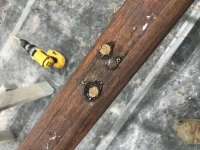
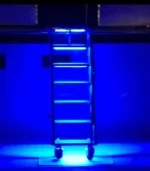
My son and I spent the last two days working on the cabinets we built on the mezzanine deck. We are finally at the stage where we are adding the teak steps, tops and trim. I think one of the best improvements are the cabinets on the mezz deck on either side of the salon doors. By cutting down the ladder to the flybridge and having the lower steps built into the cabinet the space feels more "roomy" coming up from the cockpit. The port cabinet top raises and hosts a built in sink, cutting board, ice maker and storage cabinet. it will make grilling on the mezz deck much easier.

I have tons of photos and am trying to take pics as we are putting her back together. Plan is to be done by end of Sept (of this year). Albeit a long process the guys have done a good job and are perfectionist.
IMG_2550.webp

IMG_2551.webp

port view.webp

I will try to add more pics over the next couple of weeks, but if not, its because we are really in the "lets get her done mode". My son is trying to capture a lot of the work as we go. Sorry if I end up in some of the pics and scare you guys. I think the camera adds more than 10 lbs.
 
A side view, the new windows really look good with the dark color
Starboard view.webp

Major changes on the mezz deck.
rear deck.webp

The mezz deck changes
ladder.webp
 
Looking good! Love those oversized portholes you added. Where did you get them? Looks like a fabulous addition.
 
Looks fantastic! The why we are at its will get you every time.
 
Fantastic hull finish, what paint did you use?

George
 
Got the large portholes from Broudus at loookout boat windows. It took a little fitting but lets a lot more light in the master stateroom. It's always a little nerve racking to start cutting your hull. I just sorta held the porthole up, traced an outline, grabbed a sawsall and started cutting.

The paint is Alexseal. Headed there tomorrow and will be there all week works by on the boat.
 
Six years ago we had our old girl painted with Alexseal. Since then it has sat with the starboard side exposed to the North Carolina south sun except for an occasional cruise. In the next month or two the boat will be hauled for maintenance including some paint touch up and exterior detailing.

When I chose the paint, the two characteristics that lead me to Alexseal were the ability to do spot repairs and to compound/polish the finish over time. When I get this done I will add a picture or two to this thread.

Hope this is not seen as hijacking the thread as my intent is to add info that others may find informative in choosing Alexseal, beyond the initial gloss.
 
A side view, the new windows really look good with the dark color
View attachment 26329

Wow, great work!! Sure wish you hadn’t posted those gorgeous pics , that paint! Amazing finish, congrats, and good luck getting her back on the water soon. That was ingenious use of the space on the mezz deck. Looks awesome!!
 
Frustrating day today! Working on the brightwork and all the stainless steel. My son was working on removing the treads from the ladder to the flybridge and they were not coming off. Split one step and cracked the other two. They were basically glued on from all the years of varnishing them while on the ladder. So I spent the afternoon making three new ones.

Probably just as well, as trying to remove the finish may have taken just as long. I used the old one for patterns and now the fun comes in trying to drill the 1" holes at the proper angle without screwing something up. I guess the drill press and building a jig is the way to go.
old steps.webp

new steps
new steps.webp
 
Nice. I’ve been there. Yes a jig is the way to go, actually the only way. You will be more pleased with the new treads anyway as they will be fabulous when varnished. They are like jewelry on the men deck.
 
Worked a bit over the holiday long weekend, man, the woodwork seems to go really slow. The handrails were in a lot worse shape than i thought. Many places in the bottom of the rails where the stanchions screwed to seemed to be decayed. I figured we might as well give them a solid surface to screw to so we spent a day repairing the rails. Not sure if this was the way to do this properly but it seemed about the only way to do it and I think most of the plugs we made will not be seen when done.

We removed broken screws and/or bad wood and replaced with a teak plug epoxied in place.
 

Attachments

  • IMG_2609.webp
    IMG_2609.webp
    72.6 KB · Views: 300
  • IMG_2608.webp
    IMG_2608.webp
    70.8 KB · Views: 303
  • IMG_2600.webp
    IMG_2600.webp
    87.1 KB · Views: 303
Also got the teak covering boards done on the port side. Still have to put a 1/2" roundover on the edges and then we will finish those. It seems to take forever to fit these pieces into place and glue down. I had to take time to at least cut in the hawse pipe hole and see what its going to look like when finished.
IMG_2603.webp

Also finished trim on mezz cabinets. Now its time to finish.
port cabinet finish.webp

starbord cabinet finish.webp
 
one of the things I am most excited about is the handrails modifications. We wanted more lighting on the foredeck and have not been happy with the several options we have tried prior to going to the paint booth. I have routed a 1/4" deep channel a little under 1/2" wide on the bottom of the handrail. We found 24V LED lighting strips that waterproof and 32' long. They are RGB controlled and dimmable. We plan to connect all the light strips to a RGB controller and be able to both dim and change the color.

We tested them just because we couldnt wait any longer. I think we are going to be happy with the result. The strip fills the groove very well and a small bead of clear caulking should make for a smooth bottom of the rail.

we changed the color form white to blue and dimmed them a few times before removing so we can begin the many coats of clear Alexseal.

white light.webp

blue lights.webp
 
That is one of the coolest things I’ve seen. Well thought out. Question on the screws in the bottom side of the rails more than 1/2 of mine snapped off so I stopped. How did you get them loose?
 
for the screws that snapped off, we drilled 1-2 holes to the inside of the remaining piece of the screw. We then used a small punch and hammer to drive from the outside to the inside to the area the bracket covered. So we essentially pushed the screw to the "inside area" of what the stanchion covered. We then took a pair of channel locks to grab hold and either screw out or just pull the piece out. Once it was out we then drilled the 1/2" hole, whittled a plug to fit and glued it in.

we probably spent 2-3 hrs on Saturday repairing the hand rails. My son commented he hadn't "whittled" since cub scouts. I think we had as many as 13-14 plugs in one of the longer rails.
 
I thought of using a small hole saw then plug with teak plugs. Thanks for getting back to me. I shared your stantion light idea. They to loved it. A friend and I did our boarding ladders.
 

Attachments

  • CA61AF80-53AC-40B6-A135-6E8CA3F64238.webp
    CA61AF80-53AC-40B6-A135-6E8CA3F64238.webp
    5.7 KB · Views: 281
The boat is looking fantastic. That itch to get it going is tough. I am glad to see that you used Alexseal, I have chosen that paint for our new paint job I will be doing soon. Always second guessing since its really not very common in our area. Wow you paint job looks amazing. Excited to see how it all comes out.
 
Where did you get your new windows? That Alexseal looks amazing! My 44TC was painted with Alexseal prior to my purchase of the boat but it doesn't look like Bearing Marine did a very good job with any of the prep and paint because its peeling off in spots. Also, the LED's in the handrails is a very nice touch!
 
We purchased our windows and portholes from Broadus at lookout boat windows. We are on vacation for the next two weeks so not much will be done. I will get back to it when we return.

Luckily we are on a sailboat in the Mediterranean for the next two weeks, so at least I’m still around boats just not working on one.
 
Hey how’s the boat coming? Those pix were so good I’m wanting more! You must be getting close now.
 

Forum statistics

Threads
38,155
Messages
448,721
Members
12,482
Latest member
UnaVida

Latest Posts

Trending content

Back
Top Bottom