Sam's is your source for Hatteras and Cabo Yacht parts.

Enter a part description OR part number to search the Hatteras/Cabo parts catalog:

Email Sam's or call 1-800-678-9230 to order parts.

Galley Maid windlass removal, rebuild and upside down core replacement

Briankinley2004

Legendary Member
Joined
Jul 18, 2017
Messages
1,520
Status
  1. CAPTAIN
Hatteras Model
55' CONV -Series I (1979 - 1988)
My planned winter time project was to remove my Galley Maid windlass and replace the rotten core under the pulpit. The windlass was working fine but noticed some movement when we used it and there were soft spots in the deck near the foot switch. After reading the posts here and watching some videos I tried to remove the windlass without much luck. Soaked the deck plate in 50% Acetone/50% ATF for a week and still no luck. I was using a 2" galvanized conduit nipple and it was mushrooming on me. I called Galley Maid to see what I was doing wrong. Rick told me not to use galvanized pipe as something in the galvanizing made it weaker. He told me to use a schedule 40 steel pipe. Purchased a 2" SCH 40 cut off from a local fabricator and began whacking it with my 12# sledge hammer. The steel pipe started to mushroom as well but after about 20 licks she started to move. Got the windlass tube flush with the deck plate and then had to grind the pipe down in thickness so it would slip into the deck plate. It wasn't long until it fell onto the locker full of line left for a cushion. I then realized my windlass, although working, was in worse shape then I realized. The top of the gear box was rusted beyond repair
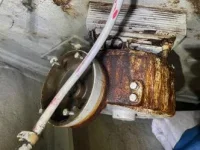
IMG_4534.webp

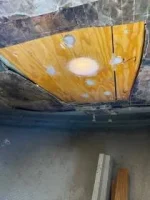
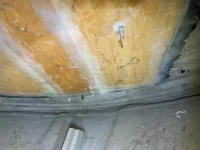
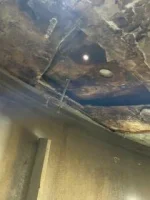
I called Rick concerning the gear box and sure enough they now have a replacement made of cast aluminum. Talked further with Rick and it made sense for him to rebuild the windlass while I had it out. While he was doing that I began to contemplate the best way to tackle the coring. Our winters are normally dry and my initial plan was to remove the pulpit and repair everything from above. But as Freddy Fender sang, the rains came. And they came and came. So I decided to cut this out from below and try my hand at it. Below are pictures of the removal
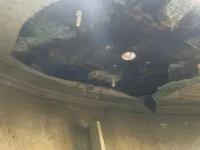
IMG_4541.webp
IMG_4548.webp
 
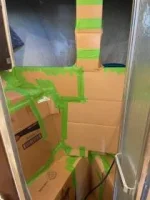
I used a multi tool to cut the glass so I didn't make as much dust. I was surprised the deck core was only 5/8" thick. The bridge floor on my 55C was 1 1/2" thick when I replaced the core on it. I decided to go with 3/4" marine grade plywood anyways as I was worried about compression with coosa and the fact that it would be harder to get resin in all the cracks working from below. I first masked the entire shower area off with cardboard as it would be impossible to remove any epoxy drippings without damaging the gel coat in the shower

IMG_4547.webp

I then replaced the wood core in the pulpit using plywood (2 layers of 3/4 and 1 layer 1/2") first painted with resin then applied using resin thickened to a mortar consistency. I used lumber and wedges to hold the first layer in place until it set. The other layers were screwed into the first layer using the same mortar type application.

IMG_4554.webp

I don't have pics but I was able to re-apply the upper skin of the boats deck back in place and glass back with strips of 1708. I used some spots of resin but didn't want to make it part of the pulpit in case the pulpit ever had to be removed again. I then beveled the edges of the 3/4" plywood to blend into the existing deck. I then applied 1708 over the plywood in the shop leaving the edges wood so I didn't have to deal with large pieces of fabric and resin overhead. Plywood then installed it using the same thickened epoxy mortar technique. I was actually surprised at how well the cloth wet out overhead without falling down. I used peanut butter consistent resin with cabosil. In the end I had 2 layers of 1708 with the plywood being 1/8" thicker than the existing core. It all blended in well with the thickened resin

IMG_4569.webp

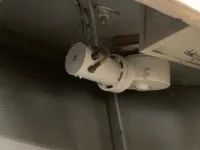
Put a coat of alwgrip primer and couple coats of paint in the locker. Re-installed the winch this weekend. That was a bear. Finally had to over drill the 1/2" carriage bolt holes to 5/8" and with a prayer and a drift pin the final bolt lined up. Re-connected the wiring and she is all ready to go fishing
 
Still need to remove the heavy washers and get the 5200 the prior owner put on them off. I had temporarily placed them on there just to make sure nothing moved. Also need to put lock nuts back on those particular areas and touch up the paint I scratched prying around on the gear boxIMG_4595.webp
 
I have a fully functioning 12V Galley Maid Windlass that you are welcome to take. Been a while since removal so some small parts may be missing but you probably have from what you have from your original.
 
I did mine from below too but did end up with wet 1708 falling on my face more than once. I laminated layers of marine plywood to replace the core.

Walt Hoover
 
I have put fiberglass cloth on an overhead by using a piece of plywood covered in plastic and holding it up by using through bolts .
 
Always satisfying to check something that big off the list! Looks good to me.
 
I have a fully functioning 12V Galley Maid Windlass that you are welcome to take. Been a while since removal so some small parts may be missing but you probably have from what you have from your original.

I am interested in this if you need it out of your way. I need to recoup from handling this one but can come down in pick up in a couple of weeks.
 
I have put fiberglass cloth on an overhead by using a piece of plywood covered in plastic and holding it up by using through bolts .

I started by using plywood covered with wax paper but found if I made the resin thick enough I didn't have to do this. I could have saved a bit of time had I known this sooner but had nightmares of Walt's scenario happening. I wound up using close to 2 gallons of resin and a couple gallons of Cabosil but it was worth the money to prevent the dreaded resin drip.
 
It was messy and I did need a fresh haircut when finished but eventually with alot of swearing I managed to keep it up there. I was amazed how heavy four square feet of wetted out 1708 is!

Walt Hoover
 
Late to the party. Check out Trying Not To Sink on YouTube, Ed and Lynn on Triton went thru this process as well. Unfortunately I never found out with our boat where the break was in between the electrical system and the anchor windlass on Pau Hana - and I lost a 70# Bruce claw anchor when Hurricane Ian destroyed our boat.
 
Late to the party. Check out Trying Not To Sink on YouTube, Ed and Lynn on Triton went thru this process as well. Unfortunately I never found out with our boat where the break was in between the electrical system and the anchor windlass on Pau Hana - and I lost a 70# Bruce claw anchor when Hurricane Ian destroyed our boat.

I saw that video a while back. The only thing I didn't like is he didn't bevel the perimeter of the old glass. I prefer to do that so I know there is a glass to glass bond and it flushes out better. I think he used Coosa which should work but I think the plywood is stronger for that area. He did his from underneath to avoid the snow and I did it for the rain. I guess we do what we have to do. Sorry for the loss of your boat and anchor.
 
The "trying not to sink" repair was all right but not the best way. There is another member here that did a rock solid core repair under the windlass and that's who I tried to copy.

Walt Hoover
 
I saw that video a while back. The only thing I didn't like is he didn't bevel the perimeter of the old glass. I prefer to do that so I know there is a glass to glass bond and it flushes out better. I think he used Coosa which should work but I think the plywood is stronger for that area. He did his from underneath to avoid the snow and I did it for the rain. I guess we do what we have to do. Sorry for the loss of your boat and anchor.

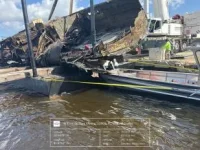
Thanks. The 7 months of fighting with the insurance company didn't help, but we learned a lot in our 2 years, 1 month of full-time liveaboard boat ownership. Along the way I removed the old Crusairs, installed 3 new standalone single-piece units, plumbed/wired them, found and solved a lot of other issues. Here's what it looked like after "salvage"...
20230424_124702.webp
04-22-2023 10_14_56 AM_W First St, Fort Myers, 33901, FL, United States.webp
 

Forum statistics

Threads
38,154
Messages
448,696
Members
12,482
Latest member
UnaVida

Latest Posts

Trending content

Back
Top Bottom