Sam's is your source for Hatteras and Cabo Yacht parts.

Enter a part description OR part number to search the Hatteras/Cabo parts catalog:

Email Sam's or call 1-800-678-9230 to order parts.

Cockpit Carnage......

  • Thread starter Thread starter Capt. Tobb
  • Start date Start date
  • Replies Replies 23
  • Views Views 8,105

Capt. Tobb

Active member
Joined
Nov 18, 2006
Messages
168
Hatteras Model
Not Currently A Hatteras Owner
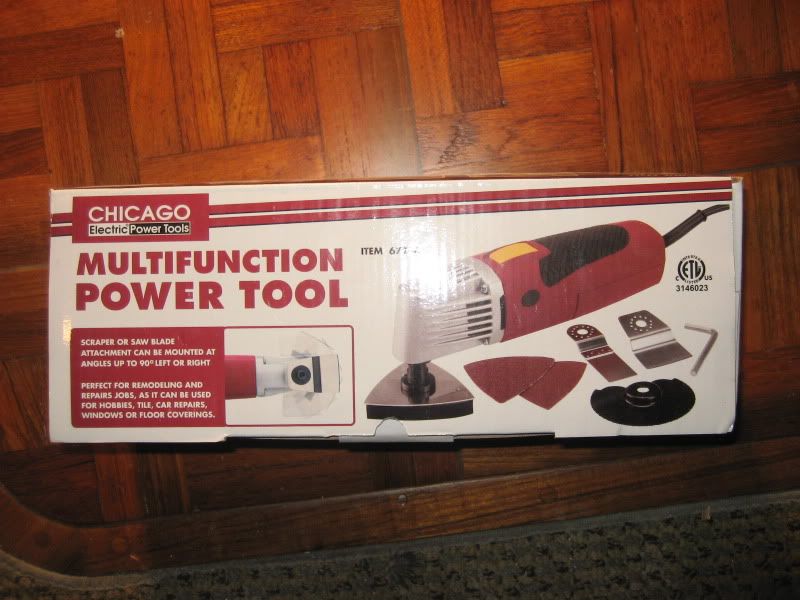
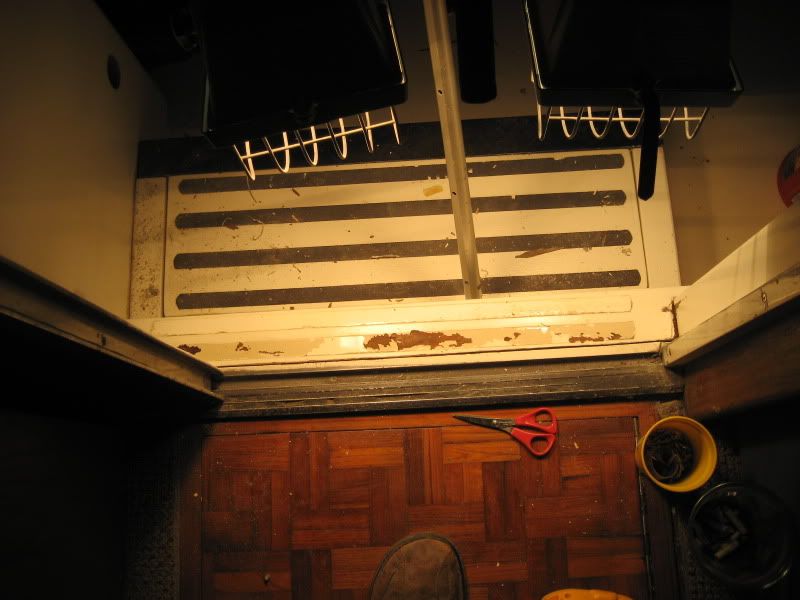
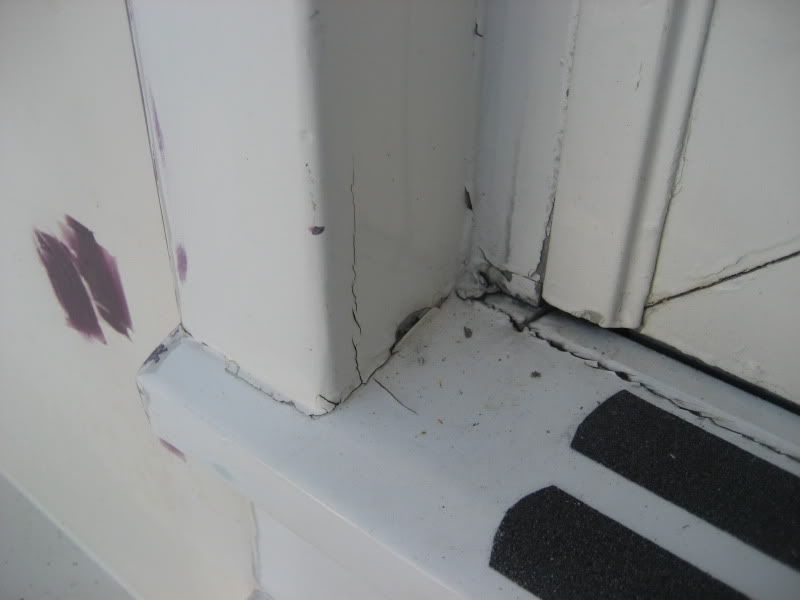
Some of you may have seen the Mezzanine Madness thread where I am making a bench seat in the cockpit like the newer convertibles have. As all of you know when you make something look better or newer.......everything around it looks old. The new paint on the seat looks great so I have decided to go ahead re paint the cockpit while I am high on paint fumes. The PO had it painted and they did a terrible job with the prep.
cockpit128.jpg

Anyway, I have some questions for the pros around here:


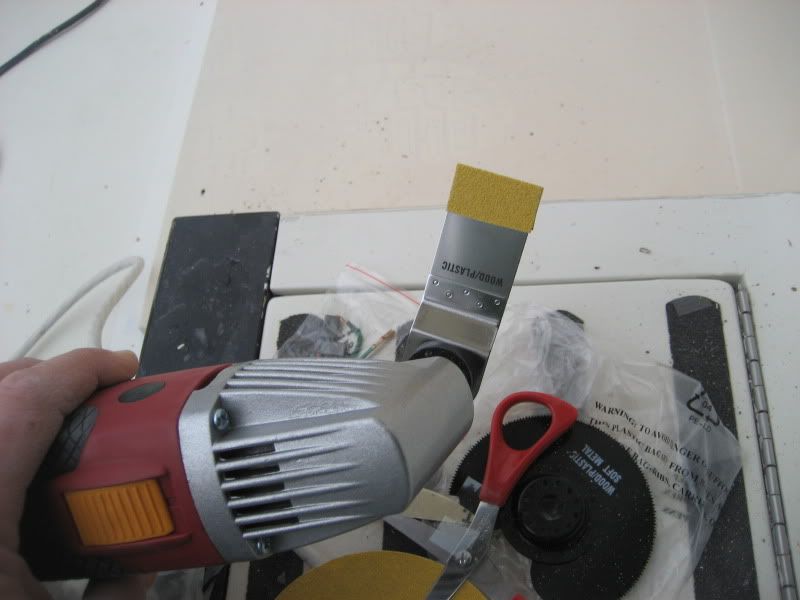
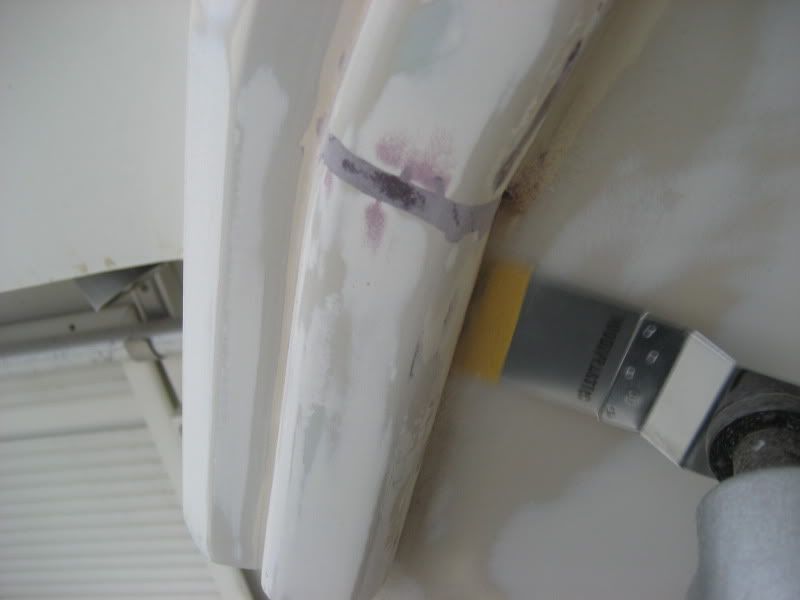
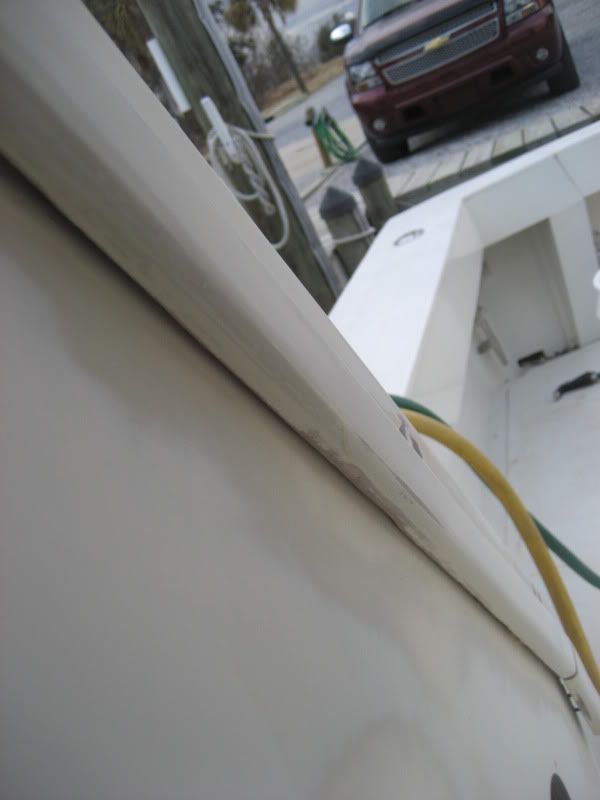
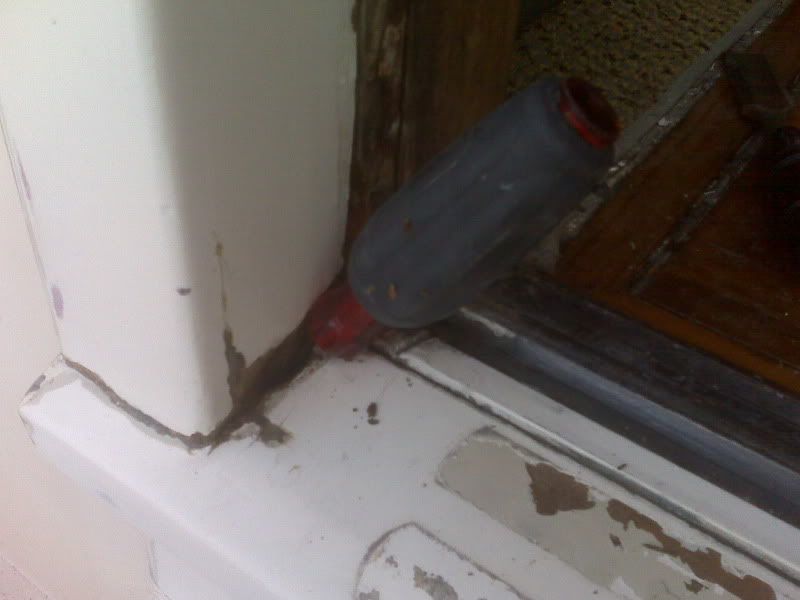
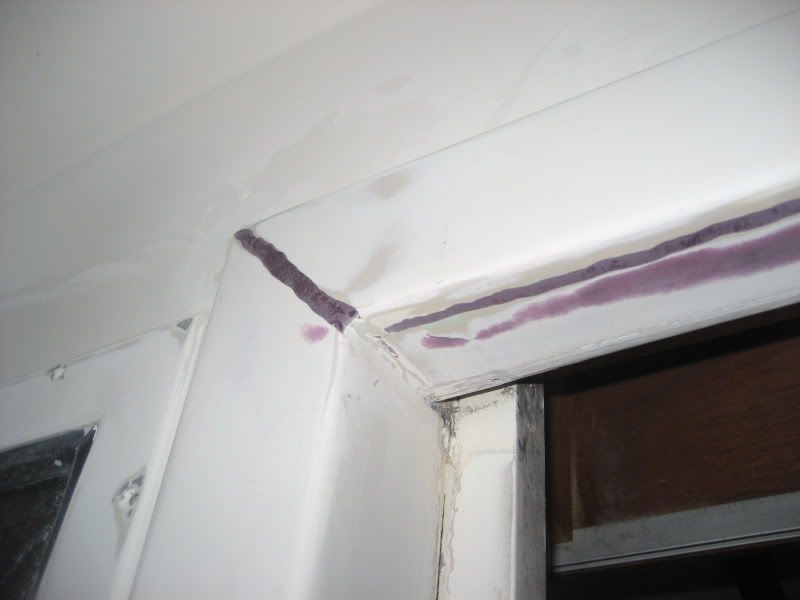
I have painted teak trim in certain areas that have small cracks at joints. What is the best way to repair? Should I dig a V with a die grinder at the joint and fill with epoxy filler? straight epoxy with micro balloons?

cockpit122.jpg


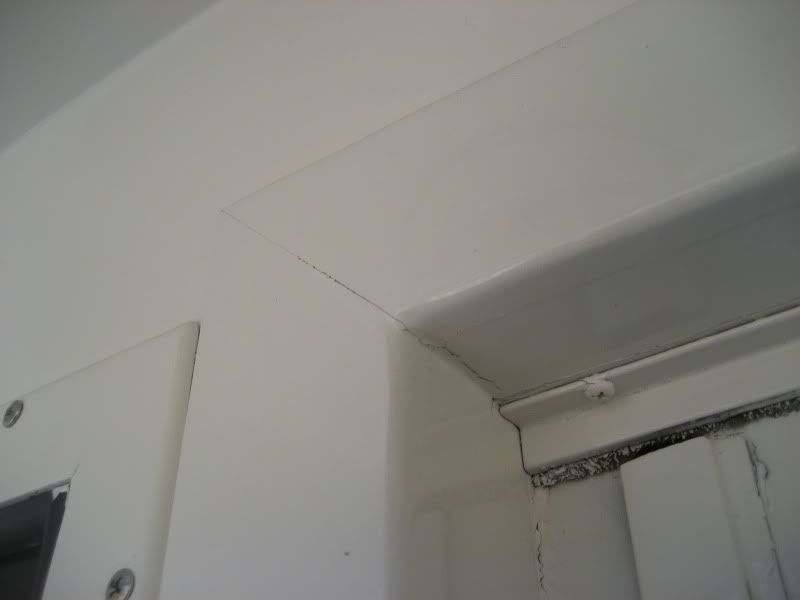
There are places where I have gaps that are over 1/4" is it best to just fill with 5200 or is there another product or process. Also should I prime before I caulk?

cockpit129.jpg


cockpit130.jpg


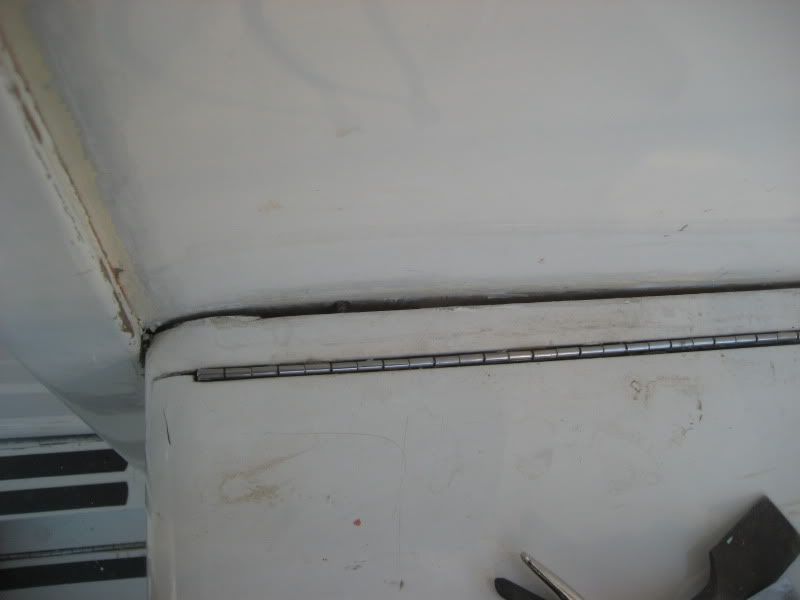
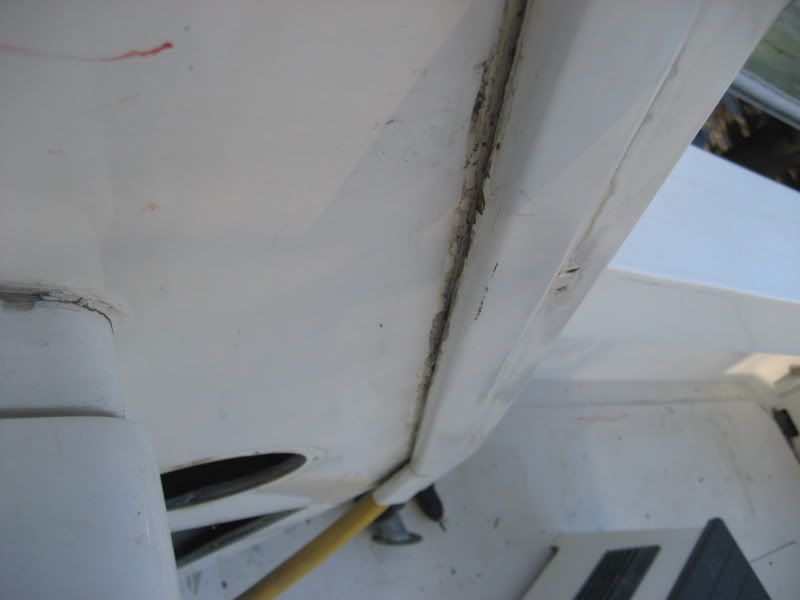
I would assume that it would be better to have less caulk at joints because there would be less expantion and contraction. Any thoughts? also, If anyone has any tips or suggestions I am all ears. Thanks
 
Last edited:
Wow, that really is a mess. Make sure you scrape all that peeling stuff, then I would sand that area with 80 grit being careful not to scratch the painted area. Next sand the entire area to be painted with 220 to 240 paper. Now vacuum and get everything out of those joints. Use acetone and something pointed to clean those nasty corners. Now, I guess I would use 5200 or 4200 in the seams. You will have to paint over that caulk as it isn't UV proof. If you want to make a nice caulked edge without painting over, use 3M #4000. That stuff is not bothered by the sun. If the cracks are from loose stuff, you might want to use West System epoxy with one of their fillers. Use #410 where you will need to sand, and #404 where you are just gluing a joint. Wipe the excess off with acetone. Enjoy.:)
 
Thanks Maynard, I think I would rather paint over the caulk but do you think I should prime with 545 ( which I plan to do to the entire area ) before I caulk? Then put down the finish paint. I would think that the 5200 would adhere better to the primer. Thanks again
 
If you fill with 5200 and paint over it the paint will eventually crack. If you want the repair to last as long as the paint fill with epoxy, grind out a vee and cover the joint with epoxy and cloth. More work but will last. I used the 5200 and paint over method in a few places and it didn't hold up. Epoxy with cloth did.
 
I disagree with 4000 uv, I have used this stuff and it does not hold up.

Some of the areas may have success with grinding deep and filling with glass and epoxy. Some areas you may want silicone. If you mask off and apply silcone and then wipe the seem smooth with plastic wrap over your finger or some similar device then it will come out smooth and be easy to clean. yes White silicone will turn a little black with age but if you clean it with denatured alcohol it will look new again.
 
Youll never get a 90 degree mitered joint to hold together on a boat. If youre good with a saw, slice out 1/4" and epoxy a dutchman into the joint. Those will be inclusive 45s and less prone to cracking. Otherwise remove the whole casement and glass it all together as one. Personally, Id pull it and dowel it and then glass it.
 
Thank yall for the advice, the main concern I have with using epoxy and cloth on the glass\glass seams is that there would not be any flexability at the seam.

Ppat, I will look into the Dutchman, I really would like to avoid taking that casing off. Thanks
 
Your concern is right but that is why everyone is saying go deep V epoxy and cloth and lots of it. If it moves it will crack I did my shower in mine that why and 7 years later still good and that's in the front of the boat.
I did the epoxy then epoxy a wooded radius in place and covered with glass and more epoxy. That gave it a nice radius and strength.
The dowel Idea would also be a great way too start. Lots of work that is why you see them screwed into place then a silicone seam done.

Good luck it is a domino effect :D
 
I used 4000 as a fillet at the joint between the salon roof and the flybridge. I applied that 6 years ago and it still looks like new. So, I guess I disagree with 34 Hat about 4000. The real problem with 4000 is trying to get fresh stuff. It is the least popular of the three 3M caulks and sits on the shelf for a long time at the marine store. I think serious prep, caulking and painting should do a good job for this boat. While it would be better to dig it out, fill with cloth and epoxy, re-fair, prime, and re-paint, that is an incredible task. I think that all that extra work would not justify the small difference in results. This is a big, bad job, and making it 5 times harder and time consuming isn't worth it. As far as priming before caulking, I would rather caulk the bare joint as long as you are painting over. If you decide to use 4000, which would be my choice, I would prime and paint the prepared joint first. Do the whole job, paint and all, then mask all joints to allow a 1/4" to 1/2" wide bead, then caulk with 4000.:)
 
I think I have decided to prime, paint then 4000 glass\glass joints. I am reluctant to glass the cabinets into the salon wall, I may want to remove or alter(again) at a later date. As far as the wood joints are concerned, I will use epoxy and milled fibers or #410. At some time in the future I have a feeling that I will have to replace the sliding door that I have now, at that time I may (have to) replace the wood with some other product.

I hope to work again soon, I will post pics

Thanks again!
 
So, I guess I disagree with 34 Hat about 4000. :)

You don't have to disagree with me since I never said that Yet ;) That was Steve.

My opinion would be to paint as he wants and go with a white silicone then no paint to peel and you can always just redo it. Painting on top of 4000 or anything else depends on how much it moves! If it moves it will crack so if it works one place does not mean it will work in another sometimes it does work but I found not always IMHO.
 
You could just beat up the brand new piece for a "distressed look" ha ha. I am just very jealous of what a great idea and how awesome the final product will look. I am absolutely going to school on this thread. Thanks for posting the pics. Please keep them coming. Good Luck !

Greg
!985 45C
Hat Time
N. Bay Village, FL
 
Well, more done this weekend..... I have been working on getting caulk and crap out of joints. There was a tool that I saw at Harbor Freight that caught my eye.
008.jpg


I used the cutting attachment with stick on sand paper on each side to get into the tight spots
002.jpg

It worked like a charm, I was able to get all of the caulking out....
003.jpg

004.jpg
 
That multitool is an awesome piece of equipment. I just used one to cut the 5200 that was holding my power box surrounds in place. It worked like a charm.
 
Fantastic! I have one of those multimaster tools on my wish list.

The Cockpit is really coming together and looking good.

I can't wait to see it in person!
 
This next pic may be painful to some........me for sure!
rot.jpg

I have a mess under the threashold and at botton of the casing. I plan to dig out as much as I can, dry it out with heat\light and fill with epoxy. I know this will be just a bandaid but to do it right the door would have to come out and I know I will have to do door work at a later time.
007.jpg


I have ground out the cracks and filled with epoxy
005.jpg

Does anyone have any ideas on what to replace these old vents with? I have seen white plexiglass with slats routed into it but that may be out of my skill set.
001-1.jpg
 
Yea, they sell them at Lowes for around 170. It is 39. at HF you get what you pay for but for that price you can buy two...

Thanks Byron, I am looking foreward to the party and the riverdancing! (and kegerator!)
 
Actually, you could glass bead that vent and repaint it, if it is metal. Or soda blast it.

Work looks good. Reminds me of a project I still have to finish on Blue Note. That will be this spring, when she's out from under the cover.
 
Thanks Jim, the vents are really dated looking but if I cant find a reasonable replacement I will blast and paint.
 
It is hard to tell from your photos, but your problem around the door may be from water pooling in your lower door track. An old surveyor told me something interesting. "Always drill drain holes in lower door tracks. Drill one on each end. Never drill one in the middle, because a boat never sits level." Pretty god advice eh?:)
 

Forum statistics

Threads
38,155
Messages
448,721
Members
12,482
Latest member
UnaVida

Latest Posts

Trending content

Back
Top Bottom