Sam's is your source for Hatteras and Cabo Yacht parts.

Enter a part description OR part number to search the Hatteras/Cabo parts catalog:

Email Sam's or call 1-800-678-9230 to order parts.

Aft Deck Balsa Core Repair - How To / Not To

  • Thread starter Thread starter Vincentc
  • Start date Start date
  • Replies Replies 38
  • Views Views 32,653
Buddy,
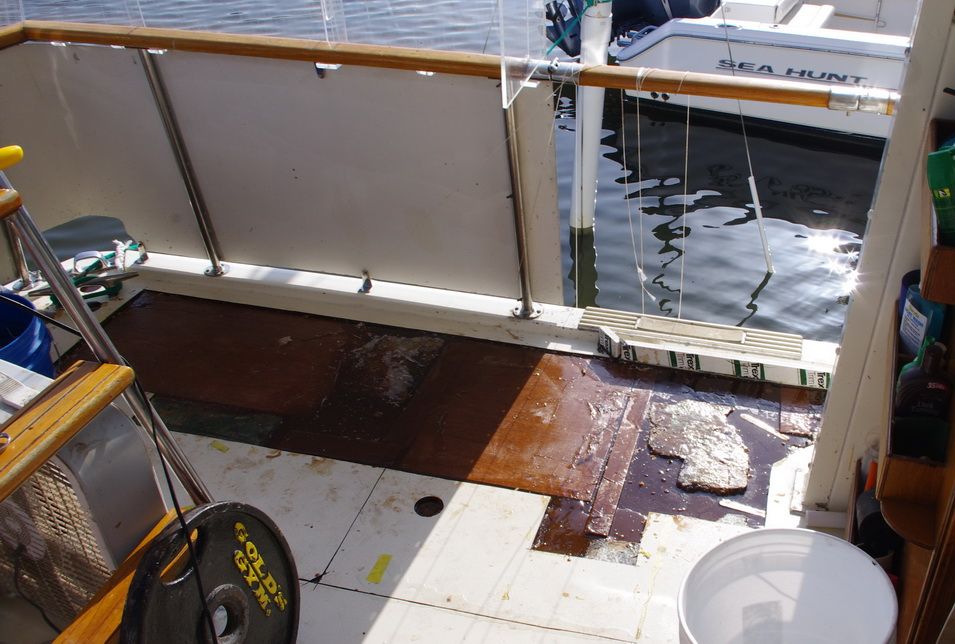
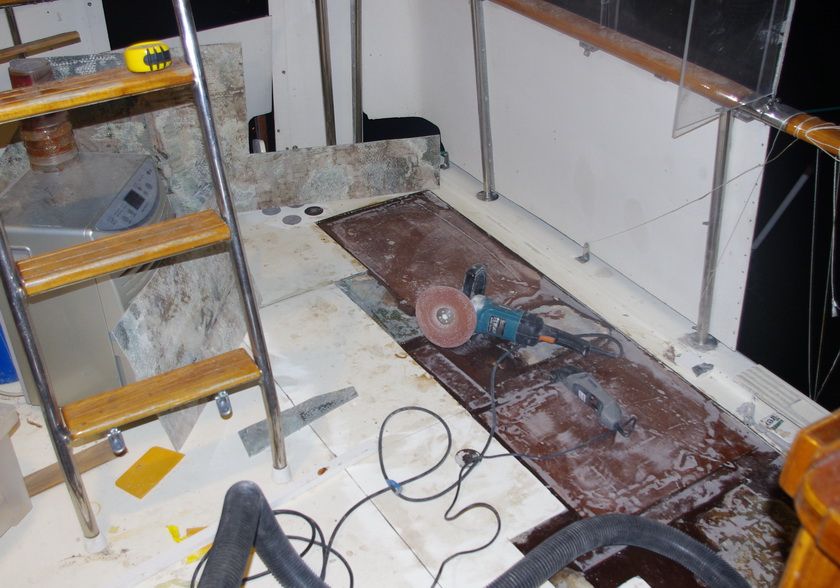
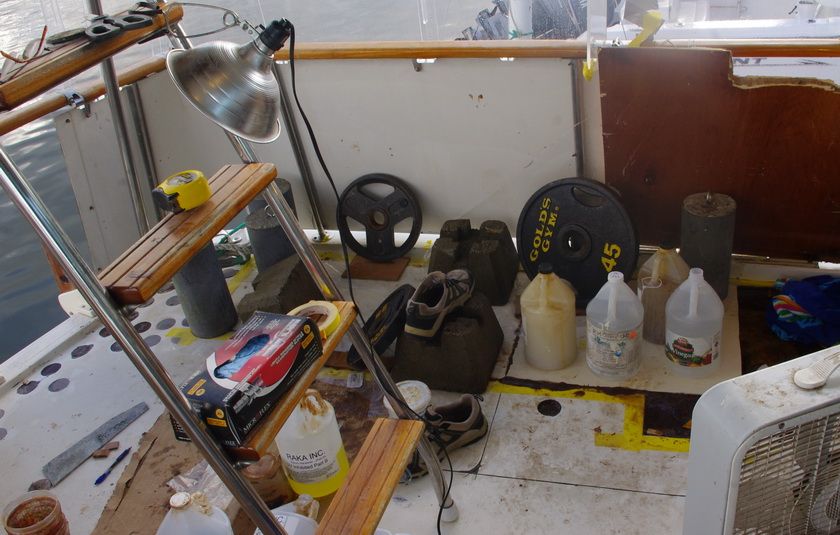
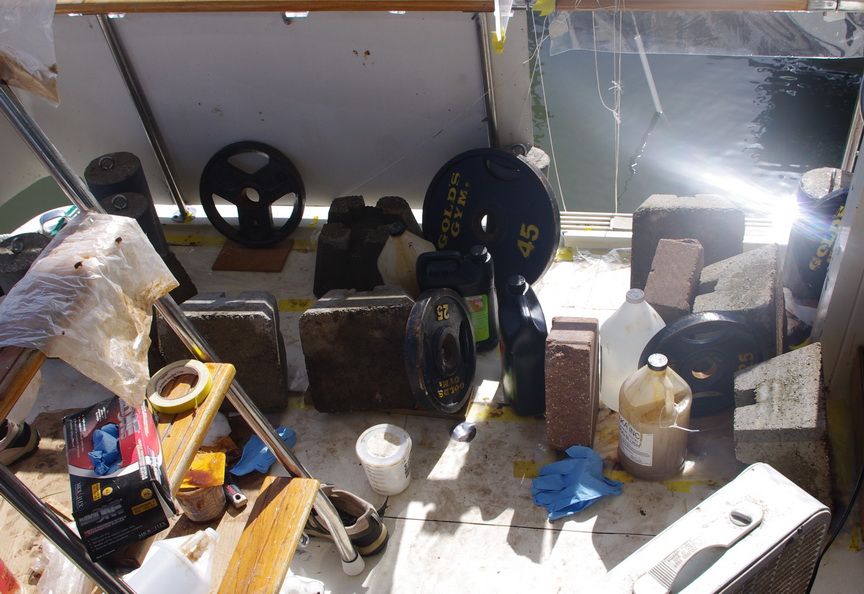
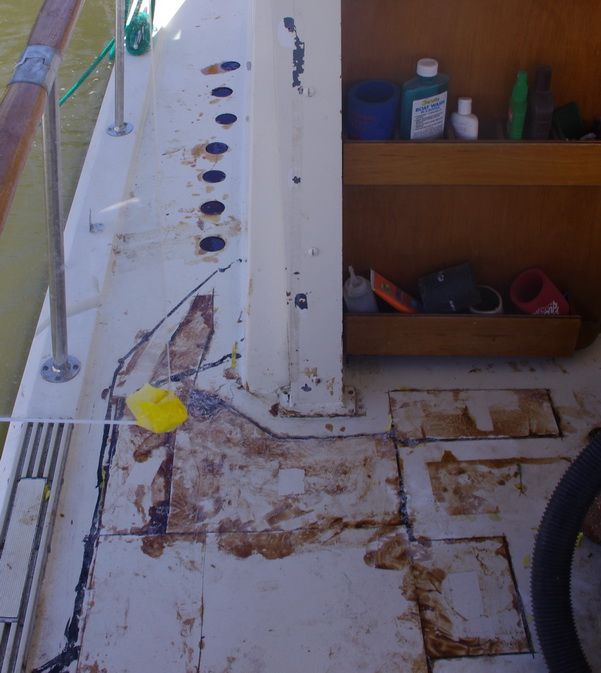
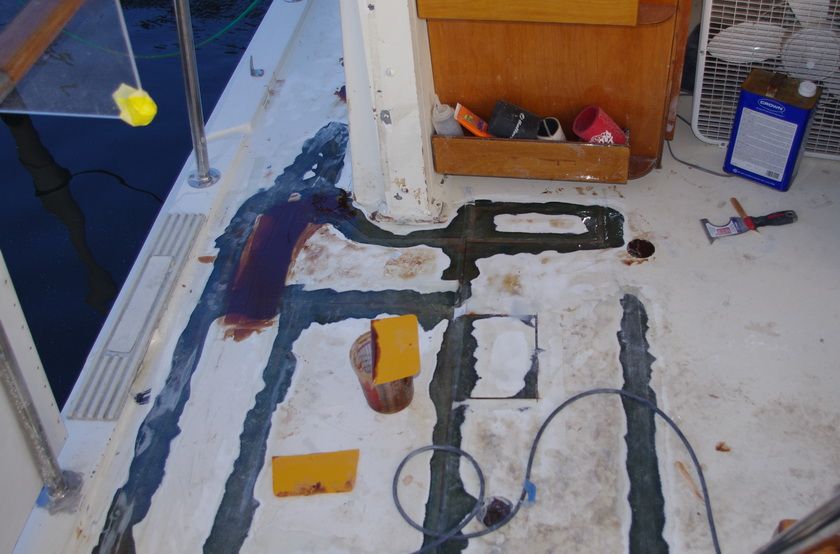
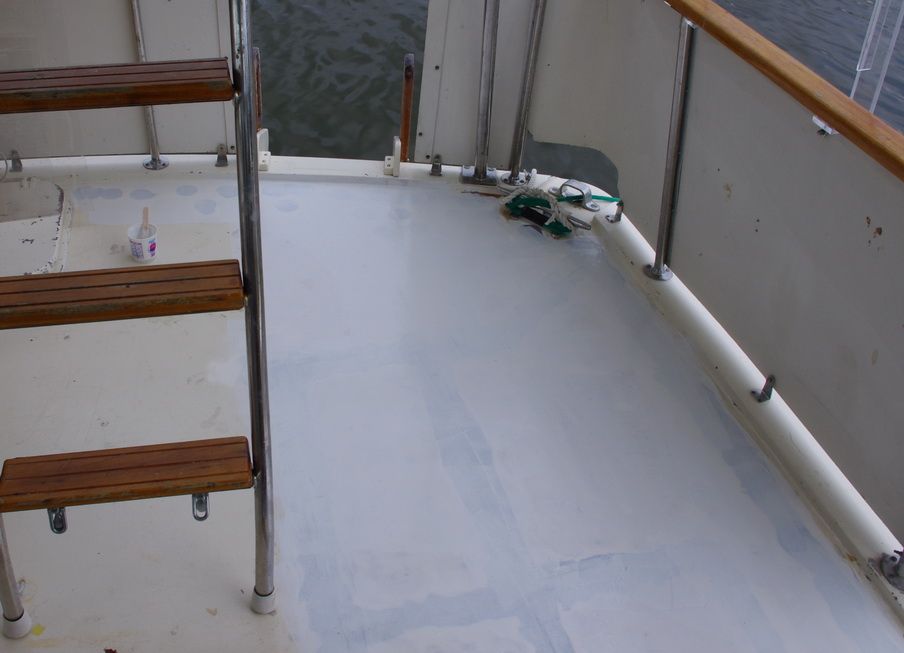
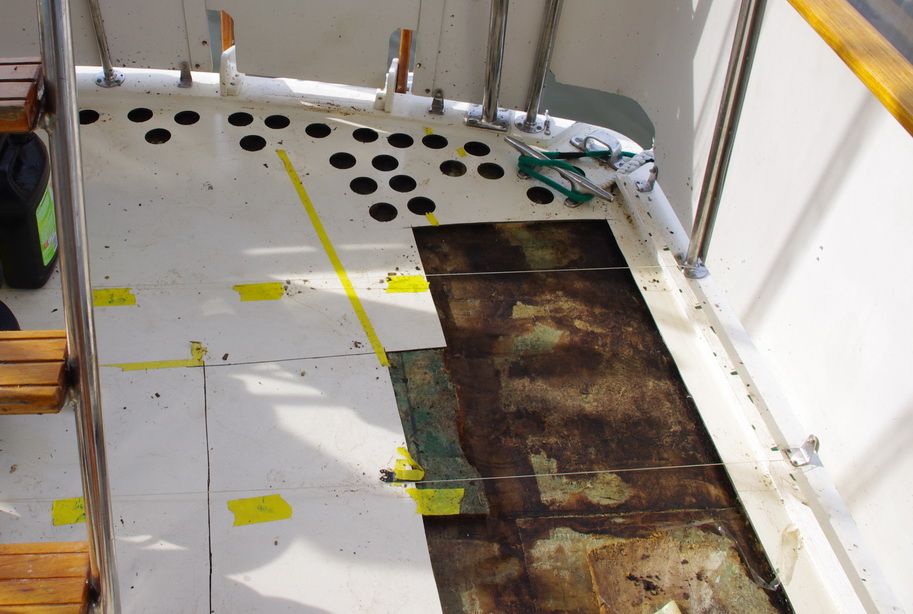
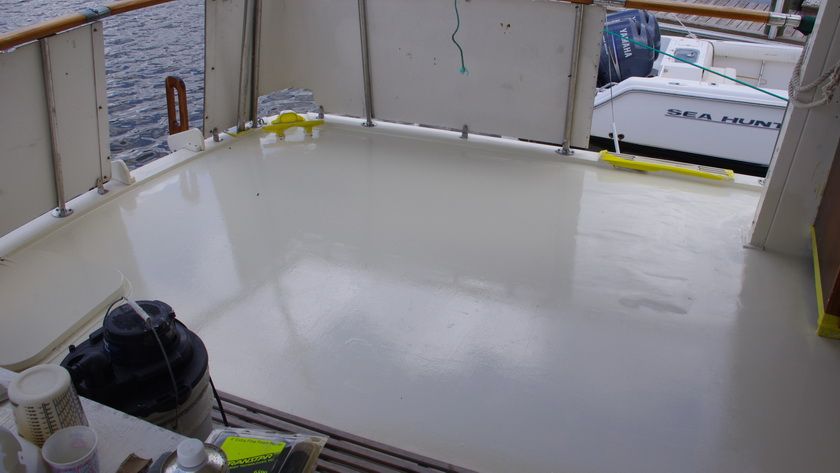
Interesting photos, good looking work. Your areas of bad core look very similar to what I found on Lilly Marie.

Sgharford,
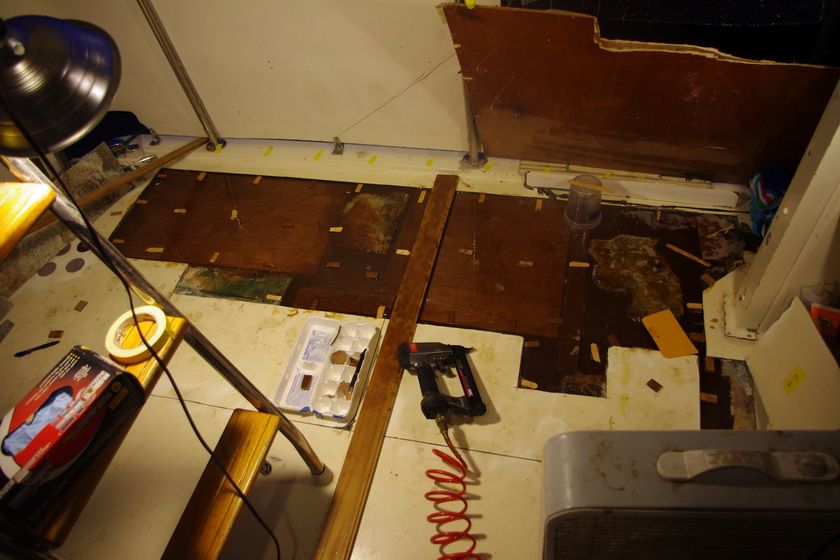
I've seen how pw soaks up epoxy. I try to pre coat before gluing, and usually pour epoxy on to horizontal surfaces and spread the epoxy with a 4x6 plastic spreader. It uses a lot of epoxy but works. I use Raka brand, it works well and costs less than $60 / gallon.
Regards
 
Sounds like you have a plan. I was lucky enough to have friend with commercial Port Supply account at local West Marine, the discounts are way better then even Defender with that card. We bought thickeners (colloidal silica and flocked cotton) in 5 gallon buckets from fiberglass supply shop. Some stand out advice I can offer for fairing the final 3rd layer of plywood for lining up seam of upper skin, a heavy duty 9" right angle sander (not DA, but circular, like a grinder) with 60 grit paper sure seemed like the right tool for taking off that much material. It also worked great for cleaning up the left over balsa on lower and upper skin. We also used chopped matt when filling upper skin seam, apparently this is important, otherwise good chance it will crack over time. We used DA and flat orbital sanders for the final fairing on seams. With the final epoxy coat on seams we used West System 407 low density filler which worked very well.
 
Sgharford,
Your pictures and comments have been very helpful.
I have a Makita sander/polisher which should do the job of beveling the seams and then grinding off the excess. I have a roll of 1" fg cloth tape for the straight seams and cloth to place over the plugs. Chopped mat sounds interesting as a high strength filler.
One question. What is a "DA"? Often times I feel like one, but I don't think that is what you meant in this case.
Regards,
 
Glad I can offer some help. DA sander = Dual Action. It spins and orbits. It's my go to sander for nearly everything, they are primarily what body shops used to fair down body fillers and the like (at least they were 20 years ago). You can really take allot or a little down with them and easy to maneuver. I highly recommend adding one to the tool chest, you can get them online and even at home depot.
 
After cleaning the antifreeze and vacuuming the water we had a serious thunderstorm which flooded things. After another vacuuming, I built a "tent" frame out of 1" pvc and enclosed the area with clear plastic sheeting. I then set up a dehumidifier inside and let it run until wouldn't take out any more water. I then set up a small window unit air conditioner to keep things dry and make the space cool enough to work. I wish I had taken some pictures, as it worked well.

The weather forecast showed significant chance of thunderstorms over the next several days but last night looked pretty good so I started filling the deck core voids with plywood, epoxy, wood flour and chopped fg strand working well into the night.

I am pleased to report that the area is now sealed with epoxy. It is not pretty, but I won't go into depression if it rains now.

IMGP9087r.jpg


I hope to be able to reattach the upper skin this weekend. My plan is to mark the vertical contour with a batten and small wood shims stuck to the deck with double side tape add very thick epoxy spread up to the points set by the shims and then coat the underside of the fiberglass deck section with more filled epoxy then place the fiberglass skin on top of the shims.

Once the epoxy has set up I will go over the seams with a grinder sander then epoxy fiberglass tape along the seams.

To get the water and then the epoxy to flow aft and to the port, I placed a couple of 150 qt ice chests on the port side of the swim platform and filled them with water. With the epoxy in place, I have drained the ice chests,

IMGP9093r.jpg


and will move the up to the stb bow to make the side and aft cambered deck closer to level. Hope it is presentable by rondezvous time.

Any suggestions on a low gloss 2-part brushable polyurethane that will match the older Hatteras off-white?
 
Last edited:
It took starting work at 3:30 this morning but I got things closed up before the thunderstorms came through.

The Makita grinder/sander/polisher with a 50 grit disk, smoothed things up and cut through freshly cured epoxy easily.

IMGP9096r.jpg


I cut an assortment of wood spacers ranging from tongue depressors, 1.5 mm to 9mm plywood and then used a batten to see how much spacer I needed. I then used an 18ga stapler to tack down the spacers.

IMGP9098r.jpg


I then poured epoxy thickened with wood flour and chopped strand into the void space and spread it to the tops of the spacers. I coated the underside of the top skin and then put the top skin pieces back in place and secured them with an assortment of weights.

IMGP9103r.jpg


IMGP9110r.jpg


Once I started mixing and pouring epoxy I did not handle the camera so pictures are limited. I use nitrile disposable gloves and buy them by the box from a local safety supply store. They are thin and easy to work with, but tear easily.

continued
 
Not only did I beat the thunderstorms but I got everything poured and in place before the epoxy kicked off. I did have a problem with the chopped strand thickened epoxy getting on top of the spacers and keeping the deck skin from settling down as far as needed.

Once the epoxy had hardened, but was still green, I started removing the weights and trimming the excess with a multitool and a wood cutting blade.

IMGP9115r.jpg


IMGP9118r.jpg


I plan on working on the seams and high spots with the Makita sander tomorrow.

I believe that things will work out fine, but I could have done a better job if I had not been pressured by thunderstorms and the prospect of having to dry things out over and over. I should have spent more time setting up weather protection. The aft deck enclosure does not prevent all water from getting and taping up visqueen and sheet vinyl with masking tape is not good enough. Closing things up and using a dehumidifier is important. I am not going to dwell on that because I need to get thing a little better looking for the weekend.

Regards,
 
The excess epoxy sands off well with the grinder. I went over the seams with the grinder removing the gel coat and creating a depression along the seams. I epoxied one inch wide ten oz fg tape along the seam followed by 3" tape.

IMGP9130r.jpg


There are a couple of low spots where the panels did not quite match up and I filled the depressions with filled epoxy.

IMGP9135r.jpg


Grinding fiberglass is not one of my favorite things and I am itching to get this project completed. I believe I will remove the wood stud supports tomorrow and see how things lay.

Regards
 
What are you using for a fairing compound? The west brand flows out well and sands a lot better than cabosil
 
I am using wood flour and chopped strand as a base filler, the top coat before the fg tape was just epoxy and wood flour which the 50 grit grinder disk cuts through easily. I have some phenolic microballons which I will use for faring. The West Microlite filler is really smooth, but I don't have any on hand. Both will sand easily. I agree, Cabosil doesn't sand very well.

I am pleased to report that I removed the stud walls last night and checking this am, it does not appear that the deck sagged back. I hope to put some white epoxy primer over the filled areas and get the deck a little more presentable for the rendezvous.

Regards,
 
The primer makes it look a little better

IMGP9155r.jpg


May be a lot better:

IMGP9072rc.jpg


After the rendezvous I plan doing a little more faring and putting on another coat of primer, then roll and tip the top coat with non-skid.

Hope so see some of you this weekend.
 
Yeah Buddy - Looking good! Very good of you document the process and include all those pictures, it's a real gift to the site. I felt the same way when we got primer down as it really hid all that hard work and made things look pretty nice. It did in turn make me a little sad that no one would ever know the mess and hardwork that was. I've been with just primer for about 2 weeks now to protect epoxy from UV rays. I've got 3 gallons of KIWI non skid tinted to pre 1991 Hatteras off white (Interlux color chart) sitting in garage. I'm shooting to lay it all down with help of a friend (one person spreads with trowel, the other rolls out the texture before it dries) on Wednesday. One coat and you're done, and it fills slight imperfections as it has consistency of yogurt when you glop in on. I used it on swim platform 2 years ago and very happy with it. Something to perhaps consider.
 
KIWIGRIP sucks in the heat. Do not try to put it on over 80 degrees or so or it will kick your but.
 
KIWIGRIP sucks in the heat. Do not try to put it on over 80 degrees or so or it will kick your but.

Wow - that's really good to know. It's suppose to be low 90's all next week and you can't thin KIWI. I think we can get the whole thing done in early morning if prepped the day before. If not, I'll wait for cooler weather. Thanks again for that info.
 
Thanks to Bobk's advice, I bought a very interesting moisture meter, which I not have in time for the work on the aft deck. The results of me playing with a moisture meter yesterday afternoon has my brain churning.

It appears that I have water leaking from the stbd helm windshield frame into the cabin top coring.

The meter reads density on an analog meter scale of 0-30% and regular dry cored deck reads about 10. Damp coring appears to read about 25. When I put the meter on the deck just fwd of the stbd windshield frame it read 30. Likewise when I moved the meter to the sloped area just below the frame it also read 30 on the stbd side vs close to 10 just below the port windshield frame.

Since the meter reads density. If I put it against a formerly cored area that I filled with epoxy it will read 30 as well.

I am wondering if there is coring in the sloped area just below the windshield frame and what kind of penetrations there are from the windshield frame into the fiberglass sloped deck. Has anyone looked inside there?


IMGP6651rcswindshieldarrow.jpg
 
Vincent,

If you have the same type of meter that I own, it reads inductance. I haven't seen it to read high on thick solid fiberglass. No experience with thick epoxy, but I would be inclined to suspect moisture got to your repair. To test it you could build up a small piece of epoxy to simulate your repair.

Bobk
 
Hey Vincent, replied to your PM with above question, but for the rest who are curious, it appears the balsa core goes all the way back to lower helm. We dug out 2" of core behind the slope as it was about as far as we could get and figured the new core under this area would be enough to support the window frame.
 
Bob,
I believe my meter is the same type as yours. I did not test any more solid epoxy, but I did put it against the helm windshield glass, and it read 30%. I did some more core checking and the meter worked well. I found some more spots in the 25 -30% range in the aft deck fwd of the repaired area up around the wet bar. I drilled the indicated area with a 2.5" hole saw and found wet core. The dremel multi-max with an extra long blade did a nice job of cutting wet balsa around the perimeter of the hole.

I also identified the area of 25+ readings just forward of the windshield and drilled a hole in the cabin deck. I found some very wet balsa. I suspect the water is coming from the screw holes in the frame at the base of the windshiekd glass

I do not understand what inductive readings are, but I know that the meter works to help ID wet core. I would not advise anyone to undertake core repair without one.

Regards,
 
Last edited:
I've primed and painted the deck and cabin top where the repairs were done. I used Imron, since I can have them custom match the color at the local auto paint store. I used an epoxy primer and then rolled and tipped the Imron with a foam roller and foam brush. I have not yet applied any nonskid.

One coat of Imron on the cabin deck fwd of the windshield
IMGP9463r.jpg


Two coats on the aft deck
IMGP9457r.jpg


I could have done a better job fairing and sanding, but since it will be covered with nonskid, I did not think it worth the time and effort.

Imron seems to roll and tip just fine. I poured the paint out on the deck then rolled an area and quickly tipped it with a foam brush.

I has rained almost every day and I had to paint during rain windows. Several times it rained after the paint had dried for only 3 hours or so.

Regards,
 

Forum statistics

Threads
38,156
Messages
448,757
Members
12,482
Latest member
UnaVida

Latest Posts

Trending content

Back
Top Bottom