Sam's is your source for Hatteras and Cabo Yacht parts.

Enter a part description OR part number to search the Hatteras/Cabo parts catalog:

Email Sam's or call 1-800-678-9230 to order parts.

Aft bulkhead repair/replacement

  • Thread starter Thread starter rsmith
  • Start date Start date
  • Replies Replies 52
  • Views Views 15,975

rsmith

Legendary Member
Joined
Mar 21, 2010
Messages
6,322
Status
  1. OWNER - I own a Hatteras Yacht
Hatteras Model
50' CONV -Series I (1966 - 1969)
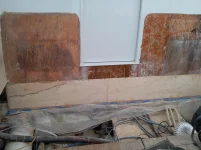
Tore out our old tackle locker and found the bulkhead pretty well rotted. Mostly the sides but also behind the bait freezer and under the window. Anyone done this project? Looks like it's 3/4 and 1/2" ply laminated together. The top of the ply is tabbed to the bridge bottom but I can't tell where the bottom ends. Look like it's supported by the deck and goes into a pocket on the return flange on the deck. I'm betting Cricket has been here before.
 
I have replaced the lower part of the wall on my 42C. On both sides of the door to a height of 12". The rotted plywood stopped at the bottom of the door and it rests on the bulkhead coming up from the hull which the cockpit liner is screwed to.Luckily that bulkhead was in perfect condition. The hardest part for me was removing the rotted areas. I used a router and jigs to get a uniform depth for the new wood. It would have been easier to just cut a 12" strip from the bottom and separte the interior wood from it for reuse with the new wood. I did not find any tabbing holding it along the bottom but it was screwed into the cabin floor along the bottom just above the cockpit liner. Fixing under the port aft window was much easier as the rot was not as bad. When I was done with window I caulked between the trim and glass to prevent water from running down the glass and into the wood under the window. I'm sure there was better way to do this but I was happy with my repair after repainting and getting my cabinets back in.

I hope this gives you some insight,

Walt Hoover
 
Time for the mezzanine install???????
Luckily we haven't had any rot in the aft bulkhead, have cut it twice on the port side from the door over to just past the window to remove the engines.
Way back we glassed the bulkhead to the house which is what probably saved us, and removed the windows, sealed with epoxy also. Can't exactly remember how the bulkhead cockpit floor joint looked like when we ripped out the cabinets and step to put in the mezzanine.
You could be correct the the cockpit floor sits on top of the aft bulkhead and the the aft wall starts there.
We did repair a crack several times under the door sill before we put the mezzanine in. The cockpit floor was cut out for about 18" from the bulkhead aft so the mezzanine boxes could be deeper since there was just dead space underneath in the lazzarette.
All of that was reinforced with wood and glassed back with epoxy.

Thanks I need o look up your post on the mezzanine project do you have any pics of the cutout?
 
Some photos, wish we had more, never good with that.
0321121429.webp0210121138.webp0210121139.webp
 
Last edited:
When first cut, before the start of cleaning up the mess.
We wanted to add a lot of storage which is why we cut the deck, especially the refrigerated boxes (4) which can either a fridge or freezer depending on temp setting. Went into the project to be able to drop in a regular chest freezer to both save money and easy replacement. Ended up going all in after contacting Sea Frost for the price of the stainless lined boxes and rest of the components.
 

Attachments

  • 0209120952.webp
    0209120952.webp
    96.6 KB · Views: 519
PICS!


xItsPMqtcHsSVnYweYXo08sjGchEg6mERipnbN2ygEMrOmxkA_3SO8HZUW2ISLHmNUN9P1VX35LPfAsBGCHpMGllELqhKTUoocEaJaA2zdMVsuZ74VAbeuo1nNL4sVNTyz3zdTDmtUDAg7FLzszpZDm-x8mnGE2NoEytylZFBvgILbRO2wHnv5dz9fXKzOjbF6OWDBnTeFx55tq0ULbKrnQ4K5mLHXXEGPKHT62VgNedCJOCQUhbHjigdrWEEf-bOM2eUaIOl85UKu3VTR4gQwqO9EAf97gbOYpEhRAkLw12_xJ9tO26SqvXihXg_rtVP06LMvakoyNk2MBEJ_dyB1HNzzyBOaFMucrt_01ICpQOIMIA8OCOfkRnAjl6kvGZIuRZlCrILzqCQO7a2JnI9BWU2RO9OeGgJG0Oyn9AIV3hQurX0vP8J0xRiqj7GF6NiEAgmncJtRfHq_T5GCp3tYvggjiLwwYzfYp-obw8q181Q1QJpNf2DwykJUycI22n7nw0_QWMx8sUaogAkz-v-NZDuegXHl15dg6y35rVEvUURjRG2HQr0Uzmas3qfSn2hNrbFmEcCaATqtybsCy4Kpc4grNY0j4PGGwkOgd2yZXcZhiQfy5ScgNMmI7pERpPiIiA-mxxhyIImLjXofc_vktCVg=w1124-h843-no


cRgHNrFhU2PTk2QGPdRLJPTcEJOvqSLnecJ3M4SdQLhfeYncP6RAJ68c4C6JRUsqeWrH6AZ429-s7BWqcLW5yZAme7dUO09SB_v2AUPlY2sk29aIloVMbhLV-6-i7HqfFGiMCkGHeX1kFNi5Z7kjK6uIQWLLorDQkoo_HOWdXq4b8LCcJv3AenSrlwUuOM99AW0bo2bIFN3JMKFzijPcyJIQ5gLGuCK14BLO5Qq-jcHqcTTNrVaS-Gwzu_WsZ2fIKauXeTFZ8zZM4HcXc8l2lP9oIBss0pwiPoJG-0WBPMCVlcplaRxl84XG2GVUvrui3UjDj-e4BNfaS1DcVoud8rWS5h93kcXqm9xWZo8MCCm_kqMlPmSGkrLOSi3h0Vnk9Msp6hpKs2lV1deUXgy70t9xEVRo_oQ-AvlC02-svuYc2kSvknmd-ZSphUTntAG85wrXEukDXNPrFgvQ41YgcN2zVZYlLGkNofrrYchHN1TEYeHEsOil_sxEedLyaHqqYUChrOhoCZdEgwU_krYDm2bwdmvbwLBJx0EdgXuwm4sYIr_7Sco2oEC_8y-o2d01EpBYhd4Wwa6MYoTziUYwlD8JJya-l6HtgNC91NxbCw8q5JJXJ85mxuXr5LxtMOAtplk07Es_YLt5Ys1PSfG-M5EHEw=w633-h843-no


BsL4UjVeIypF1PDB4CPWuvH3YG8WAs_m9YPwjK2NoTp29Nov8bWLPNvNhl9qdIRICUSTI_Bt5c2MjDwU6jD9JbyuQUYSjm17M2AhFIf45KWQwSJD29IqgHv5BZY59CE0upKefvm2xkc5LevrcYsMqevTXb-TB10u6nsoqFjAOFESIRS51kWbCJuivL_Do8YG_JQgrntQzoOCfhkI0nnyY2mcnEmWich3zuG_bQK-TzfYL2es7bebHIjPZH8JLWLNLVzDWAzxQDNaxLPbPARVFWeQkX8Y392TYxd-XqeTQ9AYoIY9Pgq3w3DC5dAYBkvu1-jkY7yz_jA_o0AoPNw6i2dnTpKdsaSMNNe2v7e2DRXuFEiLUz-LfUHdK--UQY61cl6tvr90KklSfgkh-4O6cltvQzlEXGThkxvDPT-cqV1fNeofpWCnx5bb-HAN-rSocNbDyW81PNHJQN8kkk23S7IYJKtxCk5DTUF0rMuFHKFh97LQVYQEg9E5Qa_Y4p0jdx_PEuabunDBvS445YcQUdsA_u-DZJgOlGCxu_-j7cRM09d7iycNm3BOSRo3DWQay1s3hu0KmSVNsCThlOGC2f-cWAjOnrx4jJi-xnEaxq8ywKq3AhpbeVFb6KOp6IOA78uvPrIF1e8H4gWPUCZBcR0spA=w633-h843-no


_zuhkn4Nc4RMyQb6YbdLtKPw7m0MZkr9GcnMx4VnXE3bGtQwCfzhzagrx1PjEYzBzOSJJG7-PdpPwi5ht-7eUCBhDiE86sa27kKLJaqeERsKybdY5ua44mPKf9KXvgdGInGqdtotoO8A-L3Y0K_7zwgSAWJj_eaQ6sG1birCYBNFtEDGenCZfgD9qmI-pRIif3y77ZnW0uCyhiQMilb8BnLABjARhJ2H5Dlz_SNY0RcJeQYbRQsmWf_Bfal9iNPGooTu2cE6KtKDjEQlH1cwxtVyou8NSOgxnlrfw3b7qZN5rSkoh5b6pDIvDGHQNeio4spgLXyAY65tvKvsjINi_J_9sTwY-_5WXAx7yfCQN_MMIprWVprX0l2uVj-8TCqNBpokhGGpGyoltUG0Dxl8OCIp6XhgVipht-Uavlty8f5rzCwCqdnn2BwHxCEaHS2X1D8MLLSJTLrty-Cop5-JRXVyXHWLD09O0urKwFTFD0Pkpm_dpR6QYB1QwgzdklAjit58GQl7Zgn6pVHt_xxN5Go62QjJpM7GuWWNH0CGSlW0TX0cjLk8-Y1-cjaHb6e7B778fSwCaFMLlU_66ODLV-ktNY9caEv-Gw9Kp-shvp9H_VW5giocuA7bvQ8xM9sKiKb6Bmvssx6oqkafNV83sXyc1w=w633-h843-no
 
MoaRRRRRRRRRRR


n_k9xPRC9h2Q02Fcp-bY8yd9Pn1pVES99jMNNnSEiRTKrMMYzc2ezHAKhEBFtPirUVW_nn-Rws5qPWgWQ8wjgLy3YhaDJfokGFu4-9jXADQ2UNR1-1RPGJJ-S8gzIbIHo5JNdt_mNuHXIetDiAdTmzMmPxA9G19Py_Opfrw8VPb-_34dFjCMuNJL13LmGBAJewaKLjK7otT7xSElq40oeATGH9gnw_7KyVOxRc07OKr1oEzyrUdym77PQgAkdcU2sBxEuxCr7o-RRdB5-eQM4bfC72qpHyzti6Z86mT7kK96js3T6O0PeEMjzK3dPyDz3MlMOrBX4OHqAaz2OA9Ed8yiX3nw4FdqrTutHS10oWp2wmKB3psBqAmAci5cnC_5qycnuVmG66-n0r6kOOL2jOkrpkKo42iPWpqVJgD_xFhX04hDY8foZadIyatDXFA8sccFHq1ItXzZZ8E36yhbEKCXHqTkdZ8k_mpU0AxDqqD4Mg75v4XlGJAUzFGs1Wo0WMIj7g8UFFx2obmA2coqbLi1S3TPnJXWK15vcDomkM8Go-p3h3JxpBkGRZHjHZi5b2C3zqdfl54C3do8blwFp7TbDNZwTON0QA4jC2MG6XI4dUPRkhaiIX_idW_BTQXHxN5-xQIETft3TAE_GjtuAPomTQ=w633-h843-no


d6GfUqPBQbC5MK9VtoZ8POzZ9wlmnF9nop3lNyzymcNAL3nRg9xf5SUuqEwYq3iaeHDsxp8JjYNpQr41G82BaIP102-WAs9-SGqPqOSGG-8ieCtw7-hG-juGR1g2u4kh8MjNdnjTlWhrkm1ZFoymT8DnRL48ujzQw7BFq1Pbe_PzJPXy-eEJ-WB7z_CHwmd3aeoql8dDH_41PYX62lDMYY3pa4Vqsix1D7rYJNOtggsEmOq9U5LC0MIIO1h7AmJPL9DSQK8qkvZ7TEb39gBsIgRk4F_sKnOpujJZZA8WMx3SSYbf_AjG_zV70NoI1xSgoF-3Zr2IWFqKfD6E4JETVPYnV_HkRMoAvgGKkJYX8Ewrgv6-WerInN0qh_inJ5dIMGHEcFaYH0XVXAGMPK35HTrp6H8dJ358db6hASyPFK2BQhQ8XJnTsf7ZKjwXT8tnJCzTGL4qkiuJe486XZ2UaImj6WeenJejqeak6AdObqyrCFkXVB80qPfWmvUkcXG_0T5Ov5ef4bQB1WguSXIlYJROzg54GsOseoKmZPJzTxAyMd5RQ4fnIoUvru_oi8E3KV7LEkzSbUUW7v443RNGNI4FoBzFPsdsw5GpOTCWgN_0-QP5RXcKd5rfwVne545cdhNeyua9joaACFe6FYcm5rlwKQ=w633-h843-no


XYBit9erAzQxonXzZNSXJ8WFg2PA3WL___bCgMEaogLudSposgcaZovfnKnRZALHiDeV0iCMhcC-0uVDOVkg3i_imzCmxNqjeialtGaXmIBM1J39BTR9-nMp63wubYjwIDrT2jqMHqfKKSjFhoBdxYLJly_0V2I9n1Dt7BxbmF7G8M_I6weFB926jZw3Dk94bt-jX71P_q15CmXdNJz_lU-ubUegiM3LXBUUh4NVcs1KaCmi2-DBBNlOrrvgQo_4aehvBW3sIb_h94pgopE5LzaRB90Dwx9kQvZrPLQMGaWUkfmf1jL9PB8O64QarB6jNWq3luSspD3KupjTuiJ6swVmeMHZgdcVrWNYpdxaR_9tanmD0x6jpg2Ix53JmWqk2NgonPdZ_QAcCqAuZB6Jo879OawNljm6SWZpJQ2nGAdoutt-njnPML1uHyJKajmBlq7MziPDiCQ97W4rD8pNY9DZ_lvkrWdK8tRfU4H2nVpwwqnHj9PKc9YXsxpPvrWN0Irf7rMB2ssfyja-_F9ibg3BP5hkHs4-7ItwXeXmHRNJZu9YT3SvFqWxsKq_3CIz-B-lIrkR3HlI2xjWtAU-4BPWGnEdsi0YnBJ37TgrffIT7b0sPWCLci1d5cbrN8fQsurYDiAGYZ_hvGc9anMAYrtqfw=w633-h843-no


ne-2q5cWOkEC5qlfUOLFTr6gcCbo_H9hOCX__1dSoUn7eIewfsmpAcOrl6MZGoAQCdVKv1R1hdjStnaqj7wlsD-MWCnx1aAkB23IVopjYPeyLz0WeG93iXPtjoMuEWn75P0Q0jIoDYJqqS8vA-uMbqtC0mnlVWOCZy5pbr04OGaJSR9c5qz7P4rRfA0qqAxVHLb10mbG0R-fFB1C4-KWxhwhqlkKu80e762MlISRxcoUV1f_gqQ0Di0Xj3thRX-_mMuw3lLTseGmnaYkCk_t63arDpvY1deydha0-H_hkcqrDn4EnZapgFclYp84elDOiuJN-RL7YDw8-mddC6rrDWjuo1nvJ51YVu_AO7L2d9pO6JK36EvVlSbnPV3XpbbXgfWn9d01XNk4Jf1o3JrFKyg3l63buJb9vkT5hUyUToRgcFOGN4fhwLiNKBpsCDohwUjgsuX_h_00jL8nA18V8vWNDAIwDHscYUSeKubRwdMBE2ow-3Es1WCOyCfrFa3oINBWs3ae_7F_z1QoHNKWNE2C8gI6RIyiD5XmdJuO5P7NLZAGxV6-dihqcBaP8CsxUtIpus3cMQhLOPD2RiB-y2KW791SFQ5Pb0ojIhgQDhjDFpED37bekB91kvQbtO5gix7xXX5q3WmTqNYw1HYsRujqRg=w633-h843-no
 
Wow that was extensive, makes me glad I found mine when I did. That just looks heartbreaking.

Walt Hoover
 
A little marine tex and compound .

No need to panic.
 
It looks like it's my turn in the barrel here. We're pulling things out and trying to figure out how Hatteras put this whole mess together, and how to replace the rotted sections of the aft bulkhead with a minimal amount of carnage.

Does anybody have any idea what holds this cabinet on port side in? We've removed every fastener we can find. Every piece of trim, molding, etc. and it's still rock solid. It does not appear to be tabbed to anything. Series 1 36C. Any suggestions would be appreciated before I have to take a crowbar to it.

kXCX6N8.jpg
 
On our 42C, we replaced the bulkhead on the port side below the window from the side to the door and down to the floor
. We used an saw and wood chisel to remove the plywood from the exterior fiberglass (very thin).
We used Coosa board behind the exterior fiberglass and fiberglass to build back the thickness.
It was a messy project but will not rot again.
 
Damn, glad I haven't run into anything that bad YET:rolleyes: on my 1967. Fingers crossed as I get into some areas I haven't seen yet.
 
On our 42C, we replaced the bulkhead on the port side below the window from the side to the door and down to the floor
. We used an saw and wood chisel to remove the plywood from the exterior fiberglass (very thin).
We used Coosa board behind the exterior fiberglass and fiberglass to build back the thickness.
It was a messy project but will not rot again.

Thanks for the input. I take that to mean that you did the work from the inside? Also, I've never worked with Coosa before. Can I just lap that to the plywood that is sound? I'm hoping to avoid a complete replacement.

A lot of my bulkhead has been hacked up, I think when the boat was repowered. And the window leaked causing a lot of rot as well. The tackle center hid a lot of patches and problems.

RyRUT32.jpg
 
I feel your pain

Thanks for the input. I take that to mean that you did the work from the inside? Also, I've never worked with Coosa before. Can I just lap that to the plywood that is sound? I'm hoping to avoid a complete replacement.

A lot of my bulkhead has been hacked up, I think when the boat was repowered. And the window leaked causing a lot of rot as well. The tackle center hid a lot of patches and problems.

RyRUT32.jpg
 
Yes you can attach the Coosa to the plywood. I would make sure there is some thickened epoxy in the joint between the wood and the Coosa, just make sure to use 1 or 2 layers (2 overlapped would be better) of 1200/1208 or 1700/1708 biax cloth on both sides to make sure everything stays strong/stable.
 
When you say cloth on both sides I'm @$$uming you mean on the outer surfaces. I've found a few things where Hatteras bonded wood to fiberglass structure and it looks like they used a piece of mat to hold resin in between the surfaces.

While I'm asking dumb questions, does anybody know how the door frame is held in? I can't see any evidence of fasteners or seams. The wood actually looks like it wraps around the bulkhead and is mostly held captive by the fit of the pieces. I assume this is another one where adhesives are also involved.

hbGyFci.jpg


sRR7jSd.jpg
[SUB][/SUB]
 
Epoxy is the best resin (glue) for attaching "fiberglass cloth" to wood.
Vinylester resin would be next followed by polyester resin for glassing to wood.
Just remember you can put epoxy on the other 2 but can't put the vinyl or poly on top of epoxy.
You do not have to have "mat" if you're using epoxy, only the "cloth"
So, 1208 and 1708 Biax cloth has a layer of "mat".
1200 and 1700 Biax cloth does not have a layer of 'mat".
The Coosa gets it's strength from being sandwiched between the outside layers of cloth.

We do most of our repairs in epoxy, mainly because we're better with epoxy, and we do not like smelling the other resins.

Any suggestions Rusty???

I was wondering when I'd get invited to this party!! :D;)

I think I'm pretty well sold on vinyl ester for all projects now big and small. I used to prefer epoxy on the smaller projects but I'm so used to the vinyl ester now it's easier than epoxy to me.

For bonding ply to coosa. I'd thicken some resin with cotton flock and some chop strand. Dump it on and spread it out with a notched grout trowel. Then I'd screw them together with many sheetrock screws. After the cure (a couple hours) I'd pull all the screws out and continue with my job glassing the outside. You will have to destroy either/both pieces to get them apart.

Coosa is awesome, just protect yourself when cutting/grinding it. It's some super itchy stuff, normal fiberglass doesn't even bother me anymore, I don't even notice it, but coosa in me and I can't even sleep at night. When cutting/grinding wear a tyvec with a hood, respirator, ski goggles and rubber gloves.

I use a normal skill saw blade to cut it, we use normal router bits to round over the edges and a fast wood blade seems to do well with it in a jigsaw. Bring extra jigsaw blades, if you cut much you will go through plenty.

Each boat is different, but if I were into the project far enough to be laying glass on the bulkhead I would FOR SURE come out the other side with a mezzanine or at least much better storage than stock.

Speaking of fiberglass, hopefully the weather this weekend is going to be warm enough to allow me to finish glassing my mezzanine!

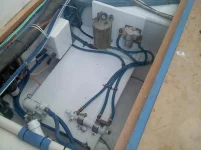
Just for reference here is my Mezz thread, has lots of details/images that may be helpful to others.

https://www.samsmarine.com/forums/s...ockpit-Mezzanine-amp-Tuna-Tube-Winter-Project
 
Last edited:
To bond the Coosa board to the exterior fiberglass we used a putty recommended by our supplier.

I can't recall the name of the putty, but apparently is used by boat builders to bond the Coosa board between two layers of fiberglass.

I think you have 20 minutes after mixing before curing.
 

Forum statistics

Threads
38,156
Messages
448,724
Members
12,482
Latest member
UnaVida

Latest Posts

Trending content

Back
Top Bottom