And yet, 40+ years later...she's still running strong.
A buddy with a 45' Pacemaker running 871s, Allisons, etc with 1-3/4" shafts and 28x28 props attempted to drive the boat into the planet core a few months ago. Ran seriously hard aground coming out of Baltimore. I was helping him make the run. Since it was his turn at the helm, I was tearing the horns apart and just found some badly corroded contacts inside. I reached for the emery cloth when all the sudden WHAM WHAM WHAM WHAM WHAM WHAM WHAM WHAM.! Turns out my buddy, a sailor, was so completely mesmerized by the thrum of the Detroits and the AMAZING speed (15kts...unattainable in his ragboat) that he paid attention to the depth sounder but not the charts or plotter. It's amazing how hard the planet can be when you go from 7' of depth to 2.5 in an area on the chart marked everywhere with twos, threes, and fours. After the crash we limped all the way to Harrington Harbor, where they hauled the boat and found the props wadded into balls of bronze...which explained why she was such a pig to dock! There was also a shaft bent at the prop on one side, and the muff coupler on the other with both keys and pins sort of merged all into one. It took a saw to remove one prop and one coupler. The shafts, though, did not snap.
So, I'm fairly sure my same-sized shafts with little 24x22 props and 1.5:1 gears will hold up OK. So long as I don't try to tunnel into the planet!
Q, what was used to get your wheels so nice and shiny.
My wheels (Michigan - nibradl) are clean as a whistle but would love to see them shine like yours.
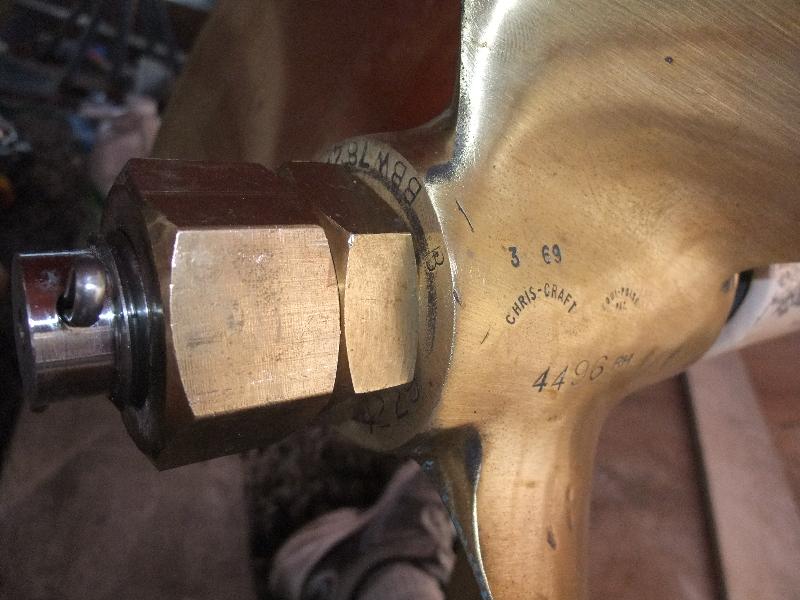
No, we had this thread a while back about which one goes on first, the thin one or the thick one. I can't remember how it ended, but there was some debate about it. Actually, I think Q did it right. I think the thin one IS supposed to go on first.
Jim,
The jamb nut unloads the threads of the first nut. Therefore, you want the larger nut on there last as it will be bearing most of the load. It's a simple matter of physics and anyone who tells you different is just wrong. End of discussion.
Today's blog covers a step I went through once before -- rudder installation -- but it turns out there was a problem with the material used for the rudder bushing. Hopefully, the new material I'm using will resolve that problem. Glide, the company that made the new bushings, also makes cutlass bearings from their material. It's pretty slick stuff.
I finally got around to aligning my rudders. Having never done that sort of thing before, I set the toe at zero. With the race cars, we always used to set them slightly toed-in, but I came to the conclusion that the dynamics are different enough that zero toe made more sense. Now...somebody tell me I did it all wrong. lol
Seriously, I think you would want something to load them slightly. If not, you will probably get some slight shaking back and forth that will eventually start to wear your bearings and linkage bushings.
I don't think it matters much whether you toe in our out, but you need some constant side load to hold them there.
I read somewhere or was told that Hatteras wants to see about 1/2" of toe in. They track better that way. Toe out tends to make them wander a bit. Wish I could remember who or what, but it is pretty similar to the automotive concept. That's they way mine were before I replaced the shaft bushings and the way I set it up when I put it back together. And it did and does now track very straight.
This site uses cookies to help personalise content, tailor your experience and to keep you logged in if you register.
By continuing to use this site, you are consenting to our use of cookies.

") LOL
LOL

