Blain
Member
- Joined
- Feb 26, 2025
- Messages
- 26
- Status
- OWNER - I own a Hatteras Yacht
- Hatteras Model
- 53' MOTOR YACHT (1969 - 1988)
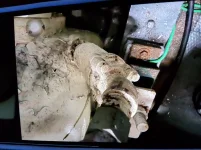
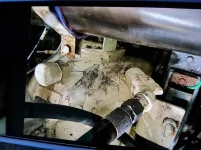
I am changing the oil in my Allison M20 Transmission x2. Manuals says to check yne breather and clean the screen. Pulled off the breather..it looked fine but I am unsure of the location of the screen. There is a cyclinder-like structure on the opposite side of the tranny dipstick with a 1" hose emanating up from it. The manual seems to imply that this is where the screen is located. I
this cylindrical structure does not seem to have been opened in years.. So I wanted to get some feedback before starting the process.
Thank you
Blain
this cylindrical structure does not seem to have been opened in years.. So I wanted to get some feedback before starting the process.
Thank you
Blain
")

