Sam's is your source for Hatteras and Cabo Yacht parts.

Enter a part description OR part number to search the Hatteras/Cabo parts catalog:

Email Sam's or call 1-800-678-9230 to order parts.

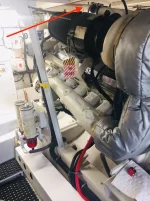
Turbo Leak 12V71

Thanks for info Rusty. Any info on what the torque should be on the nuts. I didnt use a torque wrench on the first clamp I replaced as I was unaware of this. Someone told me to tighten it then tap with hammer and tighten again. I probably need to re-do all the clamps

My manual is at the boat. I'll be there Sunday, if I remember I'll shoot you a pic of the page and post it here.
 
I have some extra of the acorn clamps that do the exhaust to the turbo. It looks like the ones where the leak are may be a little larger in diameter than the other one. I plan to disassemble next time I am down there. I ordered some of the soot cleaner but am holding off on the liquid gold until I see if it will seal without it. Still trying to find out if I need to clean the intercooler. Looks like I would have to remove the flange with the 4 bolts to get access to inspect it with boroscope. I read on an old boat diesel post that if the engines arent smoking black most likely you dont need to bother cleaning inter coolers. Then another place I read they should be cleaned to remove soot.
Intercoolers should be done periodically as routine service, however you are correct that if there is no black smoke the engines are getting enough air for now. You aren’t doing any harm by running them until the engine lets you know via smoke.
 
I have some extra of the acorn clamps that do the exhaust to the turbo. It looks like the ones where the leak are may be a little larger in diameter than the other one. I plan to disassemble next time I am down there. I ordered some of the soot cleaner but am holding off on the liquid gold until I see if it will seal without it. Still trying to find out if I need to clean the intercooler. Looks like I would have to remove the flange with the 4 bolts to get access to inspect it with boroscope. I read on an old boat diesel post that if the engines arent smoking black most likely you dont need to bother cleaning inter coolers. Then another place I read they should be cleaned to remove soot.
Brian,

I'd be really interested in knowing how you'd clean those coolers. We have the same boat. On mine, the overhead clearance on the forward coolers is next to nothing. I've always figured I'd have to pull the studs out to remove the damper assembly. Even so, a couple of those studs would have to push up into the overhead insulation. Taking up salon deck panels is a nonstarter.

IMG_9844.webp
 
Actually, just realized I brought my manual home after the last trip. Phone is acting up so I can't post the pic. Here is text from the manual

1. Lubricate the toggle bolt threads with a high temp anti-seize compound such as Jet Lube (Mil Spec 1-907D), or equivalent.

2. Tighten the nut on the "V" band toggle bolt to approx 160 lb-in (18 Nm)

NOTICE: Do not pull a misaligned turbine housing into alignment with the 'V' band coupling. The parts must be aligned and seated first.

3. Loosen the 'V' band coupling nut to approx 50lb-in (6Nm) torque and then re-torque the nut to 152-168 lb-in (17-19 Nm) torque.


The instructions above are for the v-band that attaches the exhaust side of the turbo housing to the middle of the turbo housing.

If you are connecting the v band from the compressor side (intake side, usually white) follow the following torque specs.
19. ...... lightly lubricate the threads of the toggle bolt with engine oil and tighten the nut to 110-130 lb-in (12-15 Nm) torque
 
Last edited:
Robert,I agree. The one in question on mine is the rear however I am going to have to remove forward damper as it is frozen up. Right now I have the rod loose and if I have an emergency at least the rear dampers will close off. I am thinking if I can get the studs to turn at the bottom instead of top then it would slide off. If that doesn’t happen which would be my luck I don’t see me taking up the new kitchen floor to do thisRustyThanks for the info. I will bring a torque wrench when I go back down. Looks like it will be second week in December due to work schedules
 
I'd be careful running with the rusted up damper. I had a spring break and destroy the blower.
 
I'd be careful running with the rusted up damper. I had a spring break and destroy the blower.
Thanks for heads up Scott. It’s definitely on my short list to fix.
 
Robert,

I have been thinking more about removing the air damper & intercooler. Your studs, like mine, stick up quite a bit above the nut. I am thinking if I put a second nut on top to lock the lower one perhaps the entire stud will unscrew at the base instead of the nut coming off. Then the assembly could be slid sideways and off. Not sure how far those studs go into the block but if only an inch or two worse case they may go into the insulation a bit.
The studs are 3/8 X 16. They shouldn't be threaded into the blower more than 5/8", probably 1/2". Based on that, your insulation should be fine. Be a bitch on re-gasketing for sure.

You're going to replace the studs I know. If your double nut plan doesn't work...Remove the nuts and washers and soak the studs in penetrating oil overnight. Reinstall nuts and washers, but don't tighten, to preserve threads just in case. Apply vice grips to stud above the nuts. Be gentle either way you go. You bust a stud and you'll pay.
 
If they go in to the blower only that would be better. I ass-u-med that they went through the blower into the block and would have to take both parts off. You are right about breaking one. Im not gonna force the issue if I can help it. I have also heard dont get any trash in the blower and to shop vac out before re-install. Will probably cut something to cover it with.
 
If they go in to the blower only that would be better. I ass-u-med that they went through the blower into the block and would have to take both parts off. You are right about breaking one. Im not gonna force the issue if I can help it. I have also heard dont get any trash in the blower and to shop vac out before re-install. Will probably cut something to cover it with.
Do you have a Series 71 manual?
 
I have a maintenance manual of some sort. It doesn’t go into detail on a rebuild or major repair. Think it’s mostly for oil and coolant changes filters etc.
 
I have a maintenance manual of some sort. It doesn’t go into detail on a rebuild or major repair. Think it’s mostly for oil and coolant changes filters etc.
Then you may find this helpful.

https://avtec.edu/sites/default/files/DDC 92.pdf

While it's for the Series 92, the blower/shutdown damper stuff is essentially the same as the Series 71. Can't seem to find equivalent link for the 71's. I have the 71 books if you need anything.
 
Robert,I agree. The one in question on mine is the rear however I am going to have to remove forward damper as it is frozen up. Right now I have the rod loose and if I have an emergency at least the rear dampers will close off. I am thinking if I can get the studs to turn at the bottom instead of top then it would slide off. If that doesn’t happen which would be my luck I don’t see me taking up the new kitchen floor to do thisRustyThanks for the info. I will bring a torque wrench when I go back down. Looks like it will be second week in December due to work schedules

Your engine will not shut down with only one damper closed. It will slow down a little and pour out lots of black and white smoke but it will continue to run on half-engine until you remove either the fuel or remaining combustion air to the other half-engine with the disabled damper. Not a fun thing to do when it is in full runaway mode.
 
Your engine will not shut down with only one damper closed. It will slow down a little and pour out lots of black and white smoke but it will continue to run on half-engine until you remove either the fuel or remaining combustion air to the other half-engine with the disabled damper. Not a fun thing to do when it is in full runaway mode.
Actually, it’ll run with both dampers shut with the aforementioned smoke. Good to learn how to reset underway.
 
Robert- Thanks for the link. Lots of good info there and definitely more detailed than the maintenance manual I have. I did notice, however, that the dampers on the 92's appear to be round with a flapper closing the round intake off. The best I can tell on ours is the flapper is in the rectangular part not in the round part where the turbo puts the air in. I could be wrong but the frozen rod on mine where the cable attaches runs through the rectangular unit. If you get time and could post the 12V71 damper portion I would appreciate it. I think I will try to find a manual to purchase as well.

Kelpy- Thanks for the info. I was curious what would happen or if it would tear something up if someone pulled in on half of the engine. I figured half was better than nothing. I looked all over online and posted on boat diesel about this last year with no good response. Now I know. I have moved this repair up on my list after the statement from Scott about it tearing up his blower.
 
Update on the manual. I am a member of boat diesel.com. I was able to find portions of the 12V71 service manual over there including the portion on air systems. It has some general information in 3.5.2 but no internal photo or information of the dampers. The ones in the first section of section 3 show the round ones like the 92 series. I think I can figure it out. Glad to know I can get the manuals on boat diesel. I didnt know they had all this and found it just looking to see if they sold the manual.
 
Robert- Thanks for the link. Lots of good info there and definitely more detailed than the maintenance manual I have. I did notice, however, that the dampers on the 92's appear to be round with a flapper closing the round intake off. The best I can tell on ours is the flapper is in the rectangular part not in the round part where the turbo puts the air in. I could be wrong but the frozen rod on mine where the cable attaches runs through the rectangular unit. If you get time and could post the 12V71 damper portion I would appreciate it. I think I will try to find a manual to purchase as well.

Kelpy- Thanks for the info. I was curious what would happen or if it would tear something up if someone pulled in on half of the engine. I figured half was better than nothing. I looked all over online and posted on boat diesel about this last year with no good response. Now I know. I have moved this repair up on my list after the statement from Scott about it tearing up his blower.
Brian, the round damper assemblies are used primarily for naturally aspirated, single turbo or twin turbo/single cooler applications. Twin turbo applications, such as ours (with twin coolers) use the flatter and more rectangular split assemblies. My 71 books don't go into any more detail than what I sent. I will be happy to take a pic of what I have, but not until Thursday.

I've been into my dampers in the past. All I can say is they are pretty self-explanatory once you take a look. Also,Scott is spot on when he points out the dangers of FOD hitting the blower lobes. So be very careful with you small parts. Try and cover the coolers and have a good magnet at close hand. You can work in a rag once you have the charge air pipe and screen off. This is where your borescope can save you.

As for the coolers, they will be oily. If you clean off the oil they will only become oily again as soon as you run your motors. You're looking for clogs. A good shop vac with a long bristle brush may be your best bet after you verify there is nothing of consequence that might be dislodged and fall in. You can always remove the guts, buts lots more work. One of the reasons I sent the link was to make certain you were clear on the complexities of pulling a blower--pretty good incentive to take your time on the stuff above it.

Keep us in the loop. I've had this stuff off before, but not on these motors and, just as critically, not with such limited overhead space.
 
Thanks Robert. I will definitely try to keep them clean and let you know how this progresses. Dont worry about the manual as I found it on Boat Diesel site. Sounds like its pretty much the same info you have. I plan to go down there the week of the 10th and start on this
 
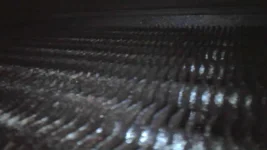
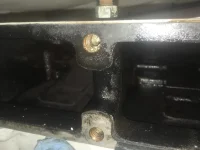
Update on the progress. Used the double nut method and was able to break all the studs loose except one. I then realized they are so long they run through both the air intake and the intercoolers thus the intercooler would have to come off too or I would have to cut a hole in the floor under the refrigerator. After cutting a box end wrench in half (actually two) I was able to loosen the top middle screw on the intake elbow. This allowed me to access the stuck dampers along with the actuator rod. The springs and dampers appeared to be in good shape and just the rod was frozen. I sprayed crow oil & PB blaster in them until it finally worked free. I also visually checked the intercooler fins although this isn't the side the exhaust leak was on. Im not sure how I will get that last stud out if I have to remove the intercooler but that appears to be the only issue. Since it looked clean I am going to forgo that until I just have to. Here are pics of the dampers and intercooler on that one

IMG_0461.webp

IMG_2436.webp

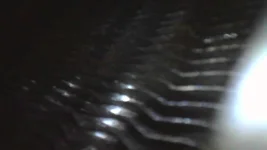
On the side with the turbo leak the damper functions fine so I didnt bother removing the elbow. I ran my boroscope in there and it appears to be clean as well. The clamp I think is leaking is the bigger one and is an $80 product. I think when I bought the smaller one it was $25. I ordered the clamp and elbow gaskets so cant complete til they come in. Im thinking of going ahead and breaking the 4 bolts where the exhaust flange attaches as I couldn't get the riser assembly to move. I suppose if I removed the two braces and clamp from the other turbo it may move but it is also heavy stainless steel. Im afraid I may start more leaks. Does anyone know if there is a gasket on the flange where the four bolts attach the exhaust? There doesnt appear to be one or it is very thin. If so I need to order one as well. Here is a picture of the intercooler via boroscope on the leaking side

IMG_0466.webp
 

Forum statistics

Threads
38,156
Messages
448,745
Members
12,482
Latest member
UnaVida

Latest Posts

Trending content

Back
Top Bottom