Sam's is your source for Hatteras and Cabo Yacht parts.

Enter a part description OR part number to search the Hatteras/Cabo parts catalog:

Email Sam's or call 1-800-678-9230 to order parts.

*siboney 2.0* structural repairs - 1972 58' yachtfisherman

  • Thread starter Thread starter MarioG
  • Start date Start date
  • Replies Replies 73
  • Views Views 157,467

MarioG

Legendary Member
Joined
Apr 12, 2005
Messages
1,440
Status
  1. OWNER - I own a Hatteras Yacht
Hatteras Model
58' YACHT FISHERMAN (1970 - 1981)
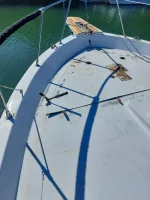
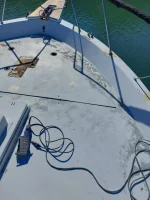
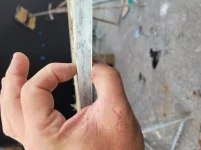
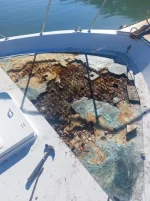
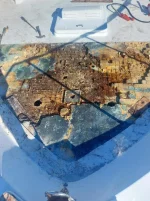
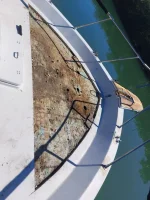
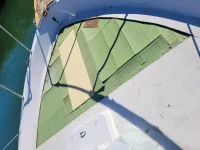
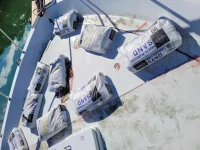
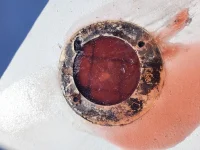
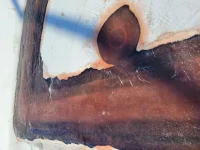
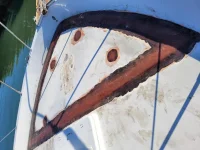
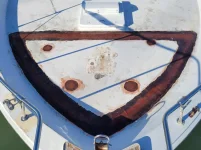
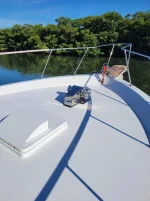
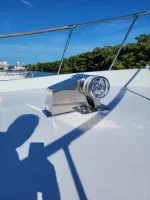
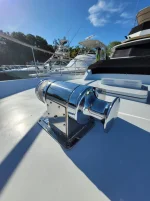
*siboney 2.0* structural repairs - 1972 58' yachtfisherman UPDATE!

Hello everyone,

As promised, I would share all the repairs and upgrades of our boat in the hopes that others can derive a solutions to our common problems associated with ownership of our old boats. this thread is dedicated to the structural repairs that I have done or am in the process in on going refit of our 58 YF.
 
Last edited:
First up, the dreaded DECK ROT.

As we all know, Hatteras in an effort to keep the weight down while keeping structural integrity, our decks are of a "sandwich" fiberglass/ balsa design construction. the deck of the 58 YF is composed of a 3/4" balsa center with approx. 3/8" thick layer of fiberglass, on each sides of the balsa core. It's Very structurally solid sturdy construction. Unfortunately, the balsa core is it's weakest part in the design. as long as the core remains absolutely dry it will remain structurally sound. the failures of the balsa cored decks {and salon roof) come from improperly bedded screw holes and cracks in the fiberglass due to age and or damage.

on Siboney there are several areas of deck rot, mainly attributed to the forward deck in the area of the windless, the side decks and the roof top/flybridge sole. in these series of pictures ill try to explain what i found and how i approached the repairs.

I started by making drilling exploratory holes with a hole saw to have a general understanding of the dimensions of the area of rot outside of the areas that felt "bouncy" and weak when walked on. also, tapping with a hammer is a good way of "sounding" your way around finding the difference between and solid "tap" vs a " hollow "thump". once I had a general mapping of the area to redue, I used a small skill saw and a multi tool cutter to cut the top layer of the deck. once I cut the deck all the way around, used crow bars, hammers and screw drivers to prey off the top skin from the portions of balsa core that was still good. what I found once I lifted the top side off and exposed what remained of the core was nightmarish!
 

Attachments

  • IMG-20230107-WA0006.webp
    IMG-20230107-WA0006.webp
    75.8 KB · Views: 234
  • IMG-20230107-WA0007.webp
    IMG-20230107-WA0007.webp
    88.6 KB · Views: 232
  • 20230128_151039.webp
    20230128_151039.webp
    65.3 KB · Views: 231
Last edited:
Rot!!!!
 

Attachments

  • IMG-20230111-WA0003.webp
    IMG-20230111-WA0003.webp
    108.5 KB · Views: 233
  • IMG-20230111-WA0002.webp
    IMG-20230111-WA0002.webp
    108.3 KB · Views: 234
  • IMG-20230111-WA0008.webp
    IMG-20230111-WA0008.webp
    96 KB · Views: 231
Using an angle grinder with coarse sanding disks i began to remove all the rot all the way back to the undamaged balsa. this step is important since the underlaying fiberglass must be sanded clean in preperation for the lamination process. when grinding make sure to grind out at least 3" into the good balsa and under "lip" that remains all the way around the cut away of the upper surface.
I used a section of 20 lb close cell structural foam board for the area of the windless and 8lb scored foam board. notice in the area I laminated with glass mat the pads where the bow cleats bolt in, I wanted to give extra reinforcment in this area.
 

Attachments

  • 20230116_143929.webp
    20230116_143929.webp
    87.8 KB · Views: 232
  • 20230116_143924.webp
    20230116_143924.webp
    91 KB · Views: 234
Last edited:
once I was satisfied with the the foam core cutouts, I began to laminate several layers of 1.5 oz glass mat and biaxial. the main idea here is to get in as much of glass and resin as you can to make sure that the foam core is firmly resting in the saturation. this is important because you need to make sure there are no voids or airgaps in the lamination. the same process was done for the top surface of the foam core but emphasizing the resin is well saturated into the scoring of the foam sheets, topped with the mat and biaxial glass.
once that is done the top skin, (which the underside was sanded clean and ready for glassing) was placed back in its original place and sandbags were laid on top to give it all a firm even press keeping in mind any lumps, but it should lay even and flat above the lamination. in the pictures you can see the resin flowing all the way around the cutout.
 

Attachments

  • 20230117_105608.webp
    20230117_105608.webp
    99.9 KB · Views: 233
  • 20230117_105618.webp
    20230117_105618.webp
    103.5 KB · Views: 233
  • 20230117_105621.webp
    20230117_105621.webp
    106.8 KB · Views: 226
Last edited:
After a day or two, I removed all the sandbags and happily noted that the deck was fairly even. the cutout gap remaining must be grinded into a bevel shape about 6 to 8 inches either side of the cut in order to properly lay up glass from narrow to wide strips of mat fiberglass.
 

Attachments

  • 20230119_154322.webp
    20230119_154322.webp
    110.3 KB · Views: 227
  • 20230119_154300.webp
    20230119_154300.webp
    94.8 KB · Views: 225
  • 20230119_154404.webp
    20230119_154404.webp
    87.6 KB · Views: 228
great description of the work involved. you are doing this the RIGHT way. this is the same way a friend that works at a large composite company told me how to do mine. on small areas i drilled 3 inch holes and dug out the rot then poured 4lb foam onto the hole, let it dry and replaced the top in the same was as you described above
 
And finally, more sanding and fairing followed by non skid deck paint. I can tell you that the bow section of the deck is solid now! the windless was serviced and reinstalled.

overall, the job although it was a large area, it wasn't necessarily difficult. if I had to rate the complexity of the job from 1 to 10 I would rate it a 6.
 

Attachments

  • 20230128_125702.webp
    20230128_125702.webp
    76.7 KB · Views: 227
  • 20230128_125517.webp
    20230128_125517.webp
    84.6 KB · Views: 225
I think it came out damn good.
 

Attachments

  • IMG-20230730-WA0012.webp
    IMG-20230730-WA0012.webp
    93 KB · Views: 229
  • IMG-20230730-WA0006.webp
    IMG-20230730-WA0006.webp
    73.8 KB · Views: 227
  • IMG-20230730-WA0010.webp
    IMG-20230730-WA0010.webp
    77.6 KB · Views: 228
incidentally, I also did the side deck walkway which was also soft from about the side salon doors to about midway between the salon windows. I used the same exact method since the deck structure is the same.

Up next, the entire salon roof rebuild!!!! (teaser) if you thought my bow deck repair was massive wait until you see what I'm currently in the process with the salon roof. I 100% guarantee ill blow your mind... to be continued..
 
great description of the work involved. you are doing this the RIGHT way. this is the same way a friend that works at a large composite company told me how to do mine. on small areas i drilled 3 inch holes and dug out the rot then poured 4lb foam onto the hole, let it dry and replaced the top in the same was as you described above

Thank you Bill! Cheers!
 
I had a similar Ideal windlass on our Bertram. It was painted steel.
What a workhorse.

Is yours stainless plate or chrome??
It freaking looks great.

Oh, The deck looks awesome also.
 
Up next, the entire salon roof rebuild!!!! (teaser) if you thought my bow deck repair was massive wait until you see what I'm currently in the process with the salon roof. I 100% guarantee ill blow your mind... to be continued..
My bud is about to pull the trigger on his.
Look forward to watching this project.
 
Nice job! I know the feeling. Replacing the old wood cockpit on our 34 we discovered the bulkhead beam under the doors to cockpit was gone. All you can do is roll up your sleeves and get to work if you want things right.

Things will be so much better once done. We are doing mini upgrades to our 46 and it feels great. These old boats are well worth the effort.
 
That looks great! Its real piece of mind having that project complete. Did you support the lower skin/battens while you had all that weight holding down the lose top skin and core? I recall on mine the bottom skin was no where as thick as the top skin and I couldn't see weight as my solution for fear of distorting the camber.
 
Looks great! Imagine the yard bill if you didn't do that yourself. And it probably wouldn't have been done as well.
 
I had a similar Ideal windlass on our Bertram. It was painted steel.
What a workhorse.

Is yours stainless plate or chrome??
It freaking looks great.

Oh, The deck looks awesome also.

Stainless plate housing with bronze capstan! weighs in around 70 lbs.
 
Looks great! Imagine the yard bill if you didn't do that yourself. And it probably wouldn't have been done as well.

Thank you Sky!
 

Forum statistics

Threads
38,154
Messages
448,697
Members
12,482
Latest member
UnaVida

Latest Posts

Trending content

Back
Top Bottom