Sam's is your source for Hatteras and Cabo Yacht parts.

Enter a part description OR part number to search the Hatteras/Cabo parts catalog:

Email Sam's or call 1-800-678-9230 to order parts.

Rocket Launcher for fighting chair build

  • Thread starter Thread starter rustybucket
  • Start date Start date
  • Replies Replies 25
  • Views Views 12,820

rustybucket

Legendary Member
Joined
Jul 12, 2013
Messages
1,200
Status
  1. OWNER - I own a Hatteras Yacht
Hatteras Model
52' CONVERTIBLE (1983 - 1990)
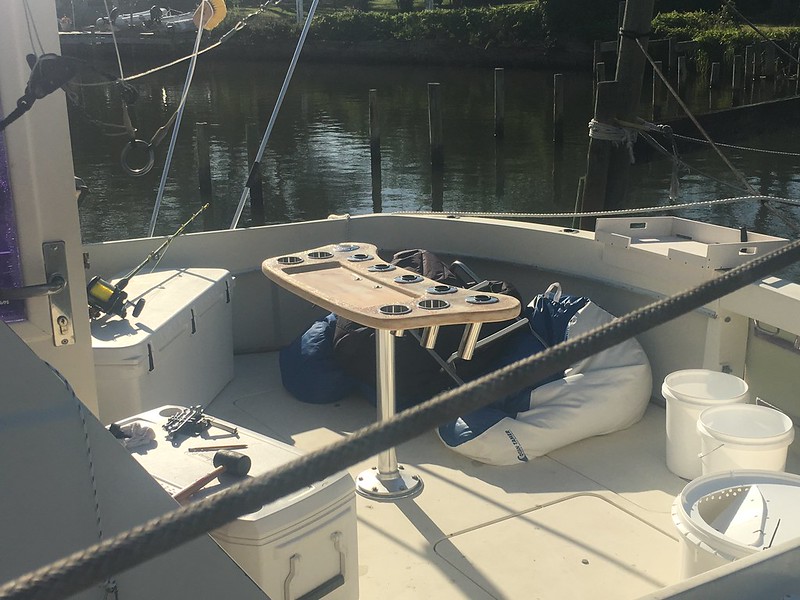
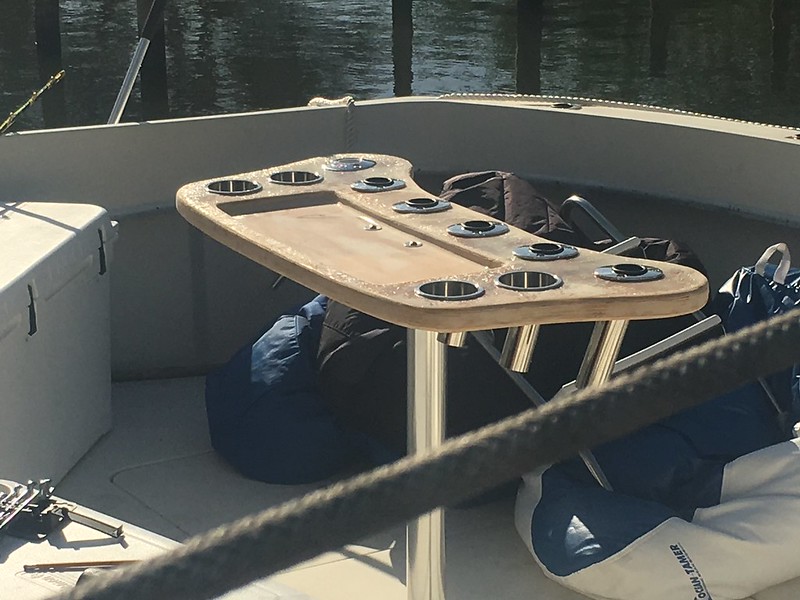
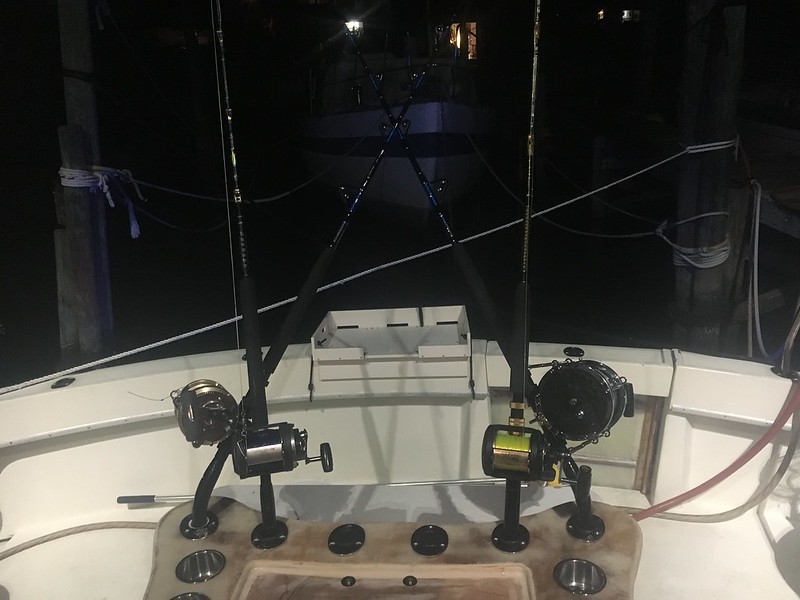
DIY: Rocket Launcher for fighting chair

Been piddling with this project for a couple months now. Finally got some non-rainy weather to make some progress.

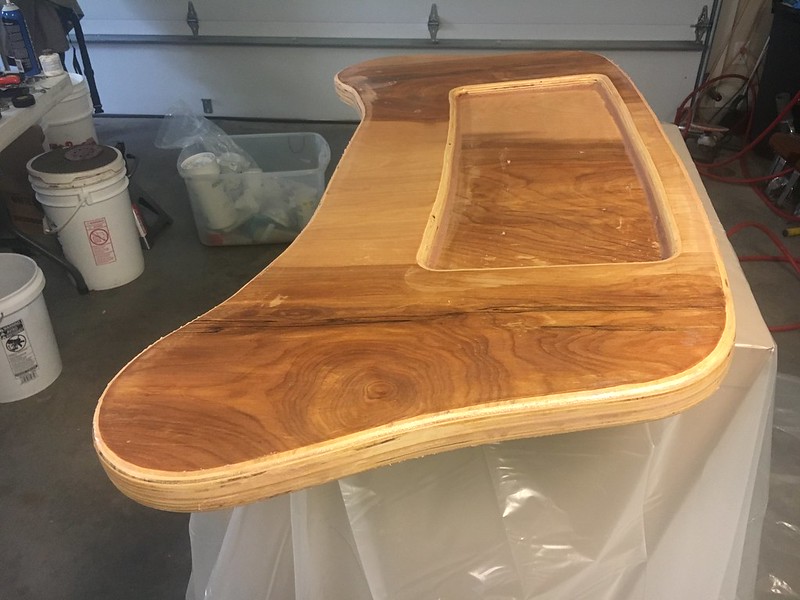
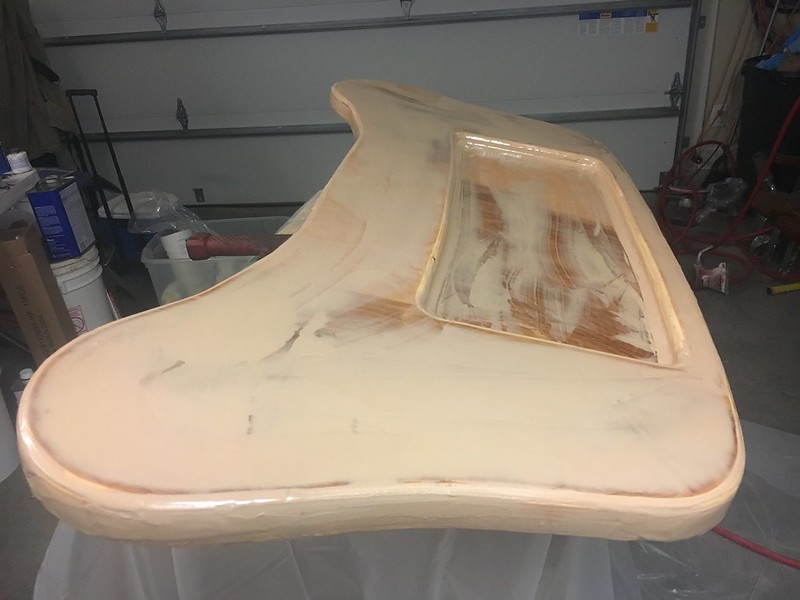
The idea is to take an old fighting chair I had in storage with a ladder back, and convert the back into a rocket launcher with rigging station and some tackle storage.

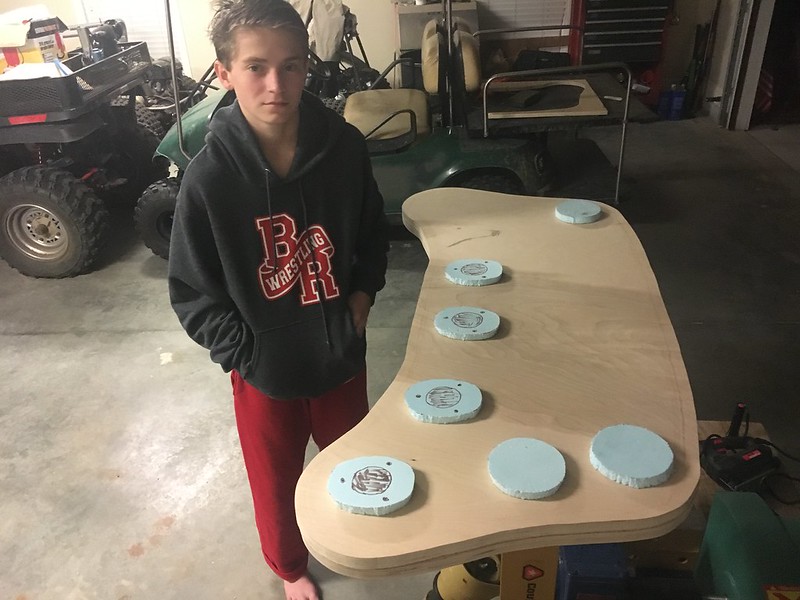
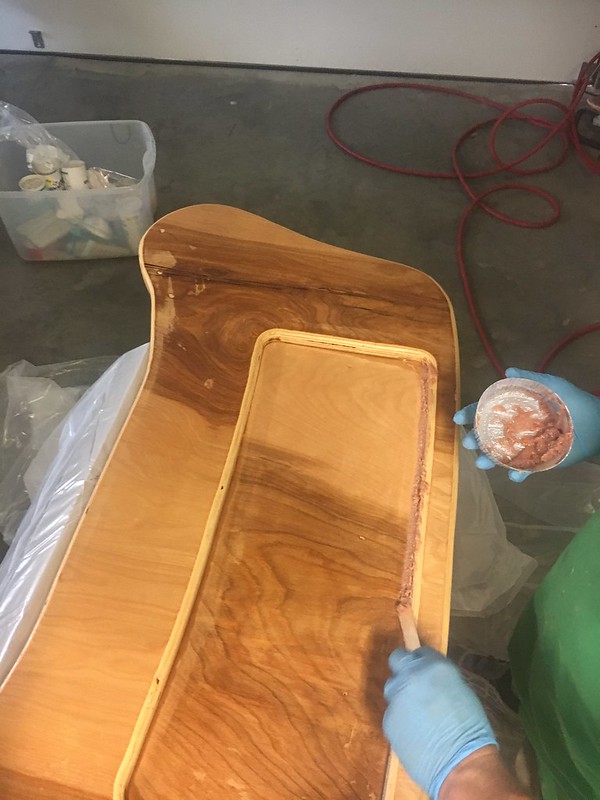
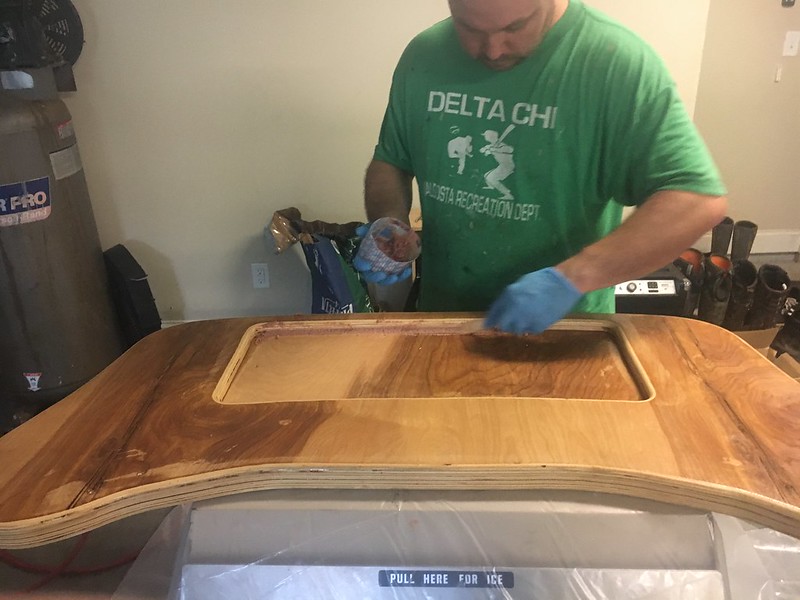
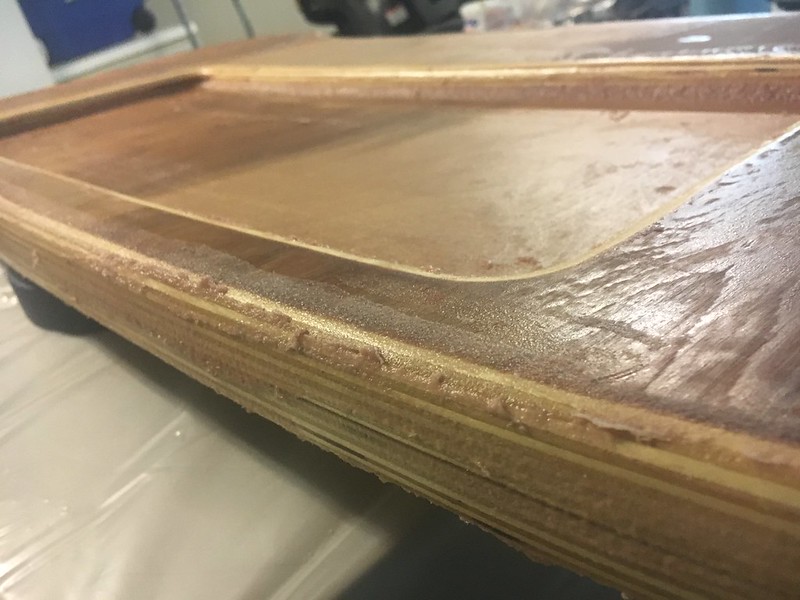
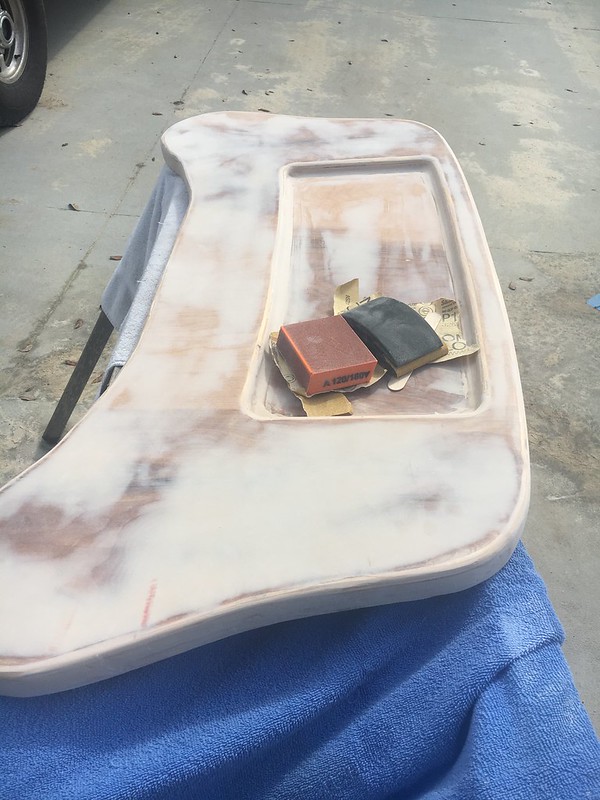
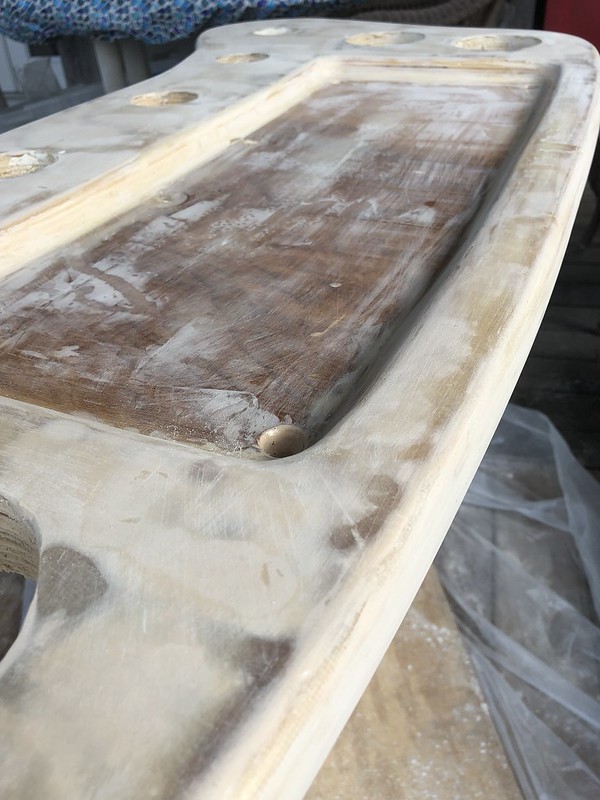
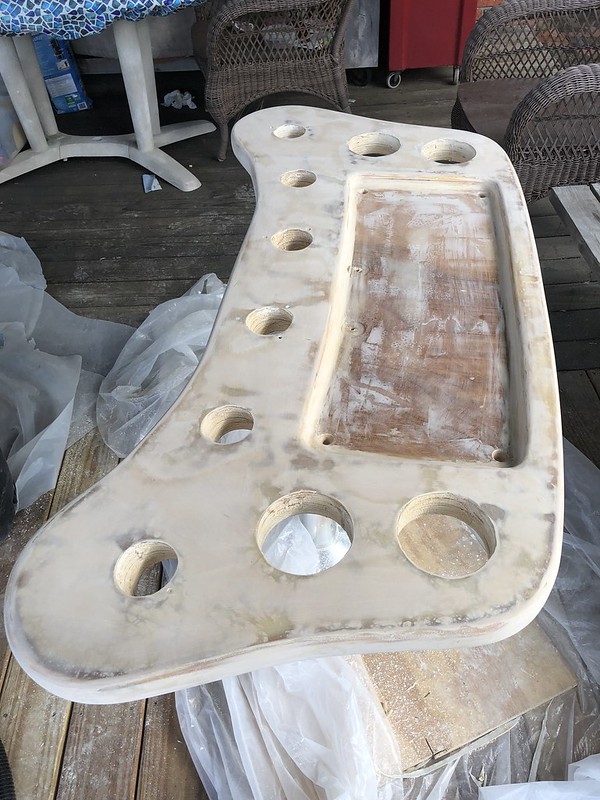
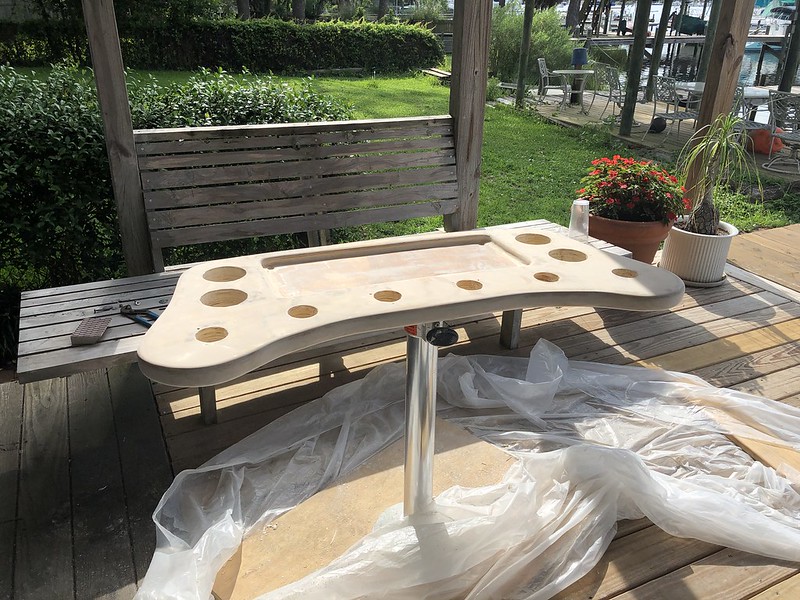
In a perfect world I would have built this out of teak but after searching for teak I decided just to go with a birch plywood and epoxy coating which will be painted.

Some goals
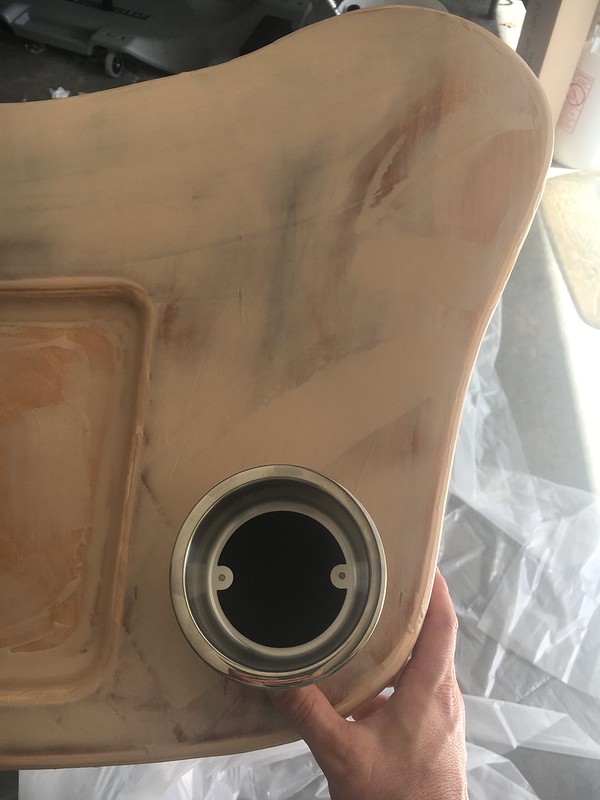
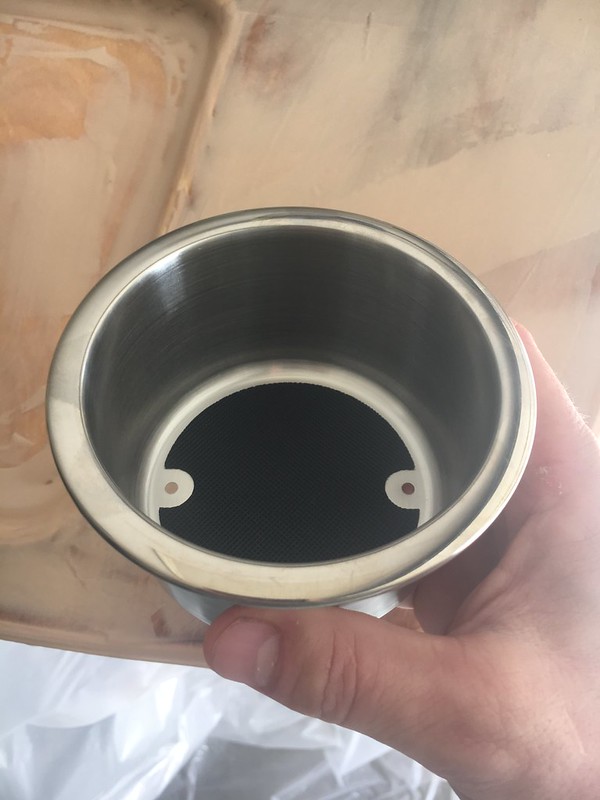
- as many rod holders as possible
- as many cup holders as possible
- as large of a rigging station as possible
- as much tackle storage as possible
- look good

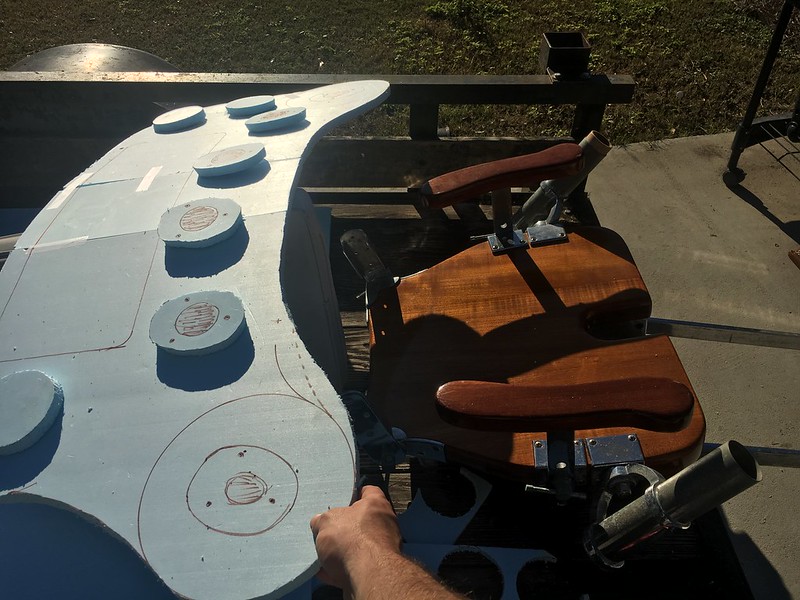
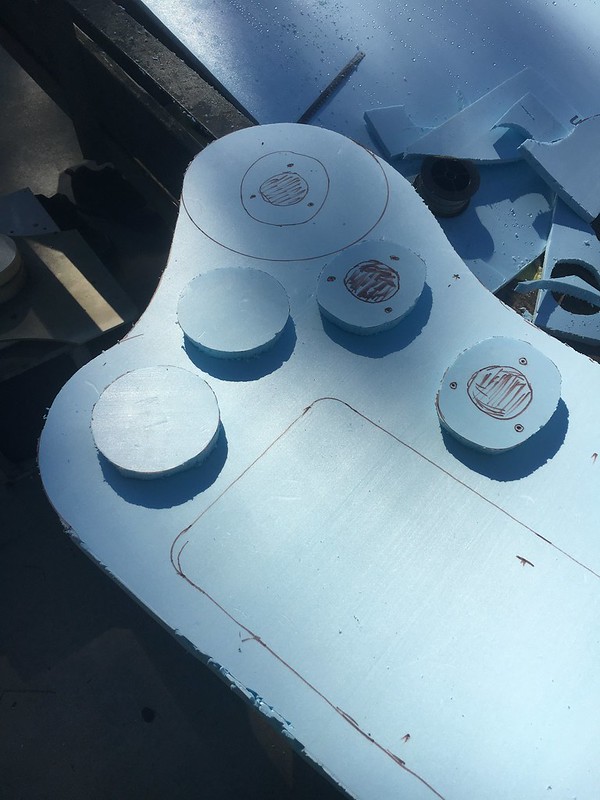
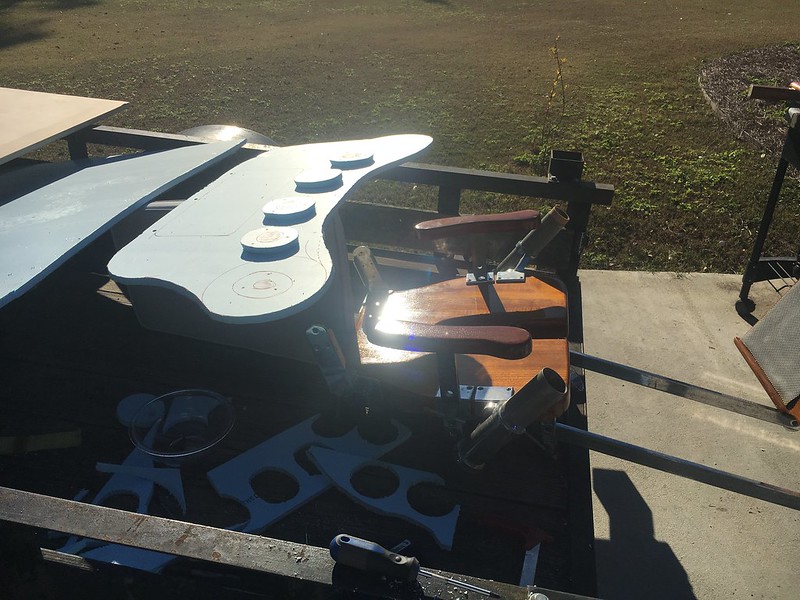
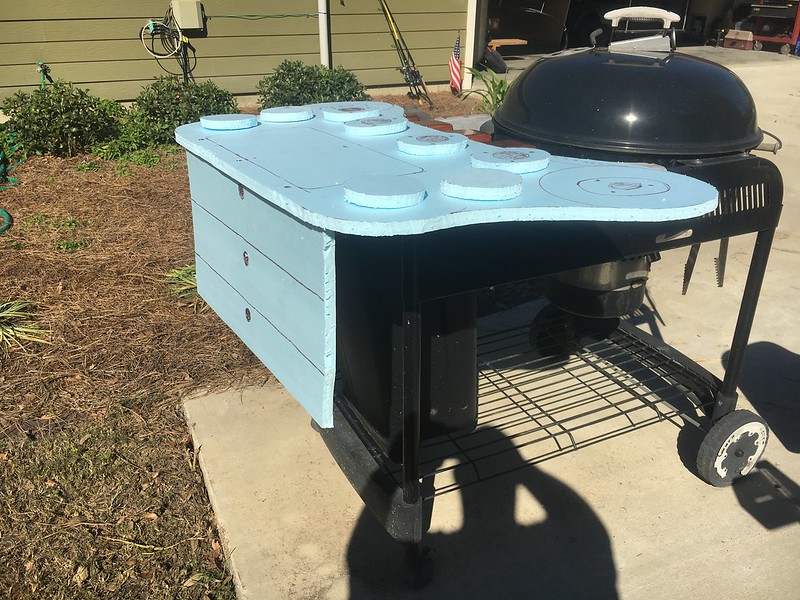
First up, I needed to mock something up. With nothing more than a general idea of what size/shape I wanted this thing I needed to mock up on something cheap. So I chose blue foam insulation at home depot. This was approx $13 for a 4x8 sheet.

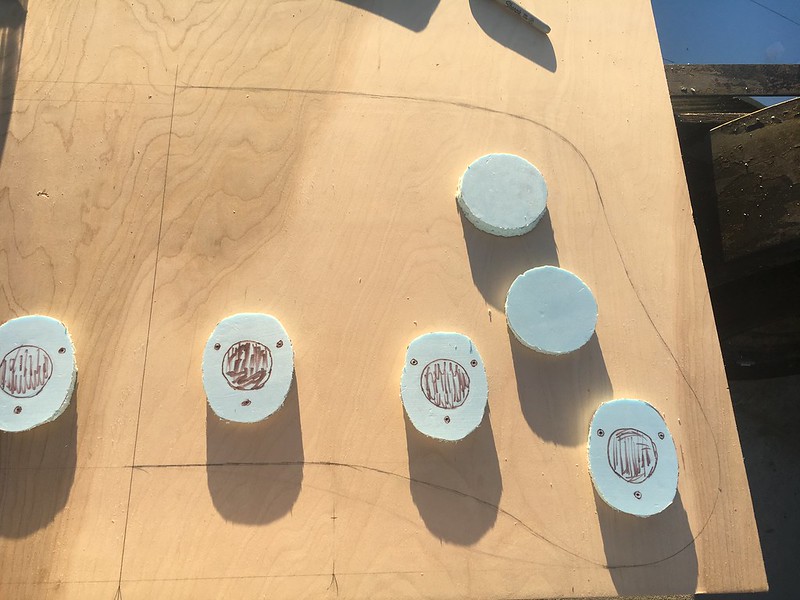
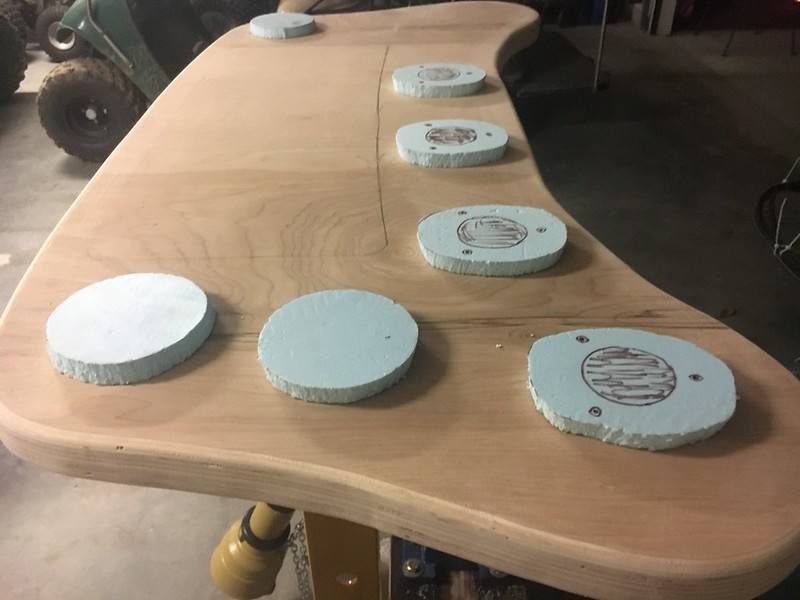
Cut up a couple of pieces before I got the general shape I was looking for. Traced and cut out discs to use for rod holders and cupholders


38550519310_c4b57a0a5e_c.jpg


Last edited:
After the mocking/comping I decided the rod holders were too close together. 2 choices, go from 6 to 4 rod holders.... or make the entire unit wider.... go big or go home baby!!! The added width makes the entire unit approx 47" wide. I sliced my foam piece up and taped a center section in to make the comp piece wider.


Transferring the design over to the birch plywood for cutting.


Two pieces cut


pieces screwed together temporarily, edges routed. More mocking/comping to make sure everytihng is good.
 
Last edited:
The tackle tray was cut out and the two pieces were laminated together using a high quality wood glue. Sorry, no pics of the laminating process. Basically squirt tons of glue, screw the two pieces together, clean up huge mess, lol.

After glue was cured time for some epoxy work.


Filling any gaps/holes in the plywood ends.


Very nice !

Thanks! Thinking the tackle drawers are going to be starboard and hope to use real teak on the drawer faces.

Got the first coat of fairing on yesterday!


Cupholders have arrived!


Yeah, we looked at those, but we use those cupholders to hold heavy weights and other misc stuff sometimes, and the fear was that the rod holder would be counterproductive b/c it would fall down inside the rod holders.
 
Pic from sanding/fairing.

 
Just a thought. Why not laminate pvc board or another core material that is rot proof instead of using wood. It's almost the same to shape it and would never rot.
 
Just a thought. Why not laminate pvc board or another core material that is rot proof instead of using wood. It's almost the same to shape it and would never rot.

There are multiple core materials that could have been used here. This piece will be fully encapsulated by epoxy and then painted, so it shouldn't rot, even if exposed. But it will be covered at all times when not in use, which should also lend to it not rotting.

I'm not a real big fan of the flexability of the pvc stuff. In this situation I wanted rigid and strength. There will be quite a considerable force put on this thing if an 80w drag is locked down on it while fishing. Plus people leaning/sitting/standing on it (even if they are not supposed to) Weight wasn't all that important for this project.

But to answer the original question. Wood is extremely strong/durable, locally available, cheap ($50 for a 4x8 piece of 3/4" birch), easy to work with, and if properly built/sealed will outlast me. For those reasons I felt it was the best core to use for this project.

Of course, my first plans were to use teak, but availability of quality teak was going to make it difficult to source and cost more than I felt was necessary.
 
Put some fiberglass cloth over it on top and bottom will make it last longer.
Bob
 
What's your plan to attach the bracket to the bottom of the launcher? That's where all the stress is. Btw, looks good.
 
What's your plan to attach the bracket to the bottom of the launcher? That's where all the stress is. Btw, looks good.

I've got a local welder that has done quite a bit of work for me. My plan was to take the chair and the top to him and have him custom build an overly sturdy bracket out of Stainless. I'll probably thru-bolt the top to the bracket. While I REALLY like the clean look of a top without bolts, I'm also a VERY big fan of thru-bolting.

I could also epoxy some tabs/blocks to the bottom of the rocket launcher to bolt the bracket to.
 
Countersink the bolts. That would work. Especially if you use nice stainless. You will be able to see the tops of the bolts but they won’t protrude.
 
We end up with a lot of gear hanging off the rocket launcher one of the most useful things on the boat. Keeps the tackle out of the way out of the spray and reddily accessible.
 

Attachments

  • IMG_0169.webp
    IMG_0169.webp
    51.4 KB · Views: 122
I've got a local welder that has done quite a bit of work for me. My plan was to take the chair and the top to him and have him custom build an overly sturdy bracket out of Stainless. I'll probably thru-bolt the top to the bracket. While I REALLY like the clean look of a top without bolts, I'm also a VERY big fan of thru-bolting.

I could also epoxy some tabs/blocks to the bottom of the rocket launcher to bolt the bracket to.

Or you could recess the carriage bolts and fill the holes with epoxy, especially if you're going to cover the top with cloth so the putty doesn't show when it shrinks. If you go that root make sure to scratch the hell out of the bolt heads.
Have a couple different chair launchers and all of them just have the bracket plate screwed in with probably #16 screws, not sure if they added epoxy in the holes or not when they screwed them in.
 
Another issue that might come up is the actual mount of the chair. Make sure the deck is reinforced for the weight and leverage the rods will put on it. My chair pedestal goes thru the deck and is mounted to the keel.
 
Looks great! Cannot wait to see more pictures.
 
Ok, guys, this project was kinda put on the back burner for a bit while other, more pressing items, were attended to. This past weekend we had a bluewater trip planned so I hacked the rocket launcher together enough to at least make it usable on the trip.

Since my last post here I took the groups advice and wrapped the entire thing in fiberglass biaxial cloth and west epoxy. I had not finished fairing yet, but with the trip coming I just sanded lightly (to remove any rough spots) and mounted the rod holders and cupholders.

All in all, it was fantastic, don't know how we could have managed without it. Honestly starting to think that we don't need the fighting chair at all, just the rocket launcher. In a perfect world it would be easy to switch between the two....

popping holes in her


right after install (excuse the mess we were in the process of packing boat up for an overnight trip


Couple notes moving forward.
- the tray needs a couple of drain holes. When it rains it fills up with water.
- 30" pedestal put it at a great height
- the thing is rock solid, but the screw/clamp that keeps it from spinning is a little weak, you have to really clamp down on it to keep it from spinning when bumped into.

Can't wait to see her faired and painted!!
 
Just wanted to take a min to update this build thread. Got a little behind posting pics so I'm just going to post them all, with details in the following posts.

This project was finished off in tandem with a couple of soft spots I was fixing at the same time. So as I was filling/sanding/fairing I was actually doing 3 different projects at once. This had it's benefits and it's drawbacks. First off it was hotter than hell with high humidity and high chances of rain. So my only chance at epoxy was usually in the morning hours after the dew lifted but before afternoon thunderstorms could form.

We fished one time with the rocket launcher in un-faired/un-painted condition. This was kinda a test run to make sure we had everything right. We did discover, rather quickly, that the tray needed drain holes, and that it would need a drain hole in each corner b/c at one time or another on the trip water pooled in all of the 4 corners, depending on the attitude of the boat.

We wrapped the top and bottom of the rocket launcher with biaxial cloth, and wrapped the edges with fiberglass cloth tape. Think i did 3 layers of tape on the edges.


I believe this was the final fairing
 

Forum statistics

Threads
38,154
Messages
448,708
Members
12,482
Latest member
UnaVida

Latest Posts

Trending content

Back
Top Bottom