kflod
Active member
- Joined
- Dec 9, 2013
- Messages
- 89
- Status
- OWNER - I own a Hatteras Yacht
- Hatteras Model
- 42' LRC - Mark II (1980 - 1985)
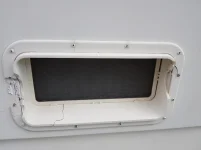
Hi,I'm in the prospect of replacing eight portlights on my 54MY 1989. None are lesning, but the PO obviously couldn't manouver very good as he broke most of the plastic trims.. I bought the original Fuller Busch here on Sam's and am ready to have a go. I've got a Fein and Pretty much all the tools, along with a sealant solvent. To be sure to do this correctly, I looked at i video I found on youtube; https://youtu.be/9yBaQr6LrZgFor me, it looks like it covers Pretty much all I need to do, but I still reaching out to this forum - are there any specific tips you could provide a rookie before taking on this job?Thanks, Kristian
")