Sam's is your source for Hatteras and Cabo Yacht parts.

Enter a part description OR part number to search the Hatteras/Cabo parts catalog:

Email Sam's or call 1-800-678-9230 to order parts.

Removing the oem Modern Mid stove/oven

  • Thread starter Thread starter MikeP
  • Start date Start date
  • Replies Replies 20
  • Views Views 10,653

MikeP

Legendary Member
Joined
Apr 12, 2005
Messages
8,674
Status
  1. OTHER
Hatteras Model
Not Currently A Hatteras Owner
I'm finally getting around to replacing the oem Modern Maid stove/oven combo with something current. Before I start seriously ripping things apart, does this thing easily disassemble in to manageable sections? I looks to me like it was installed in one piece originally and the galley then built around it.

I know lot's of folks have removed these things; how'd you do it?
 
Mike I replaced mine a few years back, if I recall correctly it was a simple removal. I think there was four screws that went in the side and it slide right out. I replaced it with a Princess ceramic top stove/oven that only required minor surgery to the trim. All in all a three hour job, of course I have a convertible and it may be a little different with yours.

Chris
Superior Nights 53C
 
One word. SAWSALL! Seriously, I cut all of my appliances with a sawsall and cut the refrig into three sections, oven into two pieces and the dishwasher into 3 pieces. My galley is up but it was still a challenge to remove and reinstall the new appliances. I had to widen the saloon door opening by 1.5" which enabled me to bring in an all refrigerator with the door removed. I installed a chest freezer below the pilot house seat (7 cu. ft). Get a few extra blades (metal cutting and demo blade) . Took me a couple of days to remove and reinstall the new appliances and build a cabinet to take the place of the DW (never used it and needed the storage). Good luck!
 
Thanks Chris - exactly right! there were 4 screws into the right side of the unit from a teak panel. The screws were underneath teak plugs. I had never noticed them. On the left there were four screws from the stove into the adjacent cabinet, visible when the cooktop was lifted, and one screw each on the base of the left and right into the floor. Once those screws were removed, the whole unit slid out. I can now disassemble/remove it from the galley. :)

That'll be tomorrow's project!

Thanks again.
 
One word. SAWSALL! Seriously, I cut all of my appliances with a sawsall and cut the refrig into three sections, oven into two pieces and the dishwasher into 3 pieces. My galley is up but it was still a challenge to remove and reinstall the new appliances. I had to widen the saloon door opening by 1.5" which enabled me to bring in an all refrigerator with the door removed. I installed a chest freezer below the pilot house seat (7 cu. ft). Get a few extra blades (metal cutting and demo blade) . Took me a couple of days to remove and reinstall the new appliances and build a cabinet to take the place of the DW (never used it and needed the storage). Good luck!

A bit off topic, but I am galley up with a galley remodel in my not way too distant future...could you not remove those appliances out the back door without having to cut them up? I wonder because I did a refrigerator swap-a-roo in under 10 minutes. Old one was off the boat and the new one in so fast that I lost track of time and forgot to take photos. I have a 4-foot wide doorway to remove stuff off the aft deck. Is yours not so? Just curious.

Mike P... 'bout time! LOL
 
I would do a saws all if I had to but I'd rather not due to the mess involved. I pulled the MM is forward and the whole thing can be disassembled (lots of screws but with a power driver, no time at all) to easily break it down to manageable bits to go up the galley stairs - out the door.

ANG - yes, I guess it is about time. The old MM was working perfectly - heck, works better than our stove/oven at home - but the SS cooktop was getting pitted/rusted and nothing was reviving it. It was Looking pretty tatty. Besides the appearance of the cooktop, the whole unit looks, of course, decidedly dated. The Admiral pointed out that the engine rooms looked better than that stove! :)
 
Stove's out and sitting on dock. Took about an hour to pull it out from wall, disassemble and carry it out. Here it is pulled out from the wall P5262047.webp and here in pieces on the dock P5262052.webp
 
Angela,
My Hatt was originally a 61 with a separate pocket door between the saloon, pilothouse and the galley. The pocket door openings were 22.5 inches wide and I increased the width by 1.5" to allow the refrig without the door to grease through. I had to cut up the appliances to get them through the pocket opening as I did not want to remove a window and all of the associated removals that go with taking out a window. My aft saloon door is 4' wide also but I had to get by the pocket door first. I ended up with a convection MW, glass cooktop (with cabinet storage below) and a new all refrigerator (freezer is in the pilot house seat 7cu ft). We added a toaster oven on the counter to do quick cooking and it does not heat the kitchen up like a regular oven would. All n all we are very happy with our mini remodel. After our Bahama cruise we are thinking about new wallcoverings and new floors (wood, eng. wood, vinyl ?????).
 
My turn. The beast is coming out in the next few weeks.

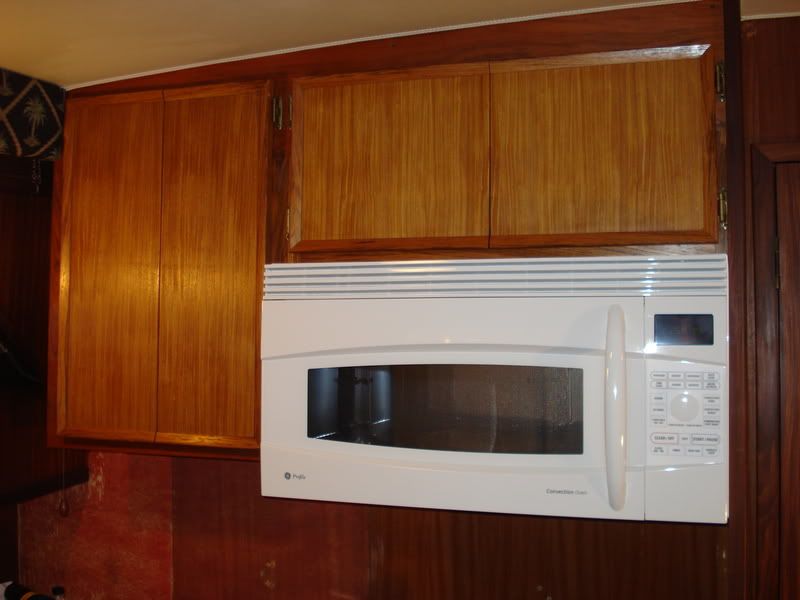
Are there any tricks to venting a new over-the-range microwave vent hood? I suppose I will need to remove the fan from the flybridge and replace or repair the duct?
 
Yep. One needs to be creative with making a transition piece to join the new MW vent outlet to the duct ( at least for my install). I made an offset transition to connect the two. Companies like ABC Supply can make transitions or any metal fab shop. Just a little head scratching is what it takes.
 
Bear in mind that your new microwave will need to be mounted lower than where the top of the old oven was in existing cabinetry. Unless of course your chef is 6' 14" tall.
 
Bear in mind that your new microwave will need to be mounted lower than where the top of the old oven was in existing cabinetry. Unless of course your chef is 6' 14" tall.

Good point. I have seen too many that forget that.

There is room for some storage up there.
stabilizerandspotlight057.jpg
 
"Bear in mind that your new microwave will need to be mounted lower than where the top of the old oven was in existing cabinetry. Unless of course your chef is 6' 14" tall"

Actually, if the chef(s) are at least 5'10", you can mount an oven at that point. That's what we did - mounted the new oven where the old vent was. My mother-in-law would have difficulty with it but we don't! :)
 
Beautiful work Sky, I'm inspired. Keep those ideas coming!
 
I would do a saws all if I had to but I'd rather not due to the mess involved. I pulled the MM is forward and the whole thing can be disassembled (lots of screws but with a power driver, no time at all) to easily break it down to manageable bits to go up the galley stairs - out the door.

ANG - yes, I guess it is about time. The old MM was working perfectly - heck, works better than our stove/oven at home - but the SS cooktop was getting pitted/rusted and nothing was reviving it. It was Looking pretty tatty. Besides the appearance of the cooktop, the whole unit looks, of course, decidedly dated. The Admiral pointed out that the engine rooms looked better than that stove! :)

Mike, for what it's worth, a few years ago I Imroned the stainless cook top and the panel behind it. It is still in good shape and looks nearly new. I was surprised at how well the Imron stood up to the heat, we feed the whole raft up alot of the time.

JM
 
I am trying to remove a Modern Maid oven unit from my 53ed. Galley down. I have managed to get the dishwasher out and the cooktop but I am having trouble getting the oven and the frame that surrounds the dishwasher, cooktop and oven out. I undid the the three screws on the left in the cooktop pan but there seems to be another screw holding it further up but I cannot find it. The unit is loose on the right side but there seems to be one screw holding it in the area of the oven on the left. Has anyone had any experience with this? I saw a post months ago with picture of the removal but I don't recall any discussion of removing screws other than the one om the left side of the cooktop pan.

Help please.
 
Did you see post 4 of this thread describing the screw locations I found in our 53MY? I would expect they are the same for your 53. Then again, who knows what the stove installers did on any particular day? :)
 
Hi Dave;I can post some photos of how we handled it on Chartmaker tomorrow if you're interested. I had a whole additional cabinet made with a pass-through for the vent. It also gave us a pace the run additional electric for the convection/microwave. We we very satisfied with how it came out. I have a few photos already in the gallery here of our galley refit.Chuck B.
My turn. The beast is coming out in the next few weeks.Are there any tricks to venting a new over-the-range microwave vent hood? I suppose I will need to remove the fan from the flybridge and replace or repair the duct?
 
My turn. The beast is coming out in the next few weeks.

Are there any tricks to venting a new over-the-range microwave vent hood? I suppose I will need to remove the fan from the flybridge and replace or repair the duct?

Hi David - our over-the-range vent hood pulls the air through a grease filter and blows it right back into the galley! I'd love to re-direct it out the flybridge blower (especially to get rid of some of the heat that builds up). Did you have any luck with this? Also, where is the switch that powers the blower in the FB? Thanks!
Jerry
 
Jerry, I installed a combination microwave range hood, removed the blower from the upper station and connected the microwave vent to the old vent in the upper station. The switch for the original blower was in the original galley maid oven.
 

Forum statistics

Threads
38,156
Messages
448,741
Members
12,482
Latest member
UnaVida

Latest Posts

Trending content

Back
Top Bottom