Sam's is your source for Hatteras and Cabo Yacht parts.

Enter a part description OR part number to search the Hatteras/Cabo parts catalog:

Email Sam's or call 1-800-678-9230 to order parts.

Lower Station Instrument Console

  • Thread starter Thread starter Pete
  • Start date Start date
  • Replies Replies 13
  • Views Views 6,646

Pete

Legendary Member
Joined
Apr 12, 2005
Messages
1,167
Status
  1. OWNER - I own a Hatteras Yacht
Hatteras Model
48' LRC (1976 - 1981)
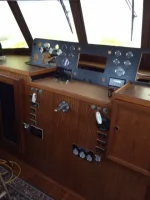
In the early nineties and late eighties, Hatteras covered their raised instrument consoles with a medium beige vinyl material. Per the prior owner, when the lower console was redone in the mid nineties on our 1976 48 LRC, a raised instrument console, manufactured for a 70 motor yacht was installed with this beige vinyl covering. For whatever reason after 20 years that material has lost all it's tension and now looks like a loose fitting cover.

So, it is replacement time, and I am just getting started. At this time I am wondering if anyone in the forum has had experience with this material. It is very thin (.021"), and appears to be a vinyl coating, with a compressed paper backing. Also, appears to have had some stretching characteristics which I am sure aided with the compound curves that are covered.

BTW, it is stapled on the edges with no glue used. Was happy to see that. The recovering job has to be done in place as whoever did the upgrade believed in wood glue. Any info on the material and where some might be found would be appreciated. Did not see anything on SAM'S part list, and he is on my call list next.

Thanks

Pete
 
A local kitchen top shop could fabricate a black Formica overlay.

There are companies that fabricate custom panels out of any material you choose. I seem to recall one that has free software to download to design it.
 
Im sure an upholstery shop can do it. Find one that does custom hot rod and car work.
 
The mystery of the ever loosening vinyl covering on my instrument panel in the pilot house of our 48 LRC is now understood.

Bet you did not know, as I did not, one of the features of foam backed marine vinyl, is at 20 years of age the foam magically turns to dust. Do not remember seeing this advertised as a feature of this fine material.

So what I am experiencing is exactly what I should have expected, and I have now started the removal process and sure enough, lots of yellow dust, about the size of white table sugar, but nothing resembling foam.

So, the vinyl did not stretch, the "lofting" that provided the soft spongy feel just went away, sort of like loosing weight and having your cloths start to look baggy.

I suspect there are a few members that have this same experience or something close to look forward to. My condolences.

Pete
 
Been almost a month since the sagging vinyl on the lower steering station made itself obvious. For more details, refer to the initial posting. Since then I have tried all know approaches, from steam, to heat guns, to boiling hot towels, to retension the vinyl, all with no noticeable improvement. So a couple weeks back, I pulled the trigger and decided that replacement was the only cure for the problem.

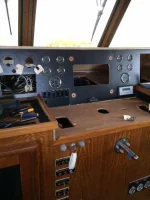
So, here is a short update, with some pictures as to where the project stands today. First is the evidence of the problem, looking across the top of the raised instrument console. That vinyl should look smooth and tight, not like a wet towel.

IMG_0517.webp

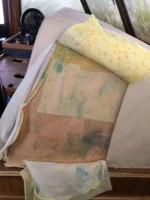
Second picture is the removal state required to get all the old vinyl off and to have the space to get a pneumatic stapler where it will have to be to install the new material. Note that all horizontal unfinished surfaced had the same vinyl with the same problem, but have already been prepared for restoration.

IMG_0519.webp

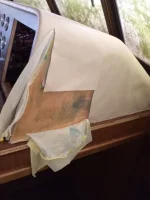
Third picture is the starboard side of the raised instrument cluster at the start of removing its vinyl. The layers from the inside out are: the wooden base of the instrument cluster, with some green glue still evident and sticky, followed by a fabric that had the foam fused to it, next is some totally gone foam that crumbles as you touch it and is super sticky also, followed by the fabric backing off the vinyl and finally the actual vinyl. Not sure what caused everything to degrade into its original parts and turn to ashes.

IMG_0520.webp

Next step is the complete the removal of all the foam from the instrument cluster included removing the glue with 3M adhesive remover. Then will come the most challenging task of installing new padding and vinyl on the instrument cluster without being able to take it off to wrap the edges for stapling. It is caulked, glued, and screwed down.

Pete
 
Have you considered replacing with veneer?

Bobk
 
The frame to be recovered has outside compound curves that I do not believe can be covered with veneer.

Maybe there is a way to do it, but this would be way beyond my skill level and available tools.

Pete
 
Right, you'd have to take the entire console apart and vacuum-bag the veneer on- huge headache. And the vinyl lasted a long time, although not long enough. If you didn't want to use vinyl, it would be easier to strip and prep it and paint it.

I'd do exactly what you are doing- try and get back to original as well as I could.
 
The frame to be recovered has outside compound curves that I do not believe can be covered with veneer.

Maybe there is a way to do it, but this would be way beyond my skill level and available tools.

Pete

Pete, I didn't see the compound curves in your pictures. If you can post one, perhaps the wood workers here can offer a solution presuming you would be OK with it. Formica can also be bent with heat and patience.

BTW, the foam behind the vinyl is probably a polyurethane and it has disintegrated over the years due to heat and perhaps UV light penetrating the vinyl skin.

Bobk
 
Let me first respond to Bob with the picture below of the starboard compound curve and just add that there is a port version on the opposite end.

IMG_0516.webp

And a follow up to Bob's failure analysis on the old foam. I just happen to be checking my work shop inventory for the tools I think I will need to do the reinstallation and came across an interesting find. Probably 6-8 years ago I purchased some West foam roller covers for fiberglass work with their epoxy. I came across two sealed packs of two rollers each and an open pack with one roller cover left. They were store high up on a shelf which has climate control and two sash windows with "low-e" glass. I would estimate the lowest temperature ever at 50 degrees F and the highest at the low 90's. Totally dry with a dehumidifier keeping the moisture around 50% to help with tool rust.

What to my amazement did I find, the two sealed packages look like I remember. The one roller in the open pack, was a little darker yellow. So I slid it out of the plastic bag and presto, the foam on the roller was just like what I found on my steering console. It had turned to sticky dust, totally separated from the core, and all you have to do is just lightly touch the remains with your finger and it falls off. And yes, the packaging identifies the material as polyurethane foam.

To say I am becoming a person who really dislikes polyurethane foam would be the understatement of the day. Absolute trash that should be required to identify the expected useful life of the products.

Pete
 
Is the frame made decently enough to fiberglass and paint? Or maybe just paint? A textured paint like Kiwi or similar can hide a lot of sins.
 
Let me first respond to Bob with the picture below of the starboard compound curve and just add that there is a port version on the opposite end.

View attachment 22733

Pete

Ahah, now I see the problem. It could be done in veneer if you could fabricate wood moldings for the corners. Not a terribly big job for a wood shop, but routine varnishing would also be a PITA.

Check these guys for a stretchable replacement vinyl. Apply like wallpaper? Trim the inside edge at the instrument panel with flexible quarter round molding if you can't disassemble it easily.
https://www.marinevinylfabric.com

But that said, as Jim suggested, painting might be the easiest solution....or paint on a wood grain. Most paint stores can sell the proper paints and tools. Getting the rounded corners to look good will take some practice.

Bobk
 
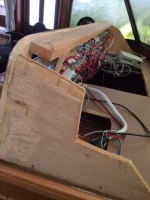
Been working on the lower console renovation a long time, with slow progress, but over time it adds up. Below are a couple of pictures of the low point in the renovation, all the chisel and saw work donne and cleaned up, ready to start putting it back together. Big change is new vinyl covering, with less extensive fine tuning of the dimensions of the pieces to get a better fit and finish.

1.webp

2.webp

Note that the console cover that had me challenged was remove in the final analysis, and the next post will have a couple of pictures of its current situation.

Pete
 
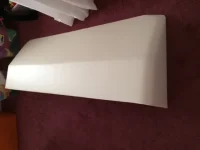
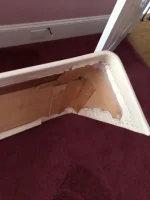
These pictures show the console cover recovered with Uniroyal Universal Naugahyde sitting on the floor of the guest bedroom. The Admiral was thrilled at this idea, really thrilled. She calls it "boat creep everywhere". The color was chosen to match the material and color of the built in table and seating in the rear of the pilothouse (not shown). The second picture shows the construction of the console cover and just how many staples you can use if you put your mind to it.

3.webp

4.webp

Lessons learned, be careful with a heat gun and vinyl, but with a lot of clamps, a good heat gun, and patience, you can stretch Naugahyde around compound curves.

FWIW, I found the Sailrite web site very helpful from videos, to tools, to advice. For full disclosure, I do not have any financial interest in the site, do not know the people that operate it, have never met with any employees or owners, etc.. These days you do not want to spark a federal investigation of your contacts.

Pete
 

Forum statistics

Threads
38,154
Messages
448,708
Members
12,482
Latest member
UnaVida

Latest Posts

Trending content

Back
Top Bottom