spartonboat1
Legendary Member
- Joined
- Apr 15, 2005
- Messages
- 2,494
- Hatteras Model
- 43' DOUBLE CABIN (1970 - 1984)
I have just finished pulling the window frames on one side of the salon of my 1972 43'DCFB. As they say, they were "really in there"; about three days of major grunting! Mostly a high effort of dragging out hardened caulking...good aerobic workout.
I must say that the quality of the fabrication of these frames is just beautiful, as least to me. They are strong, as I was stressing them pretty good, while removing them and they didn't bend (thank god)...
So hats off (pun there good I guess) to whoever built them. They were good so was their product.
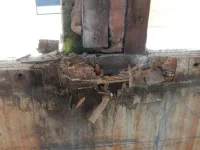
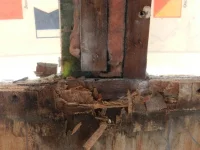
Update: 7/6/2014: Comment: this is a very time and energy consuming task, if done right. Note: This post assumes that the wood panel and internal wood structures have been rotted by years of leaking caulk.
Below, as Project Manager, here is my WBS (work breakdown structure). My entries were indented, but the indent is lost when saved.
Full Task - Port side salon Windows:
1) Pull all windows frames (3),
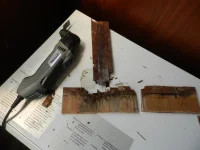
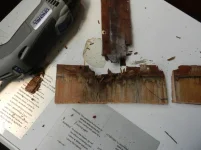
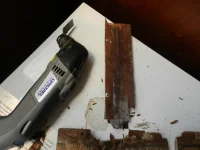
1a) This can be a major effort: Judicious use of a Fein, or Dremel recip tool (don't damage the frame or the anodizing) can be a major time/effort (major) saver.
1b) Pull out the outer frame; easier said than done!
2) Strip all frames of old caulk,
3) Replace sliding glass fuzz, gliding slides, (center frame)
4) Obtain replacement windows (4)
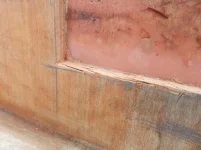
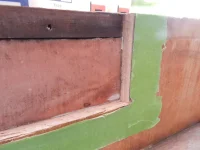
5) Inspect existing window openings in salon:
5a)fiberglass of salon and
5b) interior wood conponent
6) Bad OEM configuration: Install new wood, epoxied in, where OEM fitment was missing bad (Bubba factor)
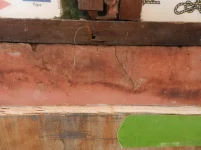
7) Replace rotted wood:
7a) Cut out bad wood
7b) Choose replacement wood:
7b.1) birch 3/8" marine/exterior grade plywood with special glues; stain to suit
7b.2) Oak 1/8" x 1" (? need to check dims)
8) Create new sections of wood
8a) Epoxy in new wood
8b) Cure epoxy
9) Pre-fit inner frame for correct fit,
9a) Drill pilot holes for new wood or where wood had not existed (screws did not have substrate)
9b) Install inner frame and screws
9c) Do "try-out" of outer frames, into the inner frames;
9d.1) make any adjustments for good fit- sanding or cutting of wood with Dremels/Fein, etc.
10) Install glass in frames: frames are laid out flat on salon floor in this case
10a) Install black foam (Sam's source) as bed for glass
10b) Lay in glass:
10b.1) Note: Good tool to lift glass is Bondo brand suction tool for pulling auto sheet metal dents
10c) Lift glass and center in frame nominal (as close as can)
10d) Cut gray gasketing for frame (Sam's source- perfect fit)
10d.1) Note: My approach was not to fit corner to corner
10d.2) Note2: Instead I "overlapped": gaskets fit so bottom gasket is overlapped by gasket above
and top gasket, as highest, overlaps the next down. Also easier to cut and fit.
10d.3) Cut so was about a 30 deg overlap
10e) Caulk frame with Sikaflex 291 (best for metal to glass), before install gasket (my approach)
10e.1) Note: 3M 4200 not best for glass, but instead used for frame to fiberglass & wood
10f) Play in the gasketing, installing "keepers" for glass, as roll in the gasket
10g) Order of gaskets: lowest in frame, next up, then top of frame: to allow overlapping
10h) Set aside to allow caulk to cure
11) Install inside frames:
11a) Note: outer frame with glass "inserts" into the inner frame that insert into the salon window openings
11b) Note2: The inner and outer framer do not "need" to be caulked to each other, as the outer frame should be well sealed, when caulked to the salon sides. However, if some caulk seeps between them, they become a sandwich, which increased their strength. So I applied enough caulk so that the two frames would be caulked to each other.
11c) Pre-caulk the inner frame to the salon window opening. Pull frame slightly out of opening to expose a little wood and the fiberglass. Apply caulk
11c.1) Note: Purpose is to seal wood, in case some water gets past the outer caulk in the future
11d) Push inner frame home to inside panel
11e) Install all screws to frame into wood panels or into sections of wood epoxied in earlier
11f) Installation of inner frames is complete
12) Install Outer Frames & Glass
12a) Lay down frame
12b) Caulk frame using 3M4000FC (fast cure- so be ready to work on steady basis!)
12c) Lift into inner frame and push into frame; should slide right in
12d) Install screws:
12d.1) I tried "new" SS Philips Head screws, but found the original Al Bugle head screws worked better!
12d.2) As screws are tightened the frame will be pulled to the salon sides
12d.3) Esp. interested is that the vertical bar on either end of the center window, will stop "bowing" out, as it was, when the frames were out. It will become "straight" with the frames installed and tightened.
12d.4) Also interesting is that my locker door adjacent to the aft cabin door, stopped sticking and jamming, as it did with frames out. With the frames re-installed, that locker door closed smoothly!
Last edited:

