


As I understand it, less than full-time work is the new norm. Knock yourself out, Jim!
That ER on Liberty sure looked good...on par with Weaver's boats.
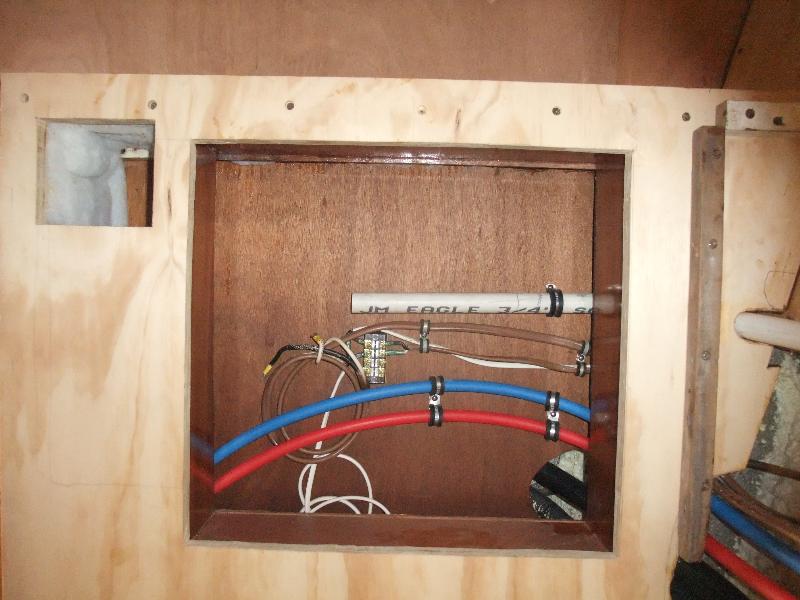
But back to the refit, I finally got around to installing the V-berth head wall panel and cabinet. Insulating the backside of every plywood panel adds a lot of time to the construction process, since once the sticky epoxy is laid on there's not much more you can do with the pieces until it's cured. Still, I think it will be worth it in the end. I also got the sink drain line, PEX water pipes, and 120vac and 12vdc wiring permanently installed.
1969 Chris Craft Roamer 46 Refit: Throne Room Wiring, Plumbing, and Final Panel Install
Cheers,
Q
This one's for Doubting Oscar.
Welcome to the Hatteras Owners Forum & Gallery. Sign Up or Login
+ Reply to Thread
Results 601 to 610 of 1855
Thread: 1969 Chris Craft Roamer 46 refit
-
05-03-2016 08:59 AM #601
- Join Date
- Nov 2008
- Posts
- 1,677
Re: 1969 Chris Craft Roamer 46 refit
-
Re: 1969 Chris Craft Roamer 46 refit
Nice as always. If we ever get some decent weather I'm going to drive down and treat myself to a tour of your boat.
I still work full time, I'd just rather goof off.
-
05-05-2016 08:48 AM #603
- Join Date
- Nov 2008
- Posts
- 1,677
Re: 1969 Chris Craft Roamer 46 refit
I'm getting to the point where I'd like to goof off, too. I can feel a minor case of project burnout setting in.
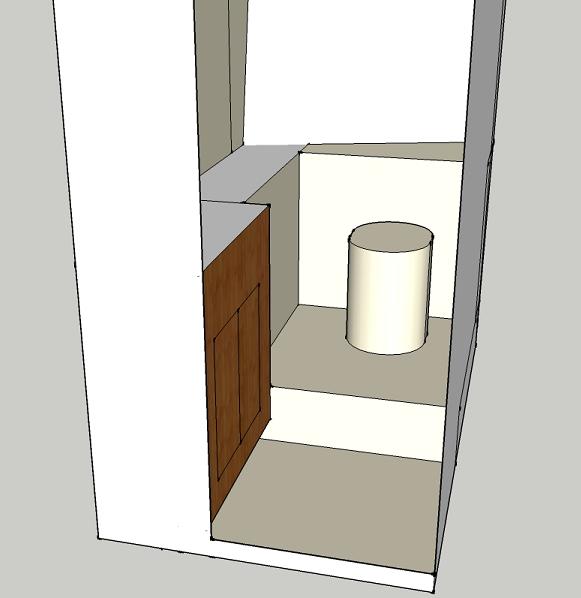
I got the toilet (AKA throne) dais installed and was ready to cut the last wall panel when I realized that the mahogany plywood I needed was way down on the bottom of the plywood stack in the salon. I need to move the stack to the other side of the salon to get the panel I need, but my tracksaw table is taking up that space. Normally, I'd just move the table to the galley, but the floor is still removed there and the forward fuel tank is sitting where the tracksaw would go. Before I can put the fuel tank back in place and finish that installation, I need to replace the temporary 2x4 floor supports with aluminum angle and insulate the underside of the floors. There's no way to do that stuff once the fuel tank and floors are back in position. So, I now have a whole bunch of other stuff I need to do before I can cut and install the last wall for the Throne Room. And I'm doing all this work in there so I can install the portholes to keep out the Chesapeake when I [hopefully] splash the boat later this year and run it around to my home port.
It's all work that needs to be done, but I do wish I'd foreseen this when I stacked the plywood. This little hitch is making it less and less likely that I can splash this year. I'm not giving up yet, though.
1969 Chris Craft Roamer 46 Refit: Throne Dias Install
Cheers,
Q

-
05-05-2016 02:16 PM #604
- Join Date
- Oct 2015
- Posts
- 2,926
Re: 1969 Chris Craft Roamer 46 refit
Have a beer or three. Be more motivated tomorrow.
1978 53' Motor Yacht "LADY KAY V"
Hull number 524
Chesapeake Bay
-
05-10-2016 11:09 AM #605
- Join Date
- Nov 2008
- Posts
- 1,677
Re: 1969 Chris Craft Roamer 46 refit
Three beers didn't do the trick. Rum didn't either. Couple shots of Jagermeister didn't help, but by that time I really didn't care anymore.

I find that my attitude tracks closely with the degree to which things go smoothly and boxes on the Honey-do list get checked off. Fortunately, things went pretty well over the weekend, though most of what I'm doing now is stuff I didn't plan to do until much later, after the boat gets splashed. Still, there's an order of operations and that order has to be followed even if chance/bad planning add steps between A, B, and C.
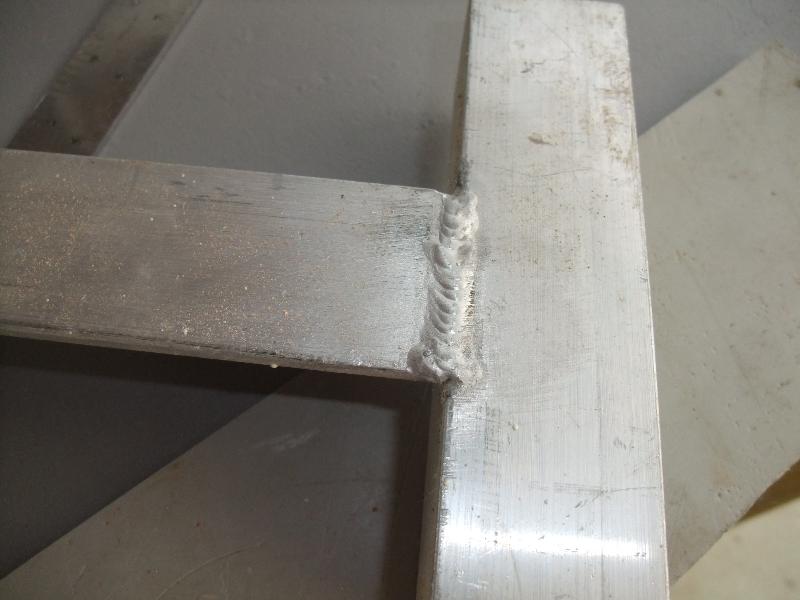
To get to that last piece of plywood for the Throne Room, which is on the bottom of the plywood stack in the salon, I've got to do a bunch of other stuff on the honey-do list. One of those things was installing the permanent galley floor supports. I had a "professional welder" put them together a year or two ago. The welds are solid but not very pretty...kinda like what mine look like! I'm sure they'll work fine, and they're lots better than the temporary supports made from 2x4s.
1969 Chris Craft Roamer 46 Refit: Galley Floor Supports
Cheers,
Q
-
05-12-2016 08:02 PM #606
- Join Date
- Nov 2008
- Posts
- 1,677
Re: 1969 Chris Craft Roamer 46 refit
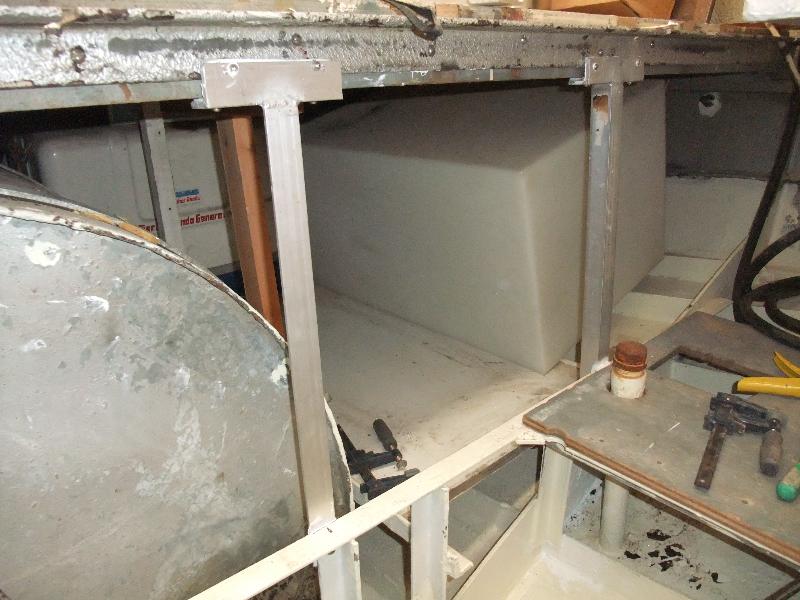
I welded some tabs on the forward tank, epoxy coated it, and finished its installation by bolting it to the corresponding tabs on the cradle. Then I insulated the under-side of the galley floors and the back-side of the bulkhead, and finished installing the floors there.
Those tab welds are not not as beautiful as I'd like. But compared to what the pros in my area do for $70/hr, I figured this isn't too bad. And I adhere to the notion that if you don't weld well...weld lots. So instead of just stitching the tabs like the OE tank manufacturer did, I put a bead all the way around.
1969 Chris Craft Roamer 46 Refit: Forward Fuel Tank Tabs and Insulation
Cheers,
Q
dscf8798.jpg
dscf8801.jpg
-
Re: 1969 Chris Craft Roamer 46 refit
Nice work. Is that where the fridge is going to be, or is it just hanging out there?
-
05-13-2016 01:03 AM #608
- Join Date
- Nov 2008
- Posts
- 1,677
Re: 1969 Chris Craft Roamer 46 refit
Thanks!
But I am soooo sick of moving that danged fridge around...
It's final resting place will be directly centered over the keel, in the middle of the bow seat window that opens.
-
05-18-2016 09:32 AM #609
- Join Date
- Nov 2008
- Posts
- 1,677
Re: 1969 Chris Craft Roamer 46 refit
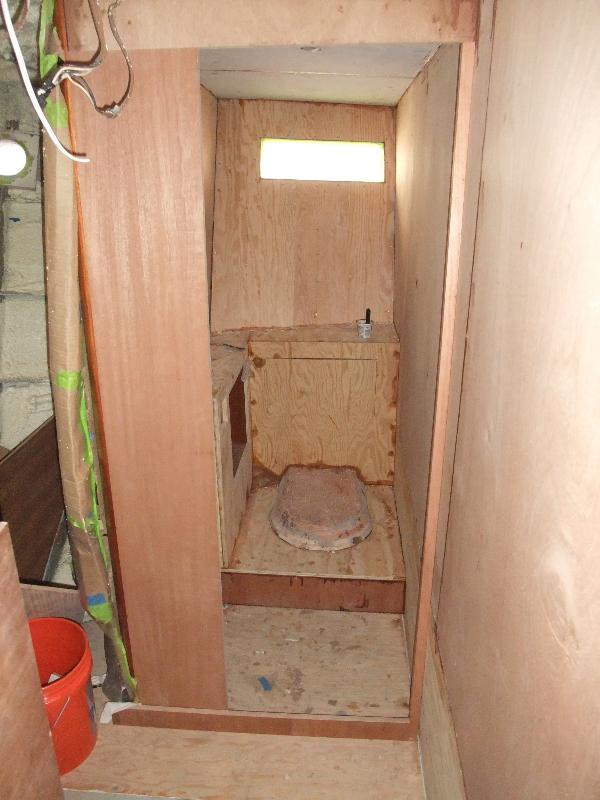
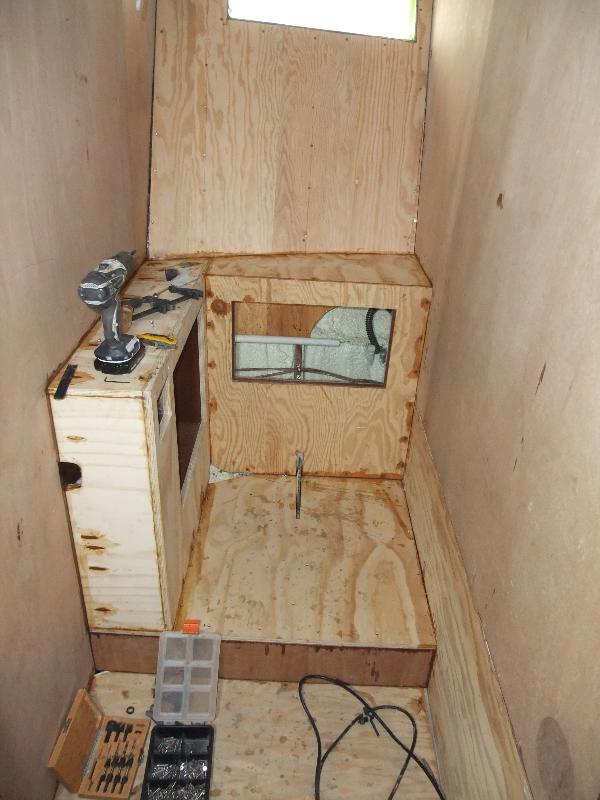
With the galley floors back in, I moved the track saw from the salon, then moved the plywood stack from one side of the salon to the other so I could get to that one piece of 3/4" mahogany plywood I needed to finish up the V-berth head. What a slog that was! But it's finally done and I'm getting close to finishing up the wood work, after which the fiberglass and painting crew will come in and turn the V-berth head into a big shower room.
1969 Chris Craft Roamer 46 Refit: Final "Throne Room" Wall Panel
Cheers,
Q
It's looking like the plan!
-
05-19-2016 10:31 AM #610
- Join Date
- Oct 2015
- Posts
- 2,926
Re: 1969 Chris Craft Roamer 46 refit
Love the "can".......
1978 53' Motor Yacht "LADY KAY V"
Hull number 524
Chesapeake Bay
 Reply With Quote
Tags for this Thread
 Posting Permissions
- You may not post new threads
- You may not post replies
- You may not post attachments
- You may not edit your posts
