


Oh yeah it will be a Huge difference for getting out of the tent I remember that well 15 years ago and wish I had it again thoughOriginally Posted by q240z


Welcome to the Hatteras Owners Forum & Gallery. Sign Up or Login
+ Reply to Thread
Results 581 to 590 of 1855
Thread: 1969 Chris Craft Roamer 46 refit
-
Re: 1969 Chris Craft Roamer 46 refit
Dan
End Of The Line II
1967 34C
EOTL II Rebuild Web Page
><(((º>´¯`.¸¸.´¯`.¸¸><((((º>`.¸¸.´¯`.¸><(( (( º>¸¸.´¯`.¸¸¸><(((º>
-
04-04-2016 02:32 PM #582
- Join Date
- Oct 2015
- Posts
- 2,926
Re: 1969 Chris Craft Roamer 46 refit
I'll bring a flatbed trailer to haul your car. Originally Posted by q240z
1978 53' Motor Yacht "LADY KAY V"
Hull number 524
Chesapeake Bay
-
04-07-2016 07:18 AM #583
- Join Date
- Nov 2008
- Posts
- 1,677
Re: 1969 Chris Craft Roamer 46 refit
Excellent.
I finally got the V-berth head side cabinet ready to install, but to wrap it up I had to install the sink plumbing. I've got all of the materials lined up for the head--1708 fiberglass cloth, epoxy, that super expensive waterproof filler, and Awlgrip products for priming and painting. Unfortunately, winter temporarily returned and it's too cold to do fiberglass work this week. Hopefully, it'll warm up next week and we can get back on it.
In the meantime, I'm getting more bench time with my new AHP AlphaTIG. My beads are looking better, now that I've got a variety of tunstens and filler rods to work with. The 1/16" tungsten that came with it was just too small for the aluminum I've got. 3/32" tungsten with 1/16" or even 1/8" 4043 filler on lap and T joints using 1/8" 5052 plate scraps is working out pretty well. And they say old dogs can't learn new tricks. Practice, practice, practice...
1969 Chris Craft Roamer 46 Refit: The V-berth Throne Room Plumbing
Cheers,
Q

-
04-13-2016 08:48 AM #584
- Join Date
- Nov 2008
- Posts
- 1,677
Re: 1969 Chris Craft Roamer 46 refit
I found an old article in my draft folder that I forgot to post last year, so this is just playing catch-up. Things are still moving forward on a lot of fronts. I haven't given up on splashing later this year...yet.
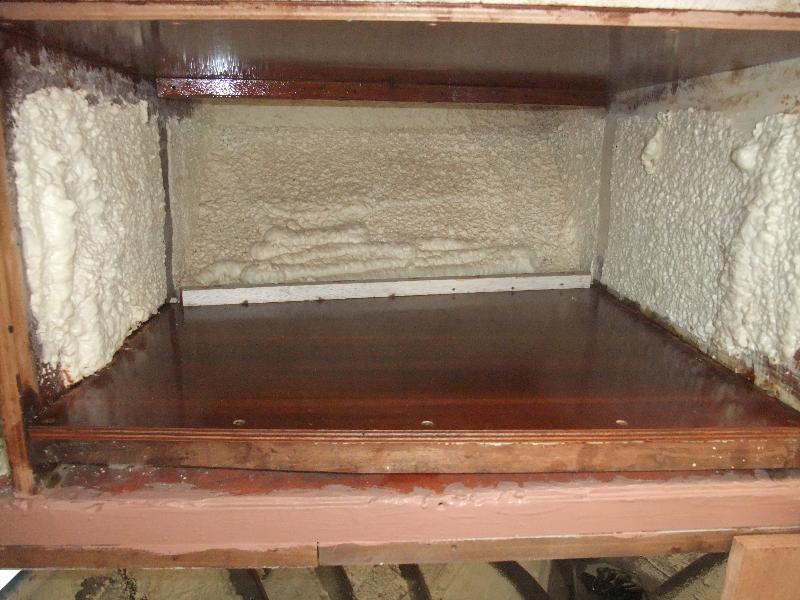
On that old draft post, I started making the galley storage and was pretty far along when I decided mahogany tambour (roll-top) doors would be a lot better than sliders or hinged doors. After looking around online, it looks like the doors won't be hard to make. Since I really want to get the boat out of this yard this year, I put the galley storage part of the project on hold with a couple of panels installed. In the meantime, I've added tambour door construction to the list of things I'm mulling over.
1969 Chris Craft Roamer 46 Refit: Galley Storage
Cheers,
Q
-
04-14-2016 09:40 AM #585
- Join Date
- Nov 2008
- Posts
- 1,677
Re: 1969 Chris Craft Roamer 46 refit
Shifting back to current goings on, I'm working on the exhaust system now. I need to come up with a guide system for my bandsaw to make straight cuts on the 4" and 6" stainless tubing for the riser. When I cut the 1-1/2" tubing for the fuel fill lines, my new HF bandsaw started straight then skewed off a bit once it hit the halfway point. Since fit up is critical for welding tubing, I'd rather not have to do a bunch of grinding and sanding to get the cuts square. If anybody has suggestions on a bandsaw blade guide, I'm all ears.
In the meantime, I've got to get the mufflers and elbows in so I know where to point the riser after the turn down to the showerhead. And that means I've got to put the anti-crush sleeves in the fiberglass tubes so they don't fail when I tighten the hose clamps.
1969 Chris Craft Roamer 46 Refit: Reinforcing the Exhaust Parts
Cheers,
Q

-
04-19-2016 11:37 AM #586
- Join Date
- Nov 2008
- Posts
- 1,677
Re: 1969 Chris Craft Roamer 46 refit
I did my best on some very challenging out-of-position welding, relocating and plugging fuel tank fills. As a rank amateur, welding fillets while sort of hanging upside down looking up at the underside of the pipe was right up there as one of the toughest things I've done. It's not even close to stack 'o dimes work, but the welds are fused well all around.
1969 Chris Craft Roamer 46 Refit: Relocating the Fuel Tank Fills
Cheers
Q
First, a comparison of a $70/hr "professional" welder's work and my own practice beads. Guess which is which.

And a capped and relocated tank fill

-
04-21-2016 10:37 AM #587
- Join Date
- Nov 2008
- Posts
- 1,677
Re: 1969 Chris Craft Roamer 46 refit
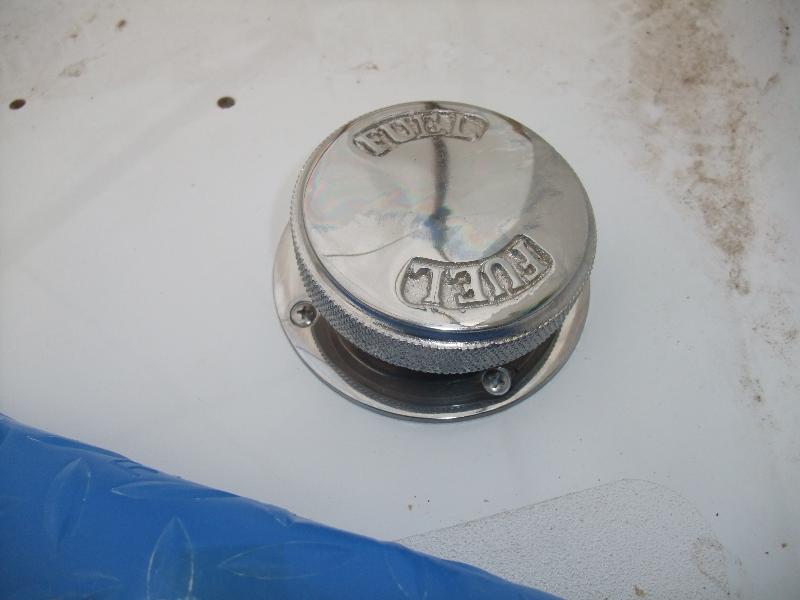
The port fuel fill and cap are now installed and attached via the stainless tube I made to the fuel tank. That officially puts a check in one box on the honey-do list. I had to weld a machine screw inside the tube for a chain that attaches to the filler cap. I've only got a 17 Series torch, which was waaaay too big to fit inside the tube. I got it tacked on three sides, though, so I think it's not going anywhere.
1969 Chris Craft Roamer 46 Refit: Installing the Fuel Fills
Cheers,
Q


-
04-26-2016 10:15 AM #588
- Join Date
- Nov 2008
- Posts
- 1,677
Re: 1969 Chris Craft Roamer 46 refit
Some of the items on my honey-do list to splash this year are pretty small, but they're all critical and some of them have been on hold for years. One of those things was completing the hydraulic steering installation. The system is in and works, but I didn't have the helm pump key stock so the steering wheel wasn't solidly mounted. Also, I aligned the rudders with 0° toe, but several people commented to say the rudders will judder without a bit of toe-in or out. I ended up buying the key stock at Fastenal and making the key myself. I also toed-in the rudders. That's a big ol' check in the box next to Finish Steering on the honey-do list.
1969 Chris Craft Roamer 46 Refit: Completing the Hydraulic Steering System
Cheers,
Q

-
04-28-2016 09:58 AM #589
- Join Date
- Nov 2008
- Posts
- 1,677
Re: 1969 Chris Craft Roamer 46 refit
I jumped back on the V-berth head. Unfortunately, it won't be done by the end of April like I'd hoped. But it's moving along pretty well. I fiberglassed the ceiling panels, then flipped the panels over and installed rare earth magnets in the back-side. The magnets will act as invisible shower curtain hardware, with corresponding magnets put into the "ears" of the shower curtain itself. The missus will be tasked with making the curtain. When nobody's using the shower, there'll be no sign of shower hardware. All you will have to do is hold the shower curtain ears up to the ceiling, and the rare earth magnets try to jump together. Each one can hold about a pound, which is plenty of strength to hold the shower curtain in place but not so much that it will rip things apart. Some of the stronger rare earth magnets are incredibly powerful. They can break things!
1969 Chris Craft Roamer 46 Refit: Throne Room Ceiling Panels
Cheers,
Q
Two magnets holding on to a fiberglassed sheet of 1/4" marine plywood

-
Re: 1969 Chris Craft Roamer 46 refit
Don't forget to put the steering station compass and the autopilot right over the shower enclosure....

 Reply With Quote
Tags for this Thread
 Posting Permissions
- You may not post new threads
- You may not post replies
- You may not post attachments
- You may not edit your posts
