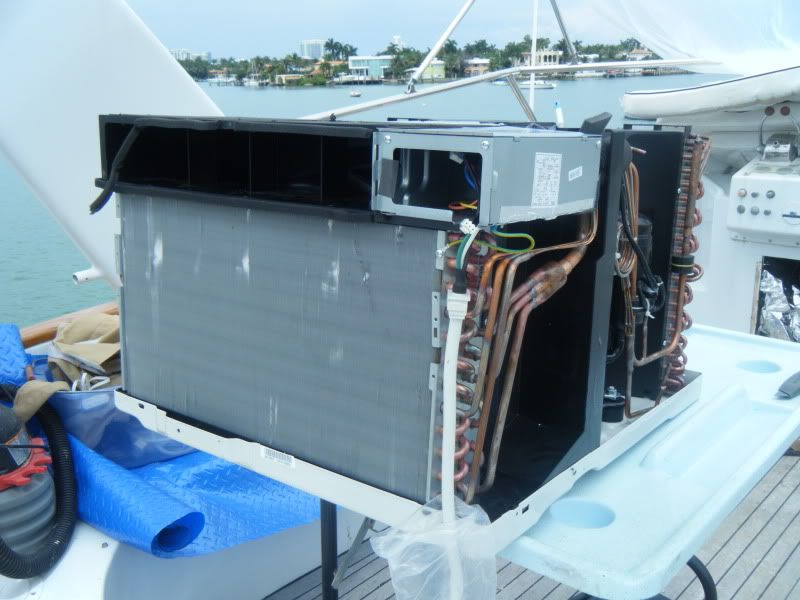
Finally, after taking a hammer to the P.I.T.A. aft salon air conditioner for the last time, I sat down and cooled off with a beer. I started to rethink this whole “marine” a/c theory and the way it is used in our application. Truth be told, this idea was thrown around last year with my good friend Hector. Hector, like me is gear head and we both share the same pastime of fixing or reengineering anything. Not being afraid of failure and with time on my hands we set out to rethink this “Marine” A/C system. Specifically how we can redesign a system conveniently and affordably with the added advantage of lower maintenance. Our old system for our salon cooling consisted of a 16K btu aft salon A/C and a 14K btu forward salon A/C that is also ducted into the galley. On a good day with both salon units working, it could barely keep up with the blistering heat and humidity down here in south FLA. especially when having a large amount of family and friends aboard. Both units were clearly showing their age and were starting to be a maintenance headache. The cost to replace both units with a substantially larger unit was through the roof which also required me to run larger Freon lines and change to 220V. This would have required me to remove the port side sofa and remove the original teak wall paneling to run new lines. Something that I wasn’t in the mood for. Another problem with the OEM units was that both A/C’s while operating were very loud due to blowers located inside it’s cabinets. Also it is poorly designed in that the a/c cabinet is located at knee level and blows cold air up to the ceiling instead of from the ceiling down which is more efficient use of cold A/C. After several months of searching we came to the conclusion that a departure from a “Marine” system was needed. Domestic systems were readily available and with a large variety and styles around, it opened up possibilities. So we created a short list of what was needed and what goal we were shooting for. The list consisted of cost, ease of maintenance, simplicity of reengineering, low amp draw, minimal/ low impact to factory (Hatteras) interior structures, cosmetically conservative. We looked and studied split systems, mini split systems, window shakers and wall units. All having their pros and cons. But after a thorough study and crunching numbers over and over we came to the conclusion that the unit that best fit our criteria for this redesign experiment was a LG 24,800btu Mod: LW2510ER window unit. After initially scoffing at the idea and the thoughts of the Beverly Hill Billy’s running through my mind, I put on my thinking hat and focused on the task at hand.
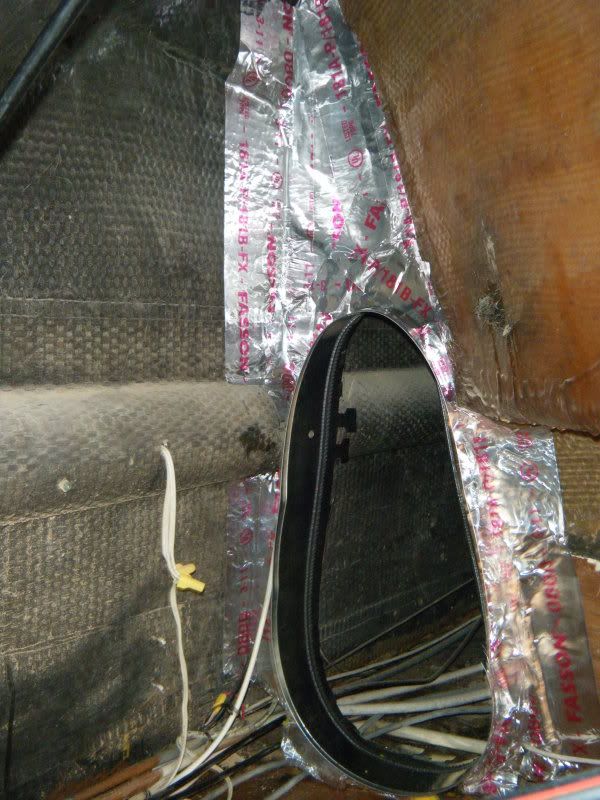
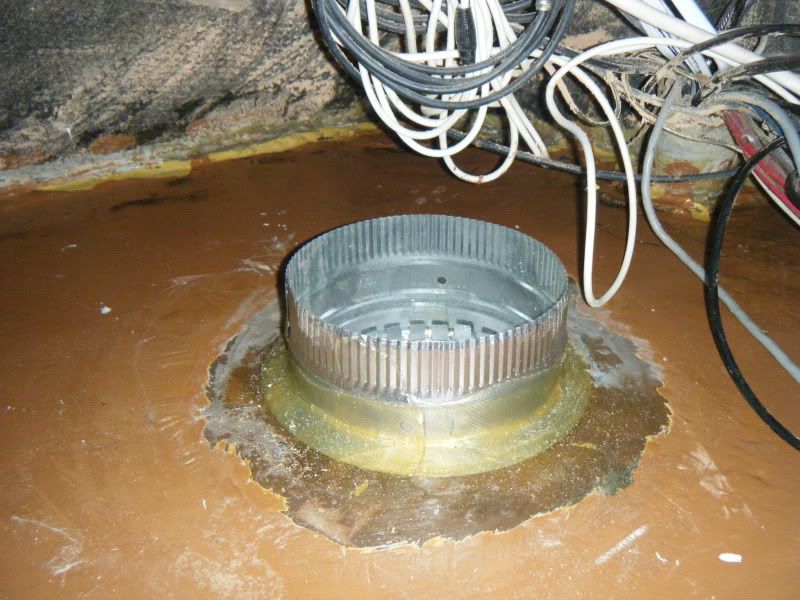
FYI, I always had a back -up plan incase this experiment failed miserably or did not live up to my strict expectations. I was fully prepared to junk this project, bite the bullet and install a “marine unit”. With this in mind I started with the duct work. Wanting to use a more efficient method of ducting, we chose to access the interior of our fly bridge to install A/C vents using insulated 8” and 16” ducting. Having a large fly bridge interior made this a fairly easy task. First I cut three holes into the fly bridge floor/salon ceiling with a router and after removing the balsa coring and epoxied the remaining exposed balsa around the circumference of the opening, I fiber glassed in two 8” galvanized ducting collars and a 16” ducting collar for the return air.
Believe it or not this part of the project was probably the hardest and the one that required the most thought because you needed to precisely place the vents between the salon lights while not cutting into the wiring. FYI the ceiling is about and 1 1/2” thick (1/4” of fiberglass, 1” of balsa, another ¼” fiberglass). After installing the collars, I ran 20’ of clear hose and 50’ of 3 wire 12ga boat cable for power through the starboard rubber wire conduit in the fly bridge which leads down through a teak wall conduit next to the starboard passageway door and into the starboard engine room. The hose was connected to a bilge drain manifold located on the engine room wall. The wire was run all the way to the 220v breaker panel. After that I ran two ribbon type RJ47C communication wires of approximately 15’ each down the port side wire conduit in the fly bridge to the area of the salon light switches that are located on the wall behind the port couch next to the port passageway door. This wire will be the harness that will be connected to the electronic control panel that was removed from the front of the A/C unit which will be remotely mounted. The final grunt work was installing the insulated ducting to all of the collars including a 16” insulated duct to a collar located down the starboard hollow interior wall of the fly bridge (more on that later).

Welcome to the Hatteras Owners Forum & Gallery. Sign Up or Login
Results 1 to 10 of 74
Threaded View
-
Reengineering an air conditioning unit to marine use. Purists should cover their e
Last edited by MarioG; 05-13-2011 at 04:53 PM.
Mario
1972 58' Hatteras Yachtfisherman
Siboney


 Reply With Quote
